Why and How to Use Lossy Compression on Your WordPress Images
- Category : Development
- Posted on : Apr 25, 2019
- Views : 3,546
- By : Ingavar J.

According to the HTTP Archive, as of December 2018, images make up over 40% of an average website’s page weight on both desktops and mobile devices. That is huge! ? When it comes to the new mobile-first index and performance, image optimization plays a crucial role in how fast your WordPress site will be able to load. Image compression is one of easiest optimizations you can implement which also, in turn, will have the greatest impact. Essentially, this entails decreasing the file size of your images by using two popular forms of compression: lossy and lossless.
Today we are going to dive into both of these types of image compression and discuss which one we recommend you use. This can vary based on the type of business you operate.
- Lossy Compression
- Lossless Compression
- Which Compression Method is Better?
- How to Use Lossy Compression in WordPress
Lossy Compression
The first form of compression is lossy. Lossy compression involves eliminating some of the data in your image. Because of this, it means you might see degradation (reduction in quality or what some refer to as pixelated). So you have to be careful by how much you’re reducing your image. Not only due to quality, but also because you can’t reverse the process. Of course, one of the great benefits of lossy compression and why it’s one of the most popular compression methods is that you can reduce the file size by a very large amount.
- JPEGs and GIFs are both lossy image formats.
- JPEGs are great for sites needing fast load times as you can adjust the quality level for a good balance of quality and file size.
WordPress Automatically Compresses Images
Did you know that WordPress automatically compresses your JPEGs when you upload them to the media library? By default, WordPress has compressed images automatically up to 90% of their original size. However, as of WordPress 4.5, they increased this to 82% to further increase performance across the board. If you’re wondering why your images look a little pixelated on a fresh WordPress install, that is why.
While automatic compression is great, we’ve generally seen that 82% is by no means far enough when it comes to really making an impact on your site’s performance. Therefore, you can disable this option if you want by adding the following filter to your theme’s functions.php file. Remember, always take a backup first before editing your site.
add_filter( 'jpeg_quality', create_function( '', 'return 100;' ) );If you want to increase the automatic compression ratio of WordPress you can add the filter and reduce the percentage of the original file, such as 70% in the example below.
add_filter( 'jpeg_quality', create_function( '', 'return 70;' ) );Remember, these won’t impact already uploaded images. You would need to go through with a plugin like Regenerate Thumbnails for it to apply it to your existing media library. Or better yet, we simply recommend leaving your theme alone and simply using an image optimization WordPress plugin (which we’ll dive into further below) or further compressing your images before uploading them.
Compress Images With Save for Web (Software)
You can use tools such as Adobe Photoshop, Affinity Photo, Affinity Designer, or other image editors to adjust the quality settings of an image (as seen below). In a majority of the tools, this is under “Save to web” or “Export settings.”
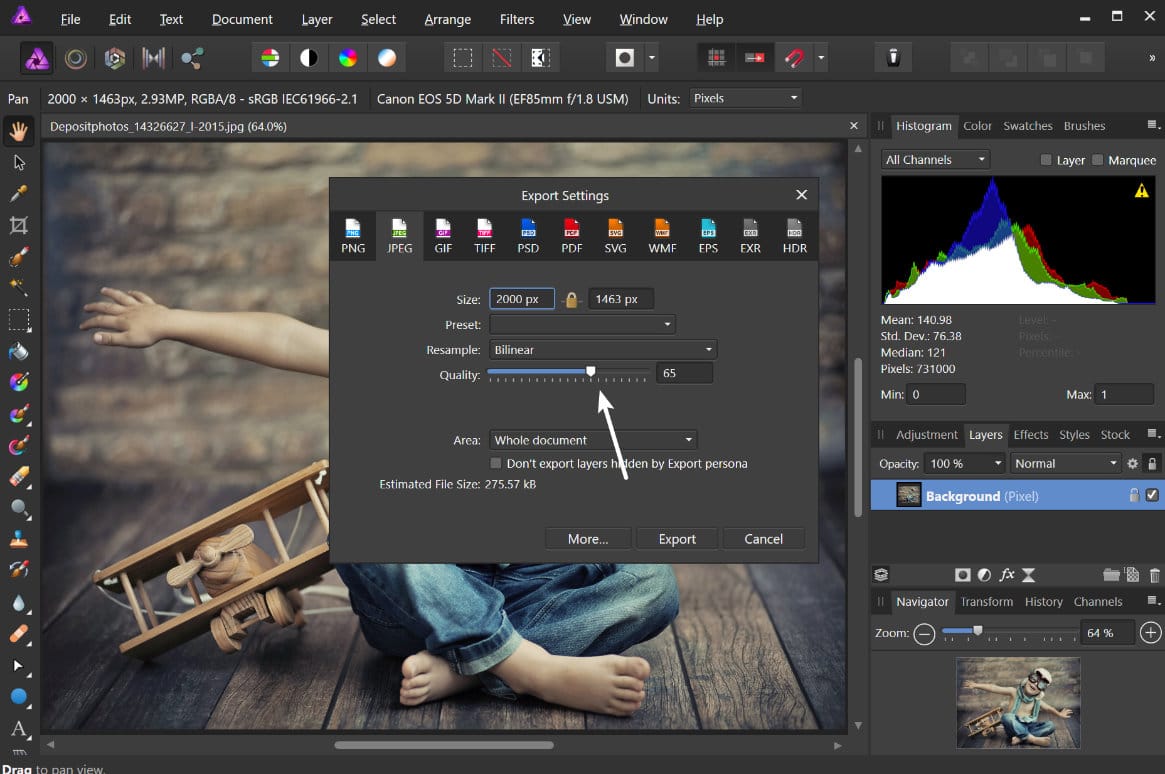
If we do a little comparison of lossy compression rates, we can see that 50% looks great. 33% is starting to get a little blurry on some of the background details (but will pretty unnoticeable), and 5% obviously is not acceptable. This is just an example of why the automatic 82% in WordPress is not enough. You can and should be compressing at much higher rates to further decrease file sizes.
- original.JPG 2.82 MB (2,000 px by 1463 px)
- lossy-compressed-1.JPG: 227 KB (2,000 px by 1463 px) 91.95% reduction
- lossy-compressed-2.JPG: 185 KB (2,000 px by 1463 px) 93.44% reduction
- lossy-compressed-3.JPG: 5 KB (2,000 px by 1463 px) 99.82% reduction

Let’s say you choose to go with the 50% compressed one. The file size is 227 KB, which is definitely a lot smaller than the original 2+ MB file. However, it’s still not great if this is only one of 15+ other images on a page. Generally, it is best to keep all of your images under 100 KB if possible. In my cases, you should be able to go much smaller. So this is where it is also important to resize your images. The 50% image resized first down to 1251 px by 916 px is only 95 KB.
But remember, you might not want to size your images down all the way, because as of WordPress 4.4, it now has support for responsive images (not scaled down by CSS). WordPress automatically creates several sizes of each image uploaded to the media library. By including the available sizes of an image into a srcset attribute, browsers can now choose to download the most appropriate size and ignore the others. See example of what your code actually looks like below.
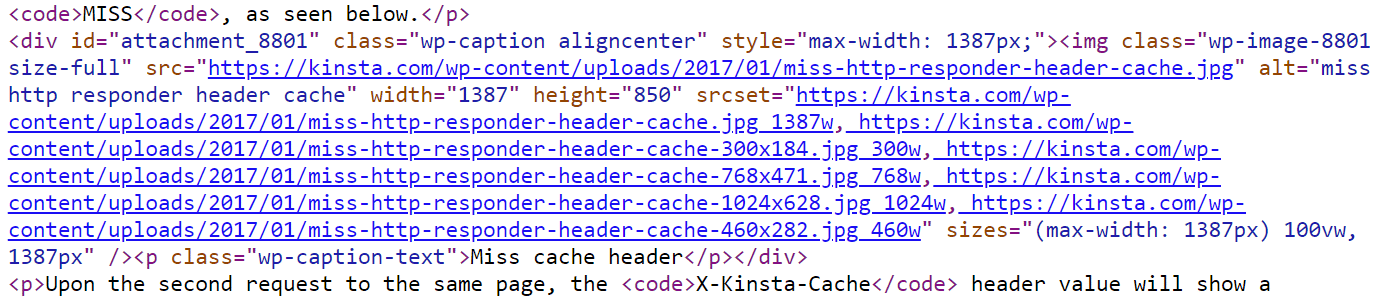
So with more and more HiDPI displays nowadays, it can be good to find a happy medium. Say 2x or 3x your website’s column or div size, but still less than the original size. The browser will show the correct one based on the resolution of the device.
Google Recommends Lossy Compression
Do you use Google PageSpeed Insights? If so, you’re probably familiar with the warning that says to “Optimize Images.” Back in 2017, Google actually updated their documentation to now recommend using lossy compression as a way to further speed up your site.
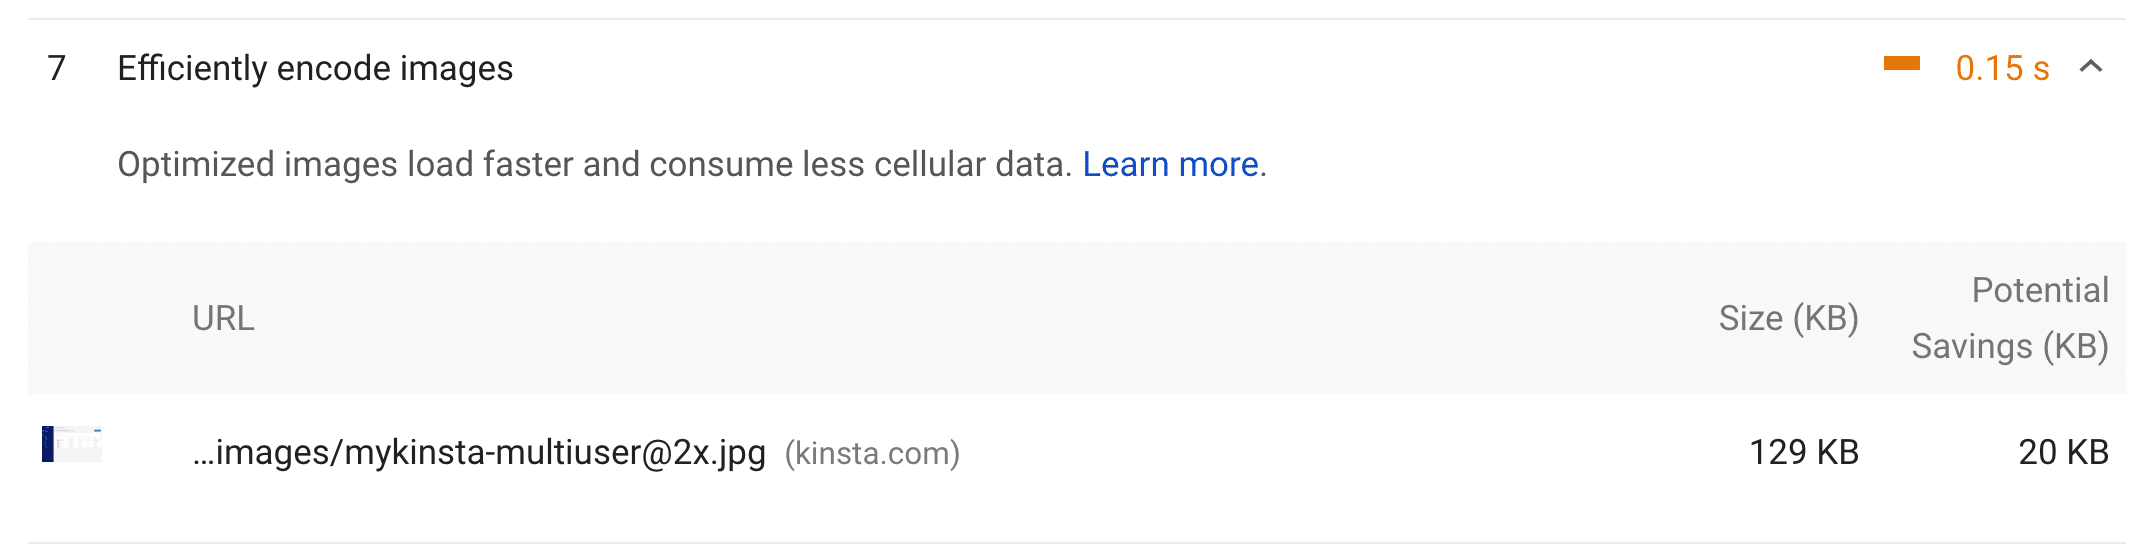
If you want to get rid of those warnings, one of the easiest ways is to use lossy compression to appease Google.
Lossless Compression
Now it’s time to dive into the second form of compression which is lossless. Lossless compression, unlike lossy, doesn’t reduce the quality of the image. How is this possible? It’s usually done by removing unnecessary metadata (automatically generated data produced by the device capturing the image). However, the biggest drawback to this method is that you won’t see a significant reduction in file size. In other words, it will take up a lot of disk space over time.
- RAW, BMP, GIF, and PNG are lossless image formats.
- You can perform a lossless compression on your desktop using tools such as Photoshop, FileOptimizer, or ImageOptim.
- Some plugins will apply Gzip compression to images (minify them).
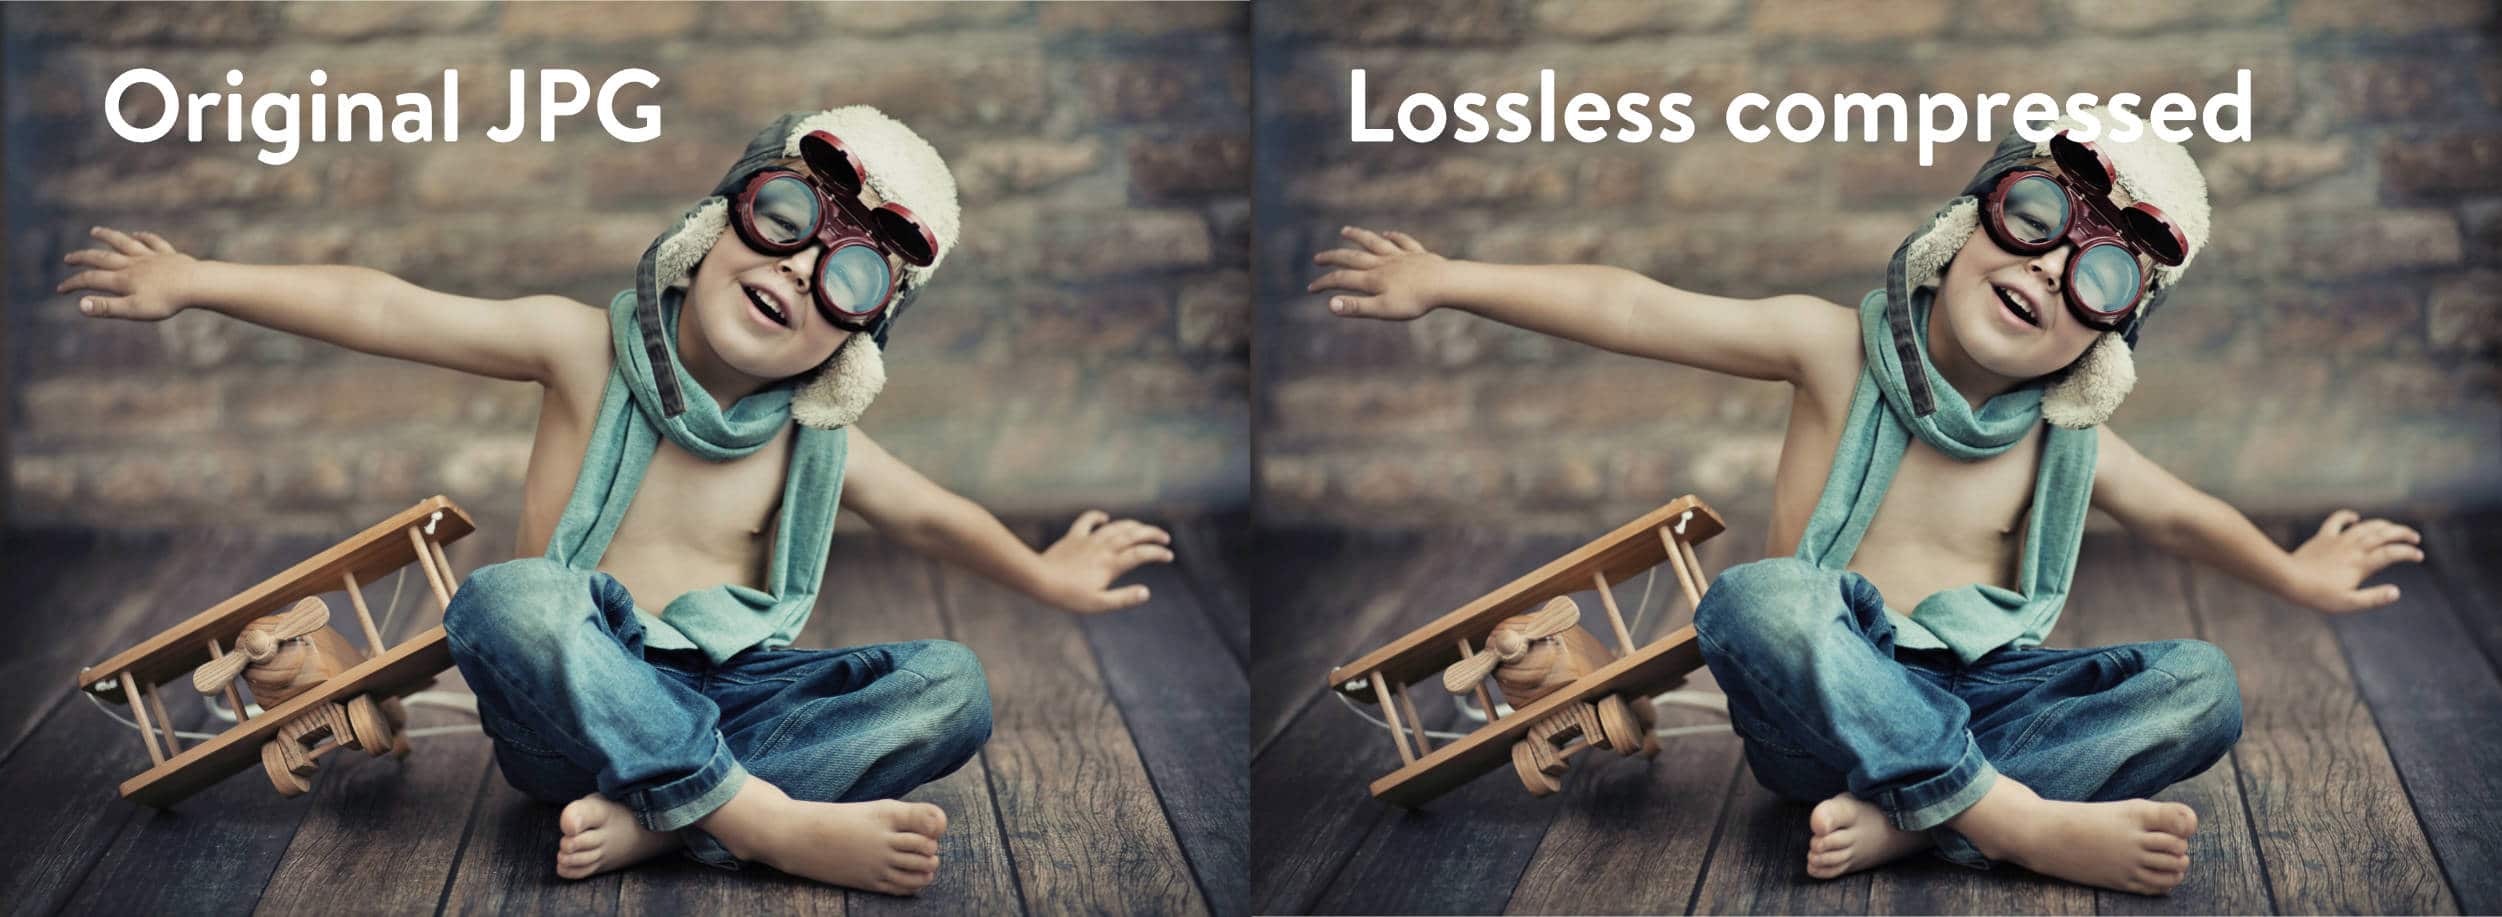
If we do a little comparison of lossy compression rates, we can see that when using lossless compression you don’t lose any quality whatsoever. However, the file size of the image was only reduced by 10.84%. This is compared to over 90% when using lossy compression.
- original.JPG: 227 KB (2,000 px by 1463 px)
- lossless-compressed.JPG: 203 KB (2,000 px by 1463 px)
Which Compression Method is Better?
The answer to this is actually up to you. For the majority of users, we recommend using lossy compression due to the fact that you can easily compress an image well over 70% (sometimes even over 90%!) without much quality loss. Multiply this by 15 images on a page and it will play a significant role in reducing your site’s load time. Not only that, but lossy compression will ensure you utilize as little disk space as possible. Which in turn means you could save money on hosting.
Lossless compression is for those who can’t afford any quality loss. Photographers, food bloggers, and models are just a few that come to mind who rely on pixel-perfect images to make a living. In these instances, it’s essential you’re hosting your images on a CDN. Due to the size, you might even need to offload them to a third-party storage service like Amazon S3 or Google Cloud Storage.
How to Use Lossy Compression in WordPress
If you’re still confused between lossy and lossless don’t worry, there are a lot of great image optimization WordPress plugins you can choose from that automatically apply lossy compression:
- Imagify (lossy and lossless)
- WP Smush (lossy and lossless)
- EWWW Cloud (lossy and lossless)
- ShortPixel (lossy and lossless)
Note: all of the ones listed above utilize their own third-party servers for compressing images. You should always bulk compress images offsite for performance reasons. ?
We use Imagify on the CentrioHost blog and so we’ll show you how it works. They have a free plan, but even their pro plans are priced very reasonably. We optimize quite a few images and we are using the “Lite” plan (1 GB per month) just fine. Pay yearly and it’s less than $4.25 a month.
Imagify has three different optimization levels:
- Normal: This mode uses lossless compression, meaning your images won’t lose any quality, but they also won’t be reduced that much in size.
- Aggressive: This mode uses lossy compression and provides drastic savings on the initial weight, with a small reduction in image quality. Most of the time it’s not even noticeable.
- Ultra: This mode uses lossy compression and applies all available optimizations for maximum image compression. This will provide huge savings on the initial weight, but you will most likely notice some image degradation.
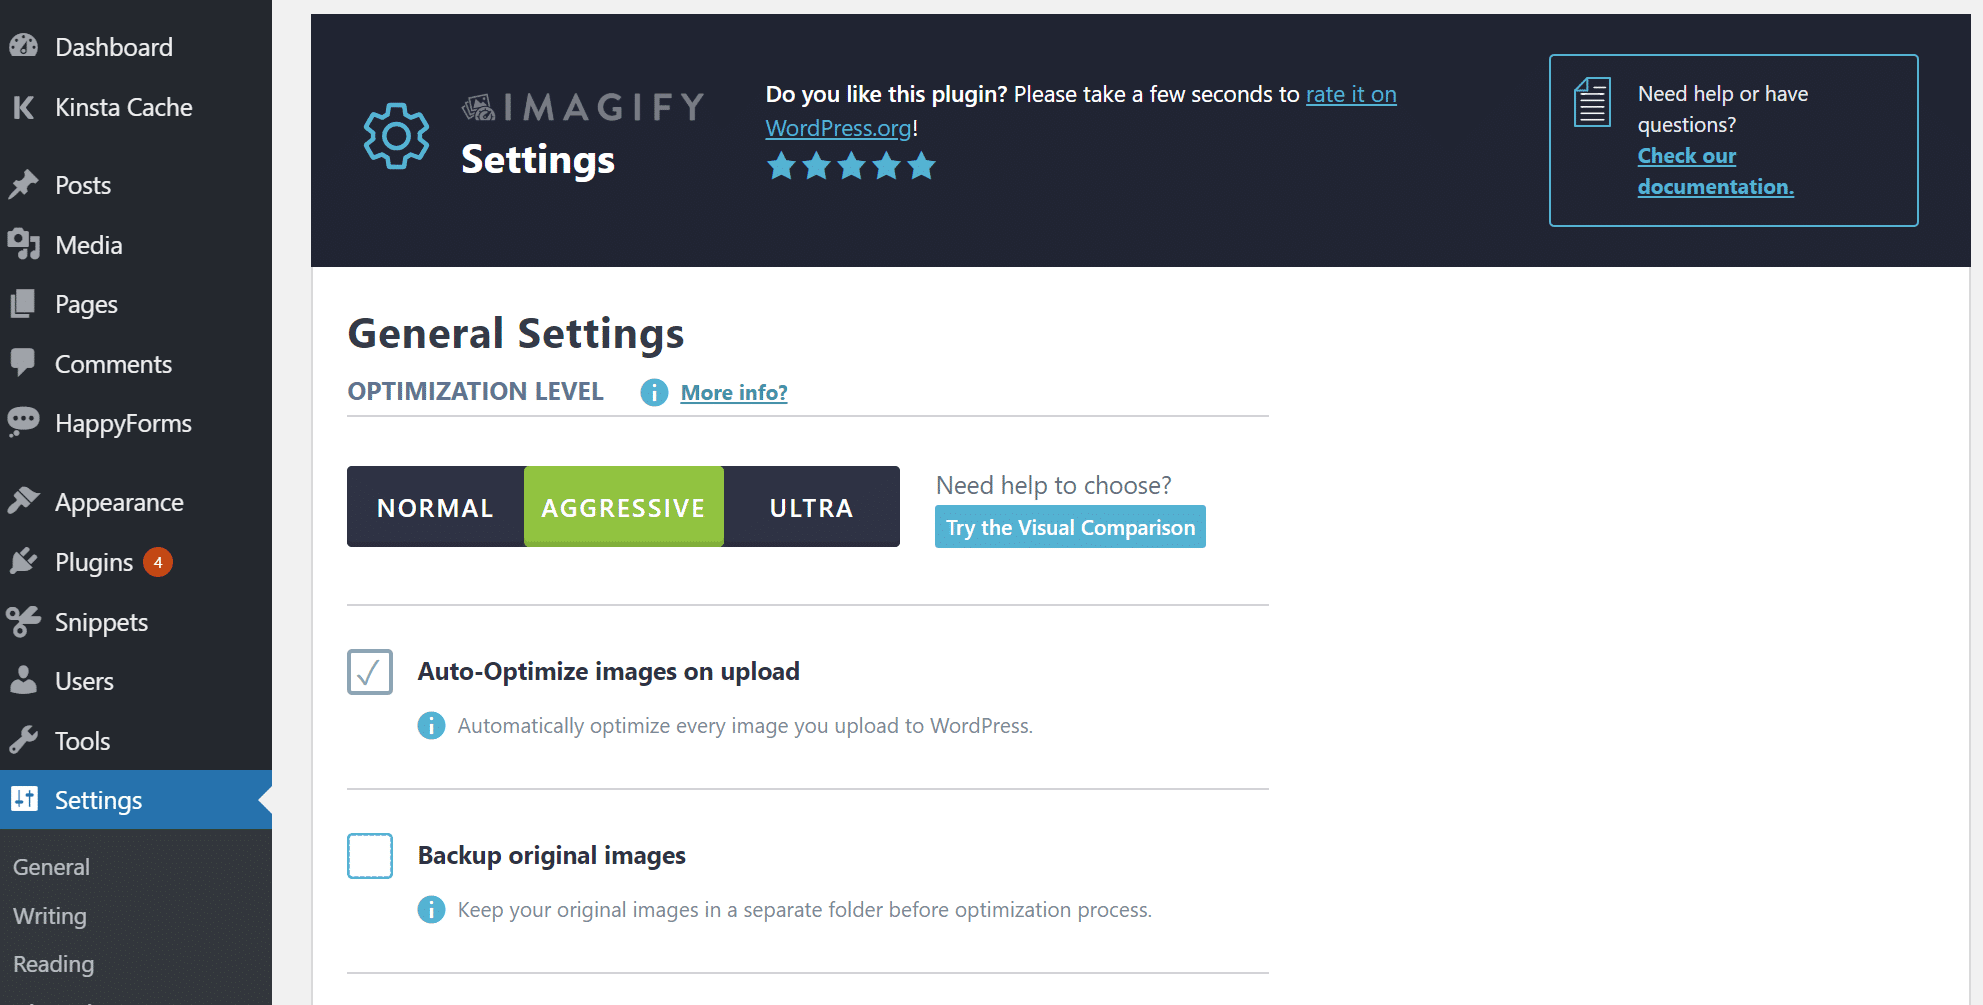
We use the Aggressive mode at CentrioHost and typically see 60-70% savings depending on the image. Note: we actually use a lot more PNGs than JPEGs due to the fact that most of our images are icons and illustrations, not photos.
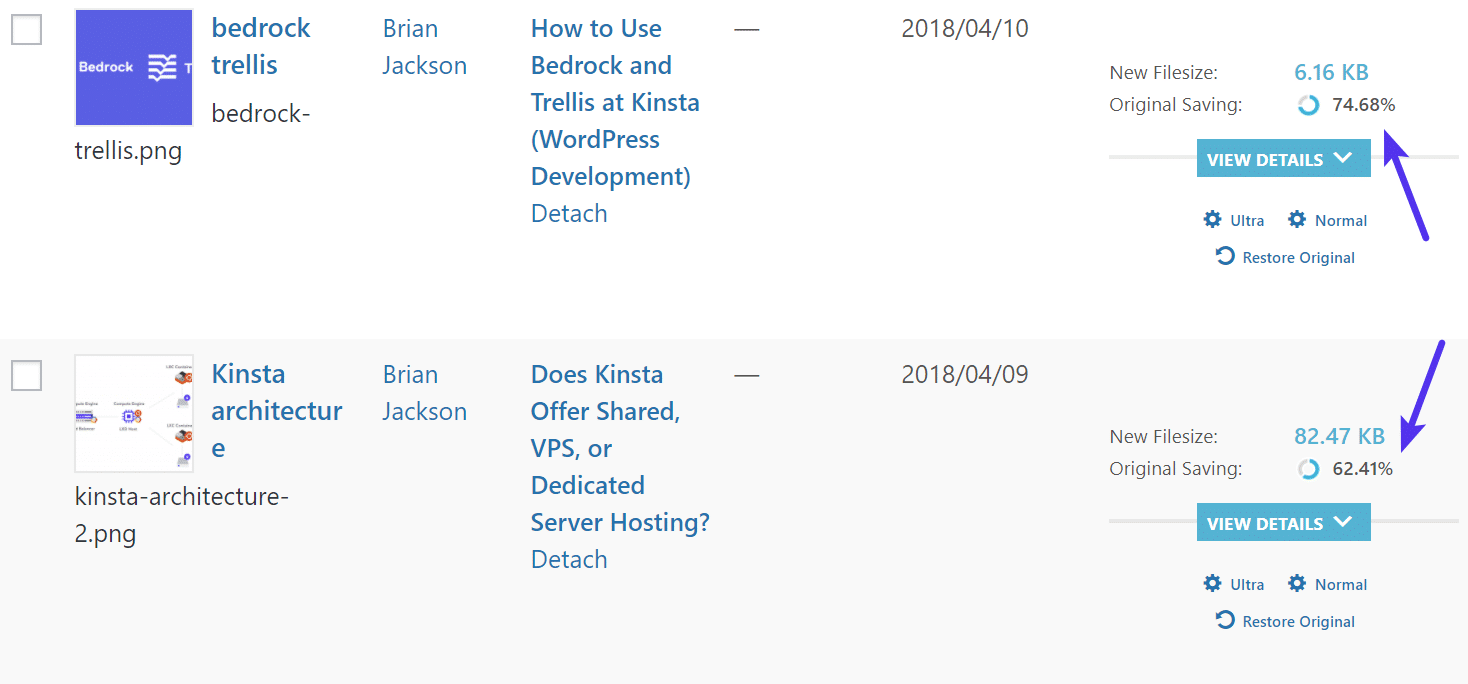
You can enable auto-optimize images upon upload (which we recommend so you don’t forget) or use their bulk image optimizer in the media library. You can also have it back up the original image. This allows you to actually convert your image to other optimization levels at a later time or even restore your original image. If you don’t use this feature we recommend keeping it turned off to save on disk space.
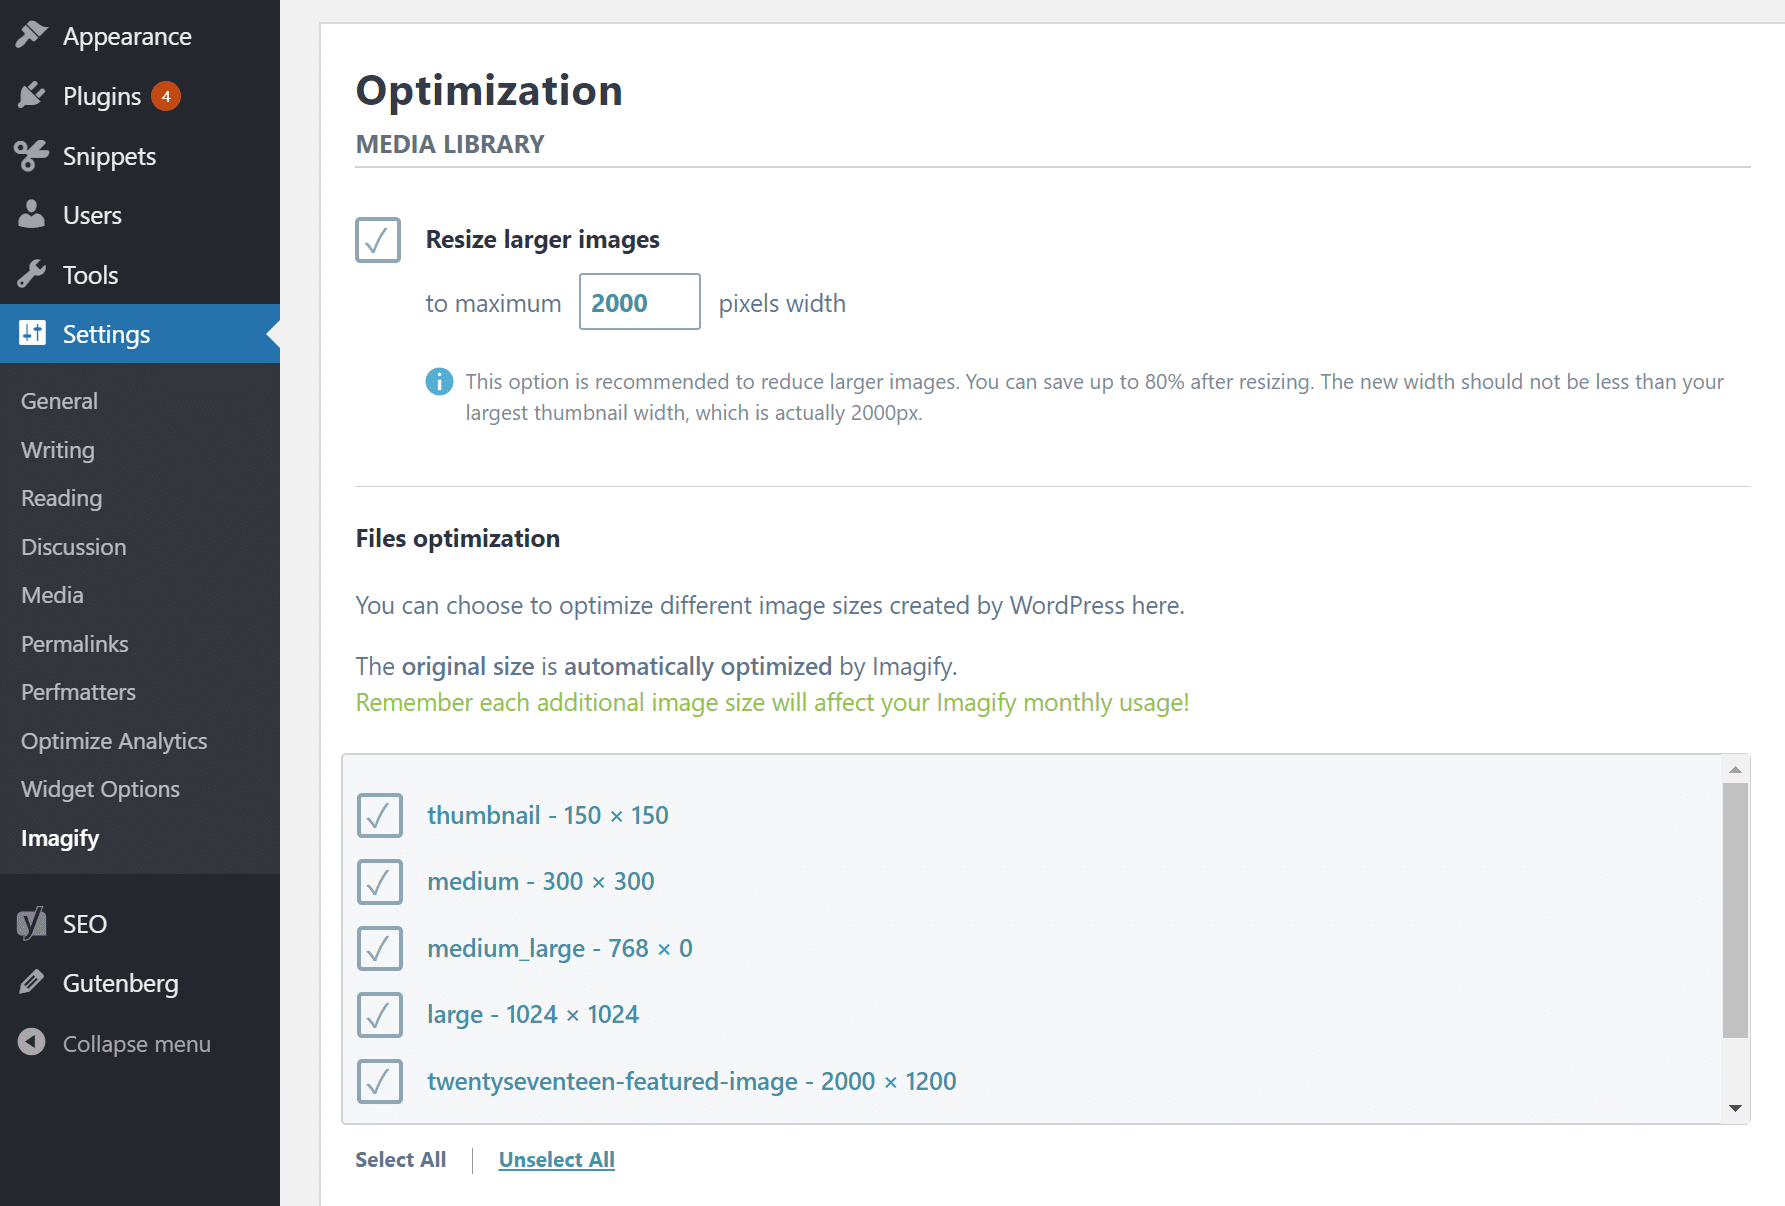
You should typically resize your images beforehand, but Imagify does have a Resize larger images feature in case you forget or don’t have time. Besides lossy compression, this is another big file size saver!
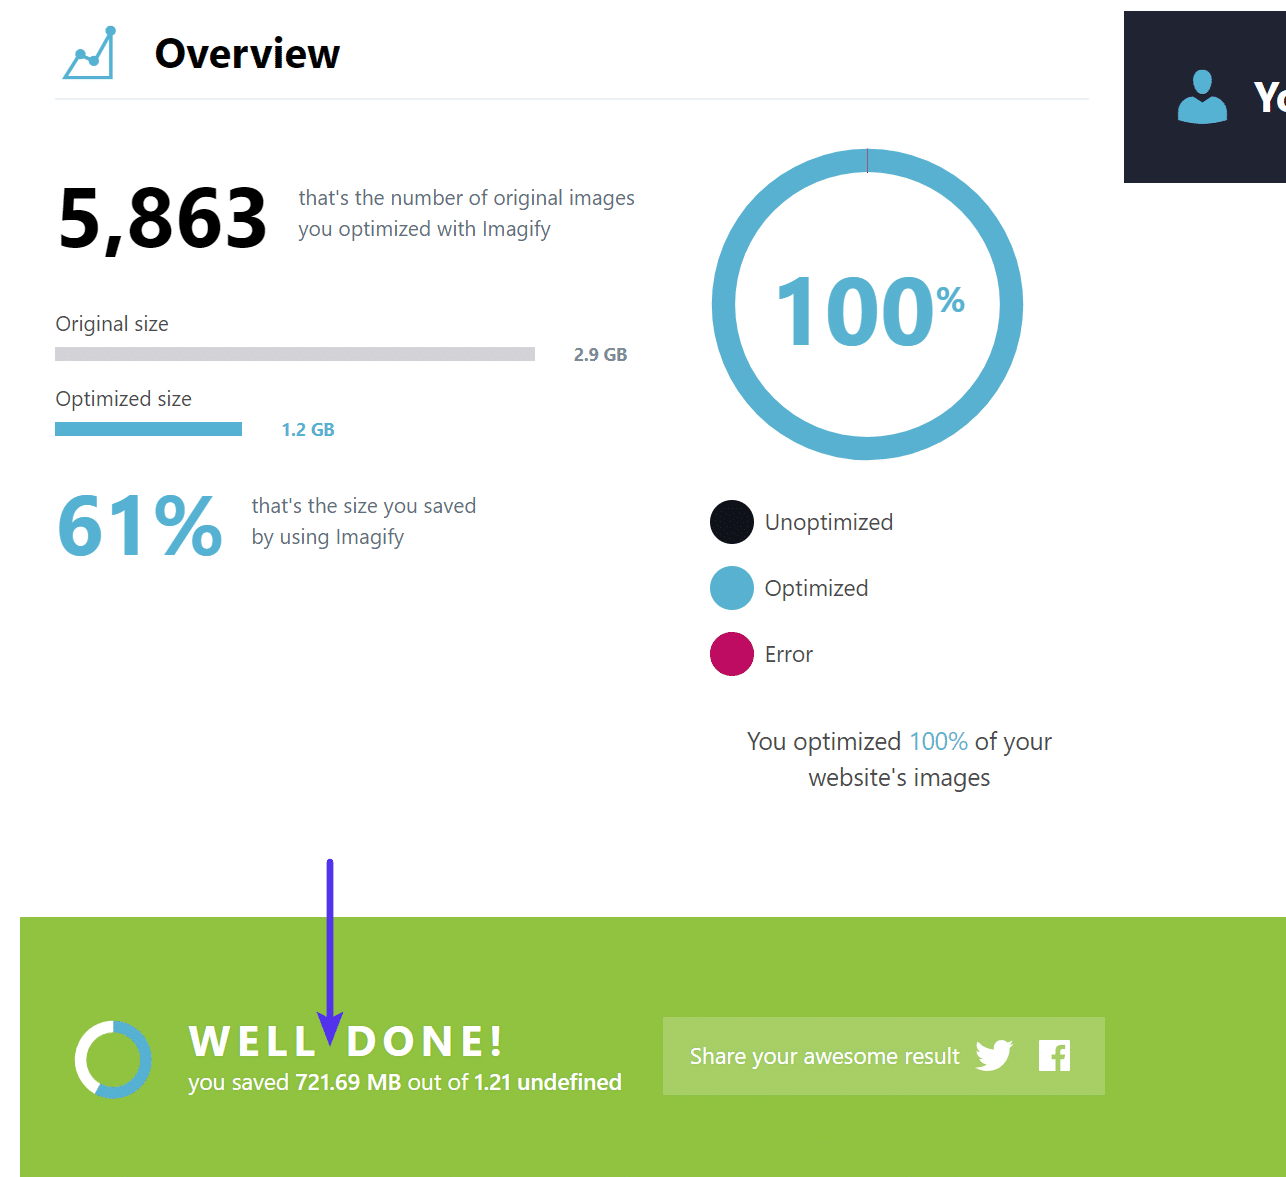
We in fact just recently used the bulk image optimization feature on our entire WordPress media library. As you can see it shaved off over 700 MB! This is huge when it comes to front-end performance.
Speed Tests
Let’s do a little test! Due to the fact we constantly see users uploading full resolution images without compression, we’ll do a little comparison on this impacts your site’s overall performance.
Test 1 – Original Uncompressed
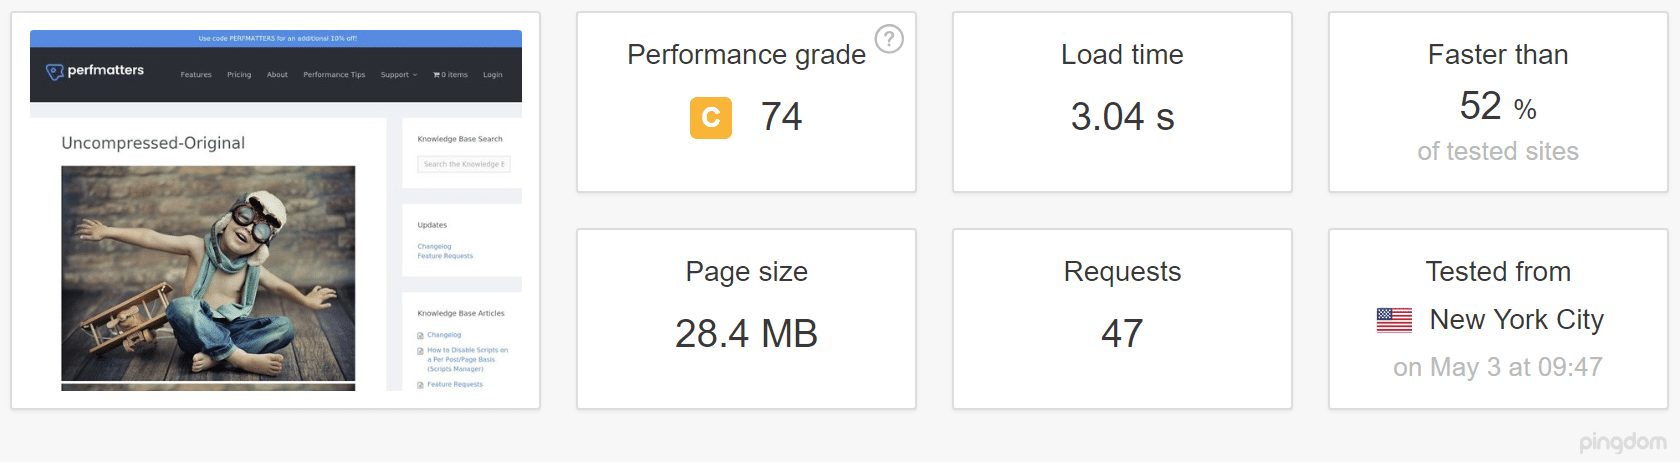
We first uploaded 10 uncompressed images. We then ran 5 tests on Pingdom and took the average. We can see the total load time is 3.04 seconds with a total page size of 28.4 MB.
- uncompressed-1.jpg (2.82 MB)
- uncompressed-2.jpg (2.82 MB)
- uncompressed-3.jpg (2.82 MB)
- uncompressed-4.jpg (2.82 MB)
- uncompressed-5.jpg (2.82 MB)
- uncompressed-6.jpg (2.82 MB)
- uncompressed-7.jpg (2.82 MB)
- uncompressed-8.jpg (2.82 MB)
- uncompressed-9.jpg (2.82 MB)
- uncompressed-10.jpg (2.82 MB)
Test 2 – Compressed
We then uploaded the exact same images again, but this time we enabled “auto-optimize” in the Imagify plugin. We then ran 5 tests again on Pingdom and took the average.
- compressed-1.jpg (69.3 KB)
- compressed-2.jpg (69.3 KB)
- compressed-3.jpg (69.3 KB)
- compressed-4.jpg (69.3 KB)
- compressed-5.jpg (69.3 KB)
- compressed-6.jpg (69.3 KB)
- compressed-7.jpg (69.3 KB)
- compressed-8.jpg (69.3 KB)
- compressed-9.jpg (69.3 KB)
- compressed-10.jpg (69.3 KB)
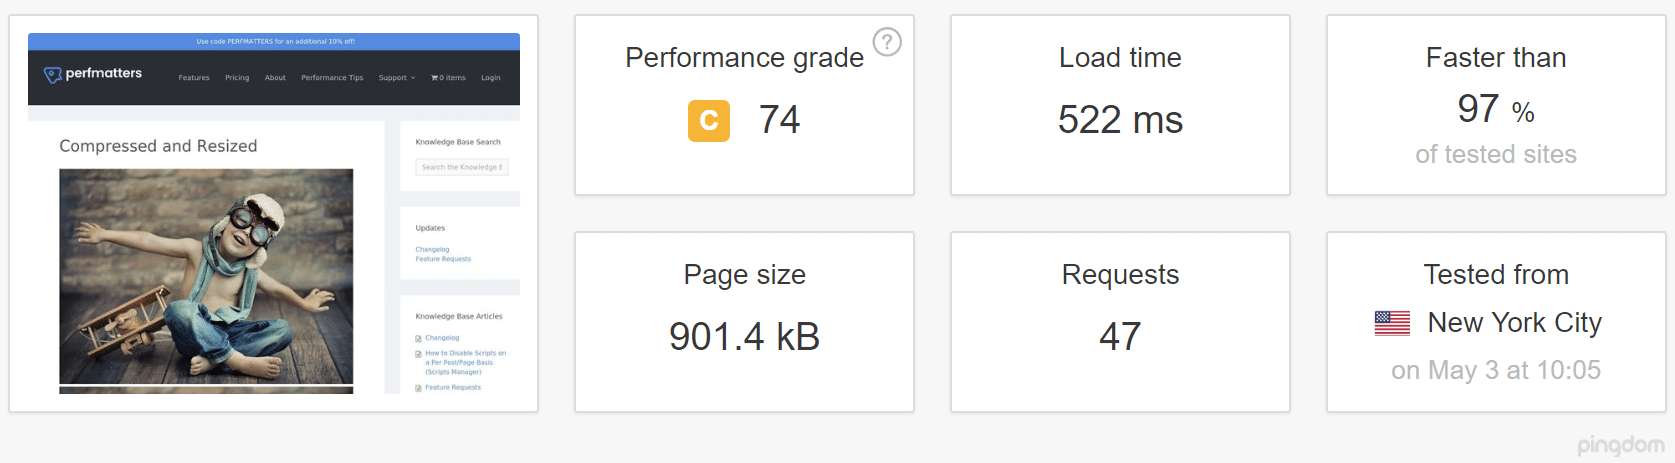
We can see the total load time is now 522 ms with a total page size of 901.4 KB. So our lossy compressed images decreased page load time by 82.83%! ? The total page size was also reduced by a whopping 96.83%. And our images still look high-quality thanks to Imagify.
Summary
Once you determine the quality of images you need on your site you can choose whether or not you want to use lossy or lossless compression. Again, for those who are more concerned with speed and less about quality, we recommend going with lossy compression. Remember, lossy compressed images can look beautiful if you find the right balance. If you need pixel-perfect images then you should always go with lossless compression.
What are your thoughts? Are you using lossy or lossless compression on your WordPress site. Let us know below in the comments.
Categories
Subscribe Now
10,000 successful online businessmen like to have our content directly delivered to their inbox. Subscribe to our newsletter!Archive Calendar

| Sat | Sun | Mon | Tue | Wed | Thu | Fri |
|---|---|---|---|---|---|---|
| 1 | 2 | |||||
| 3 | 4 | 5 | 6 | 7 | 8 | 9 |
| 10 | 11 | 12 | 13 | 14 | 15 | 16 |
| 17 | 18 | 19 | 20 | 21 | 22 | 23 |
| 24 | 25 | 26 | 27 | 28 | 29 | 30 |
| 31 | ||||||
Recent Articles
-

Posted on : Jul 25
-

Posted on : Jul 07
-

Posted on : Apr 07
-

Posted on : Mar 19
Optimized my.cnf configuration for MySQL 8 (on cPanel/WHM servers)
Tags
- layer 7
- tweak
- kill
- process
- sql
- Knowledge
- vpn
- seo vpn
- wireguard
- webmail
- ddos mitigation
- attack
- ddos
- DMARC
- server load
- Development
- nginx
- php-fpm
- cheap vpn
- Hosting Security
- xampp
- Plesk
- cpulimit
- VPS Hosting
- smtp
- smtp relay
- exim
- Comparison
- cpu
- WHM
- mariadb
- encryption
- sysstat
- optimize
- Link Building
- apache
- centos
- Small Business
- VPS
- Error
- SSD Hosting
- Networking
- optimization
- DNS
- mysql
- ubuntu
- Linux