
How to Easily Create Tables in WordPress with TablePress
- Category : WordPress
- Posted on : Apr 21, 2018
- Views : 3,074
- By : Kapueo I.

One of the best ways to organize a large amount of data on your WordPress site is with a simple table. Unfortunately, WordPress doesn’t offer table support as a native functionality. Today we want to dive into a very popular WordPress plugin called TablePress, and show you how it can help you create tables in WordPress with ease and without any coding knowledge. It currently boasts over 700,000 active installs and a jaw-dropping 5-star rating on WordPress.org, even after 2,900+ reviews!
Clearly, it’s an excellent, well-coded plugin that has resonated well with the WordPress community and is an ideal solution for creating tables in WordPress.
TablePress WordPress Plugin
Before we get into the nitty-gritty of the post and learn how to add tables to your WordPress posts and pages, let’s take a quick look at some of the key features TablePress has to offer that set it head and shoulders above the competition.

- Multiple import formats: With TablePress, you can not only create tables from scratch by entering in data into a WordPress table editor, but you can also import data from multiple formats such as Excel, CSV, HTML, and JSON files. Several competitor plugins in this niche only offer one input format and it’s a great convenience to have various ones at your fingertips.
- Export your tables: If you’ve created a table from within the TablePress interface, you can easily export your table in a CSV, HTML, or JSON file. Very handy way to keep your data if you ever migrate to a new WordPress installation or even to a new CMS.
- Extend your capabilities: The developer of TablePress, Tobias Bäthge, has developed several add-on functions for TablePress that greatly expand its abilities. These extensions build in support for things like making responsive tables, column filters, a save-to-PDF button for front-end users, etc.. All the extensions are freely available for download, but a few of the ones that were very time-consuming to code (labeled “premium”) recommend that you support the developer with a small donation when you download them.
How to Create Tables in WordPress with TablePress
Now that we’ve covered this plugin’s features, let’s dive into how to use TablePress to insert tables in WordPress.
- Creating a Table From Scratch
- Importing a Table
- Exporting a Table
- Plugin Options
Creating a Table From Scratch
Let’s start our tutorial by checking out how to create a table from scratch with TablePress’s very straightforward and intuitive interface.
Step 1
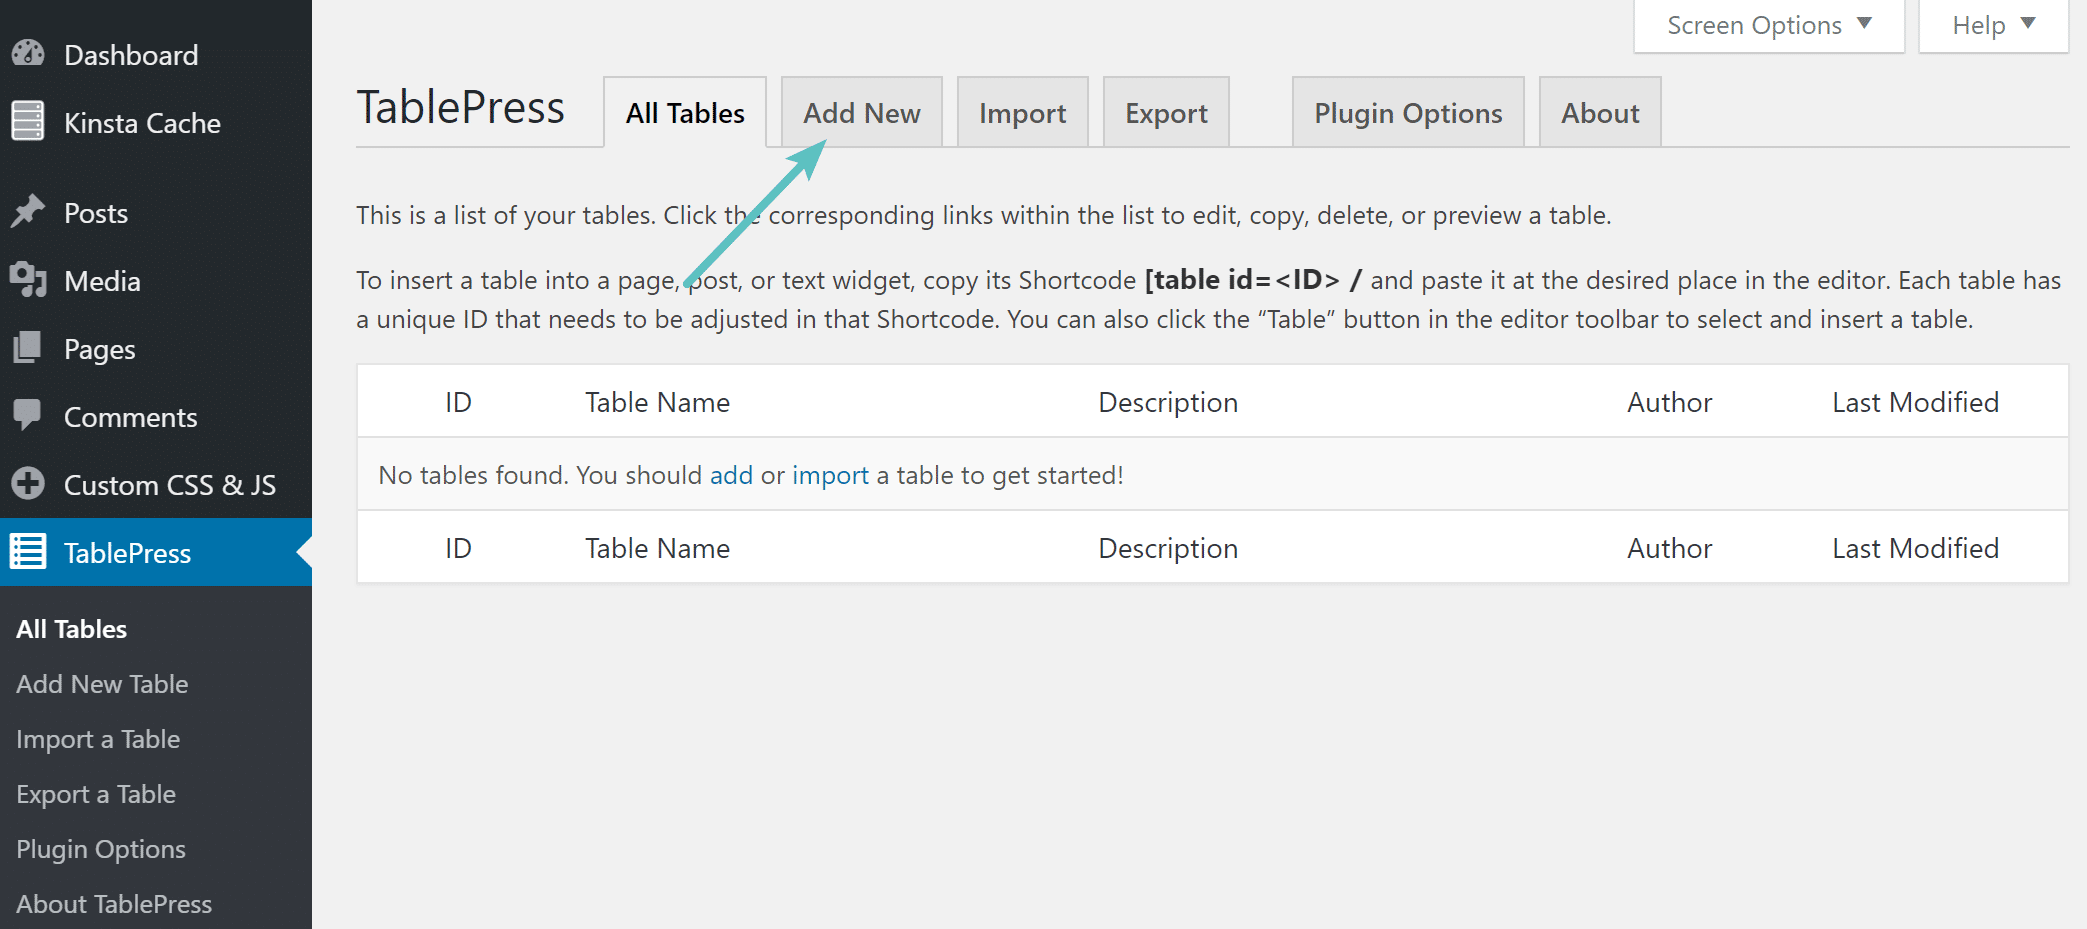
After installing and activating the plugin in your dashboard, head over to WP Admin > TablePress. This page is the control center of the plugin. The process of creating, editing, and customizing tables will all start here. The first time you visit the page, you’ll find a welcome message with FAQ, documentation, and support links as well as a list of your tables (will be empty). To start, click the “Add New” button on the page’s navigation.
Step 2
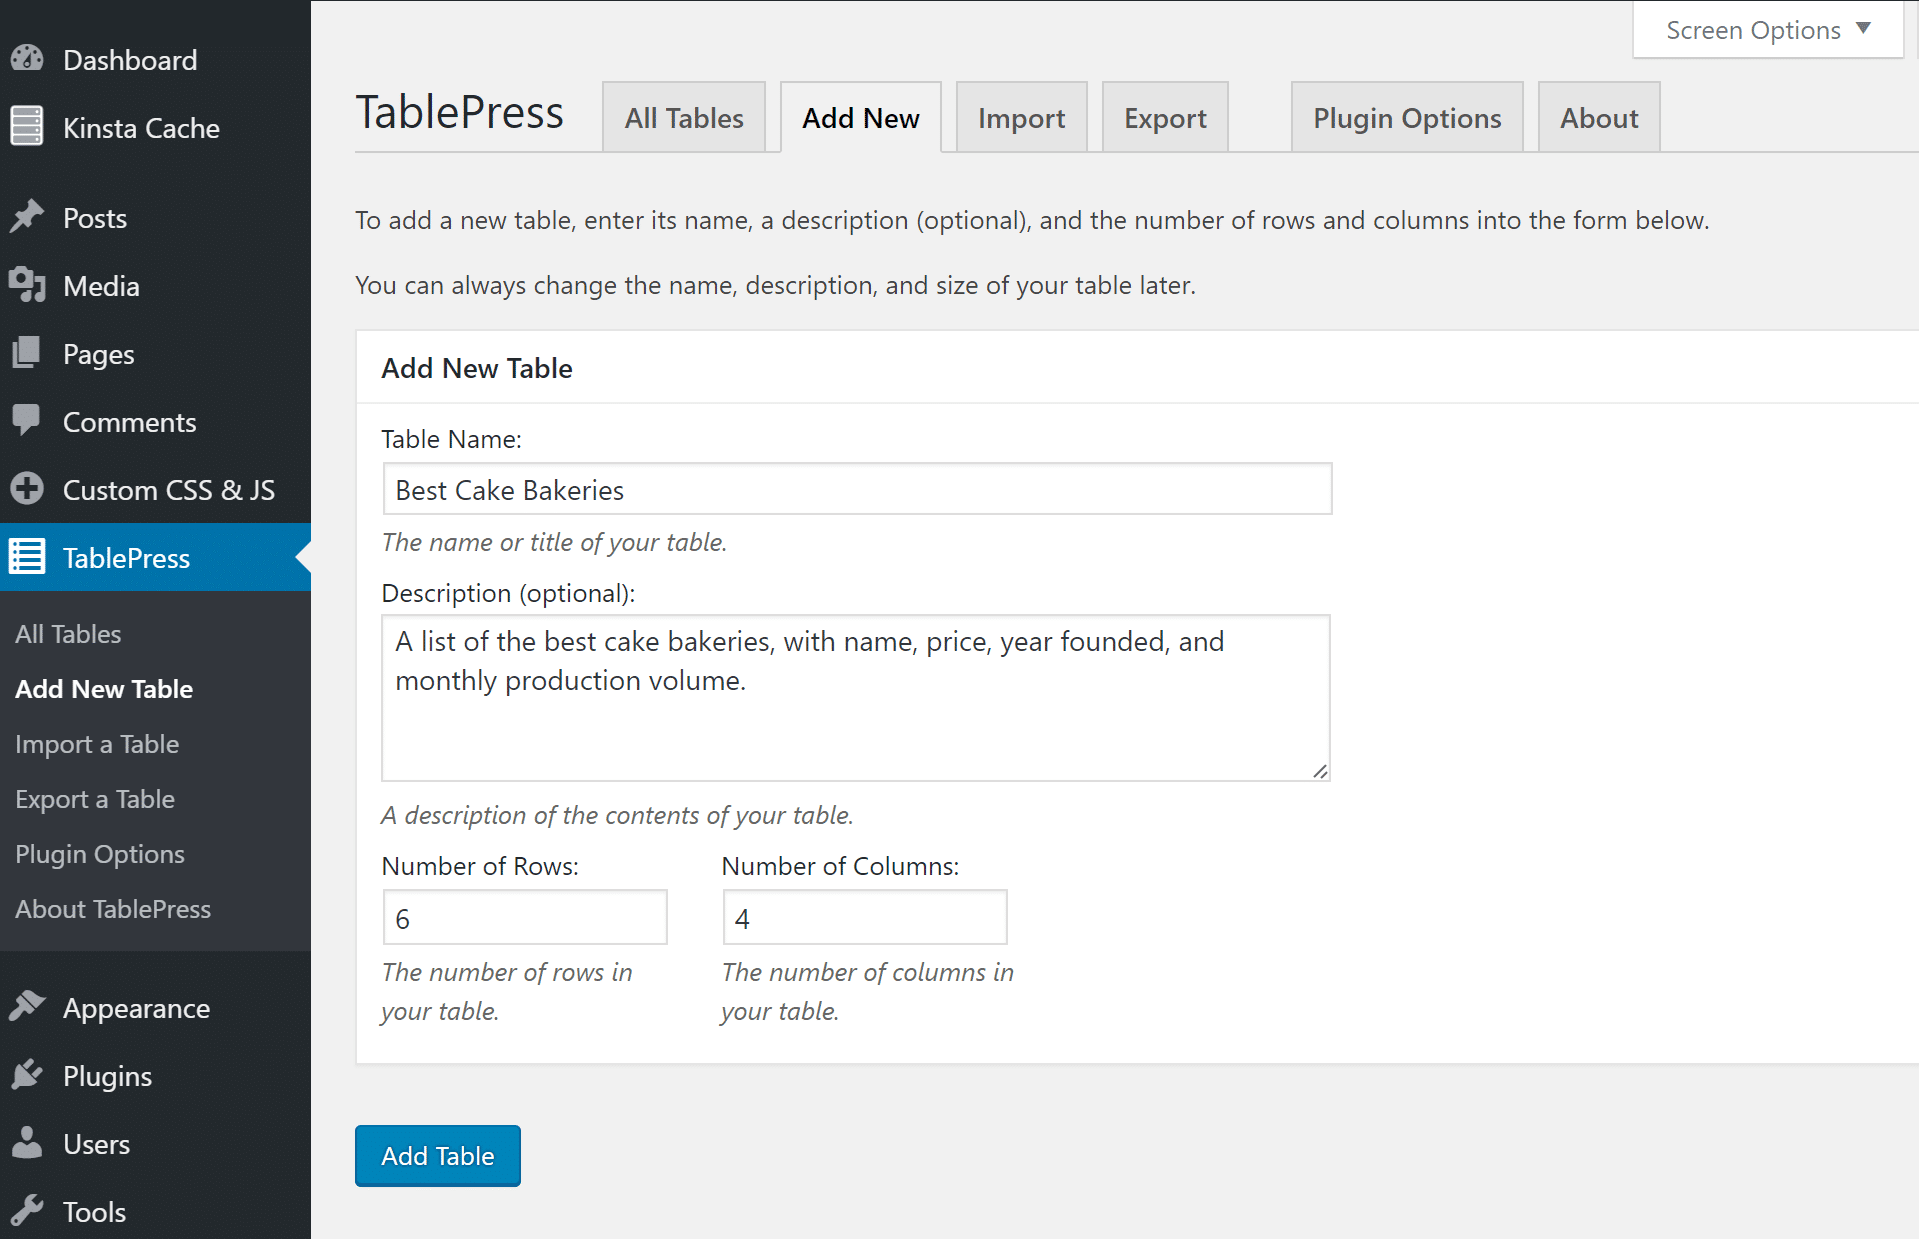
On the Add New page, you will be prompted to key in a name for your table, enter a description (optional), and specify the dimensions of your table (number of rows & columns). Once you’ve done that, click the “Add Table” button. As an example, we’ll do a table of fictional cake bakeries.
Step 3
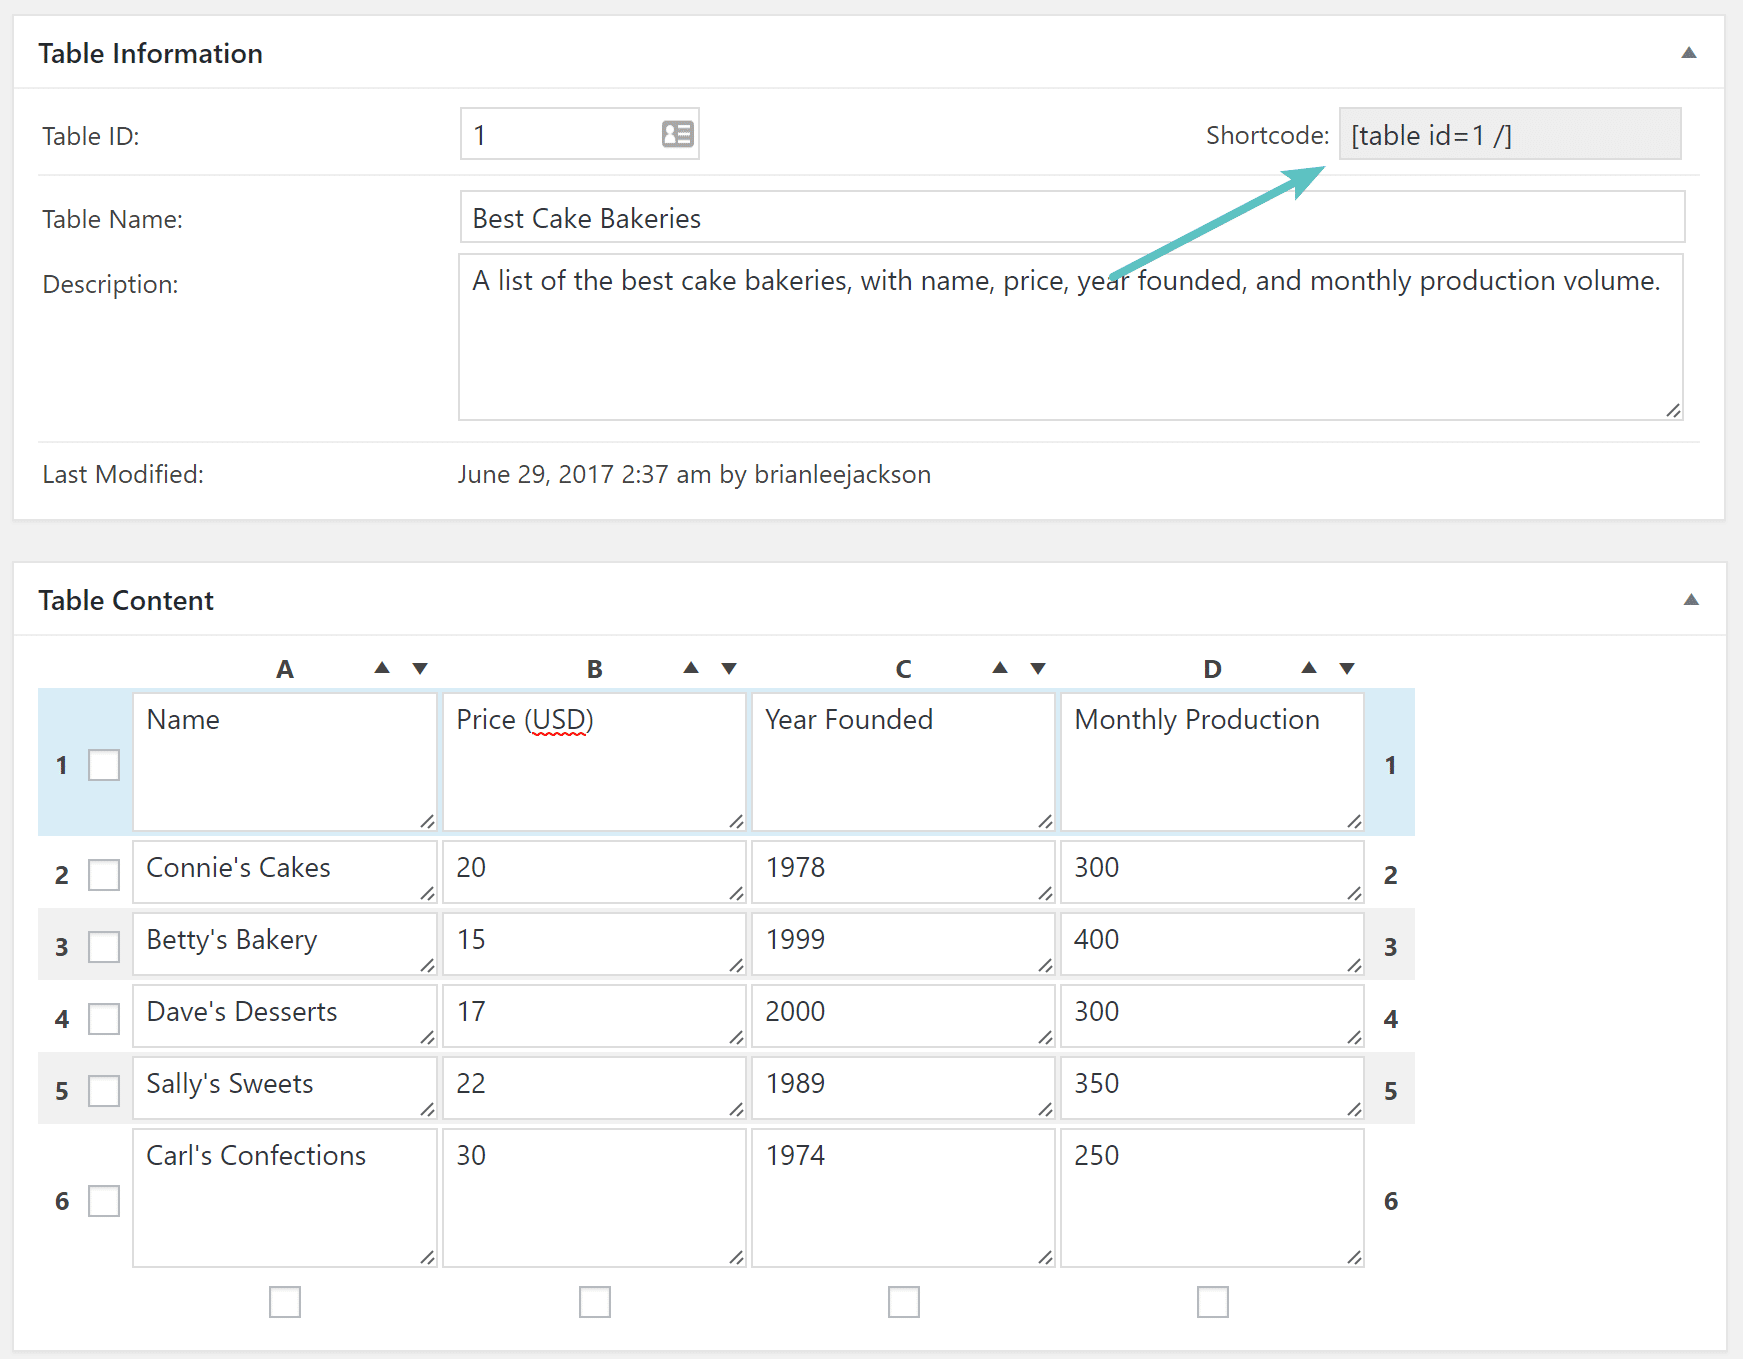
On the next page, your table will be assigned an ID and a shortcode you’ll use to add the table into your posts and pages. You’ll also start filling out the individual cells of your new table. The interface you use to fill out the table is simple and uncomplicated and is somewhat akin to your average Excel spreadsheet. Here’s what it looks like when your table is all filled out.
Step 4
Further down on the same page you can play around with some basic options. You can insert links/images in your cells, duplicate/delete selected rows and columns, add CSS classes for styling purposes, combine cells, alternate color by row, enable sorting/pagination, and more.
The plugin automatically assumes that your first row is the header row for the table, but you do have the option to prevent that and even change the last row to a table footer.
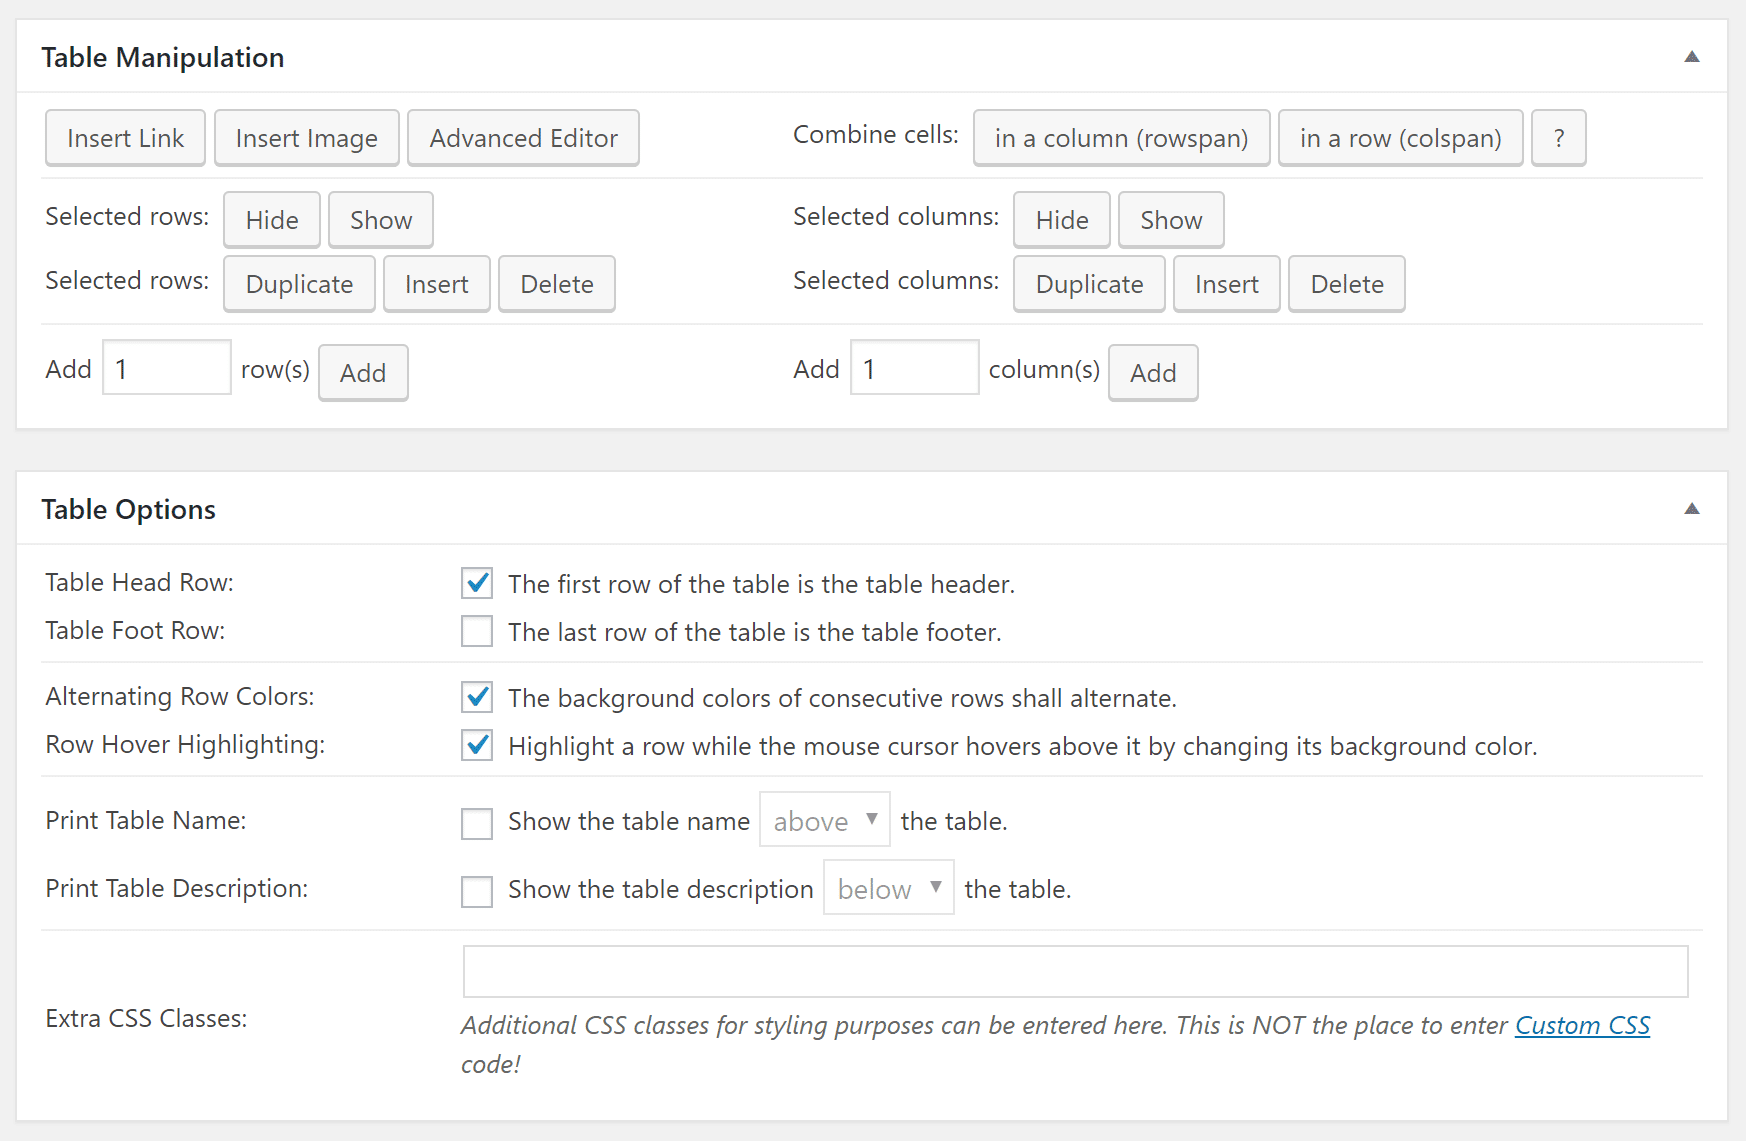
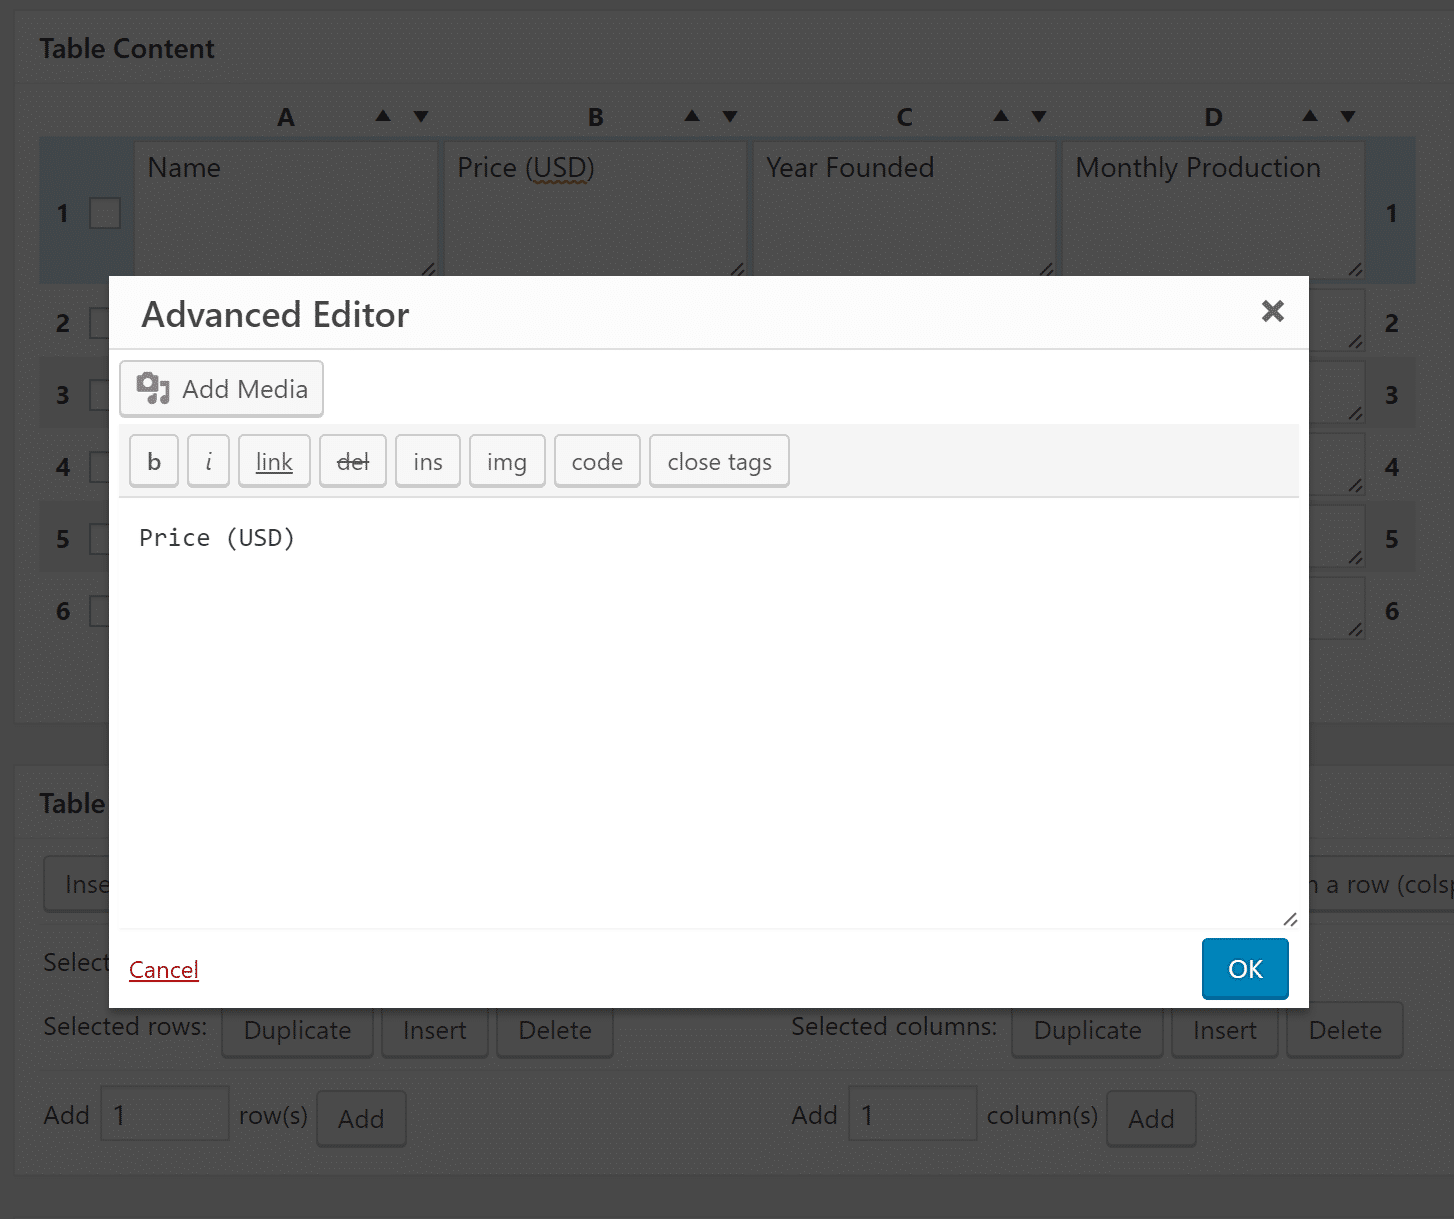
There is also an “advanced editor” button that gives you a slightly more functional interface in which to key in your table’s data.
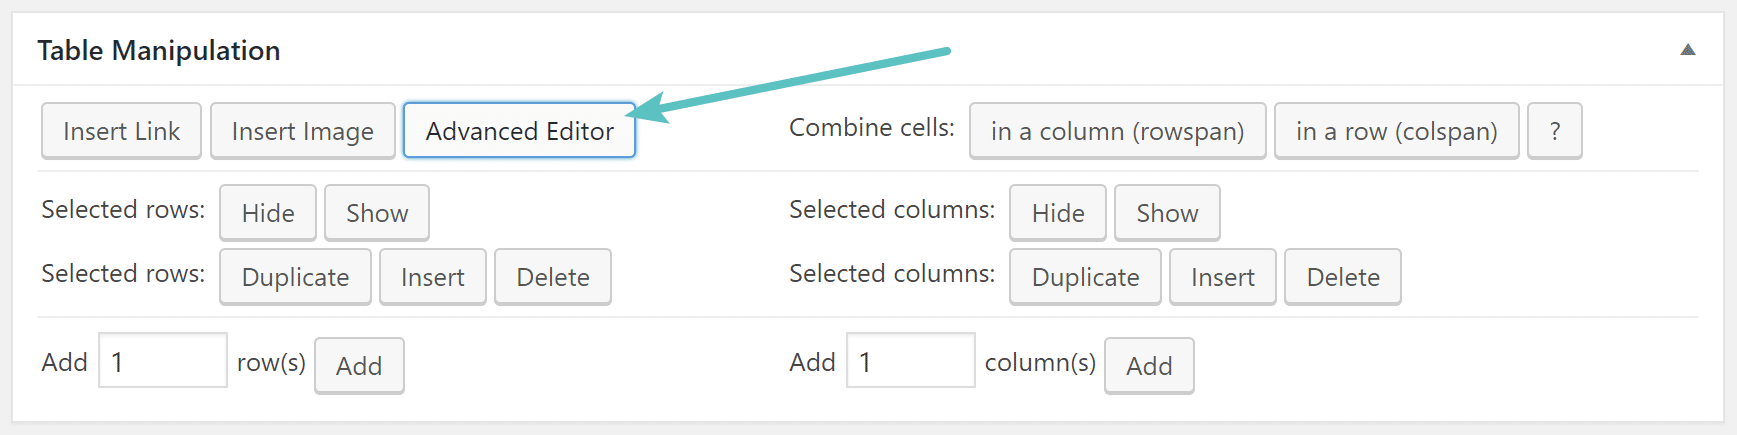
It’s quite time-consuming to use, though, since you have to click that button, then click the cell you want to edit in order to get access to the advanced editor — and you’ve got to repeat that for every single cell. In our opinion, it’s really not worth the trouble. But depending on the amount of data you are entering it could be useful.
Step 5
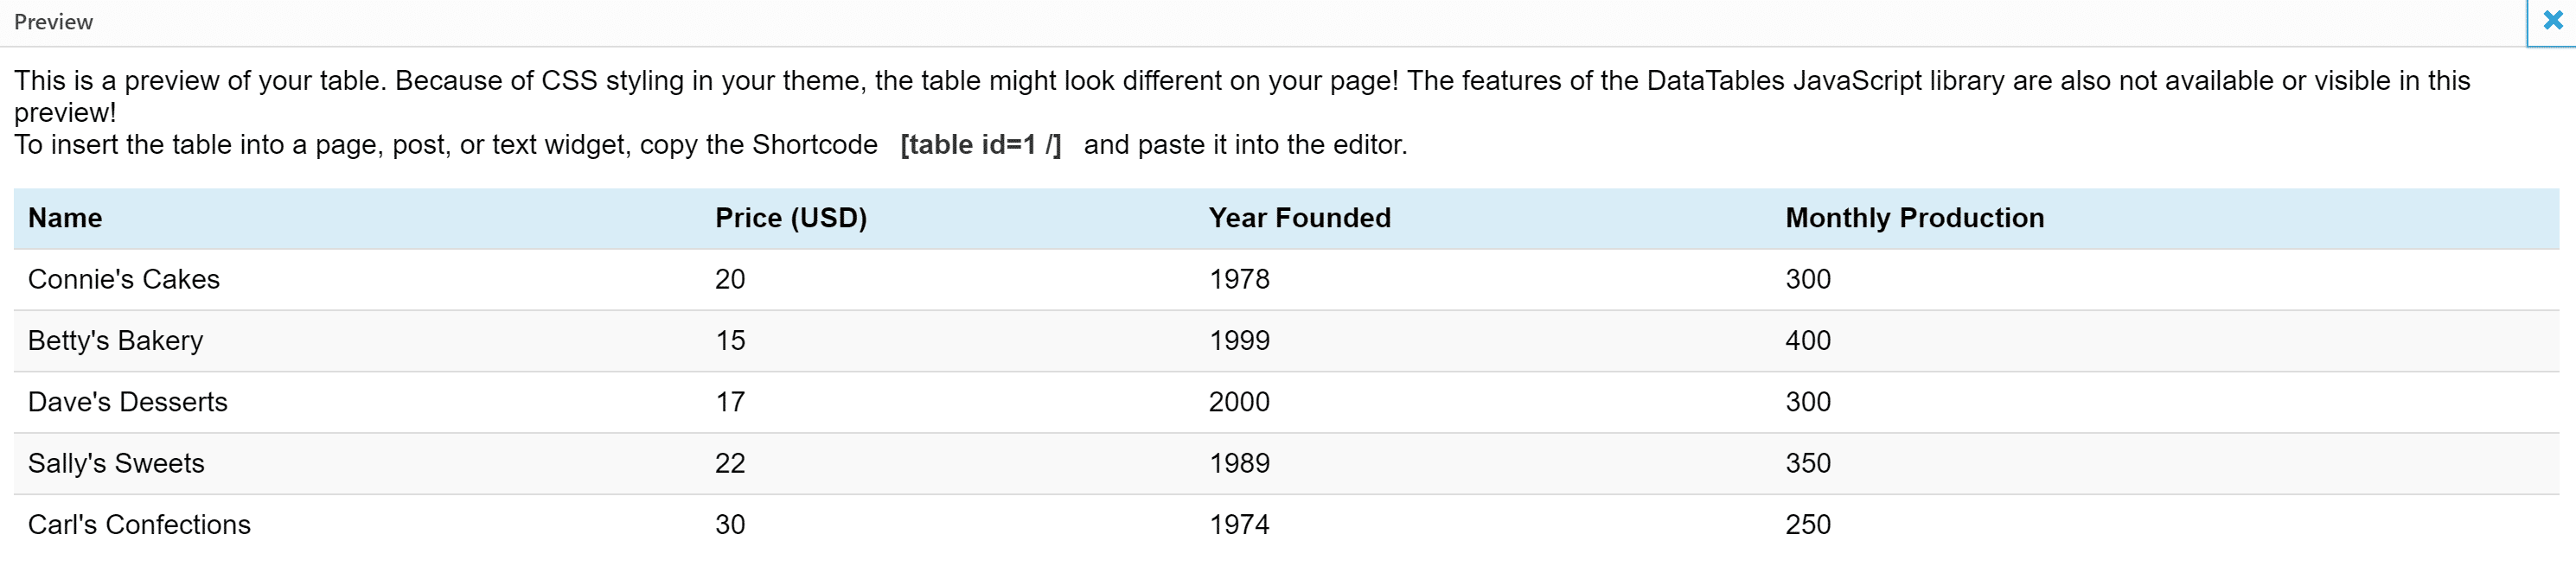
Once you’re all done editing the table and have customized the options, hit the “Save Changes” button, then the “Preview” button at the bottom of the page to get a basic idea of what your table will look when inserted in a post or page.
We’ve found this preview to be quite a long way away from what your finished product will actually look like, in terms of styling. Since so much of the styling is dependent on your theme, the preview doesn’t really do justice to the final look (which is really much better than the clunky table you see in the screenshot below).
Step 6
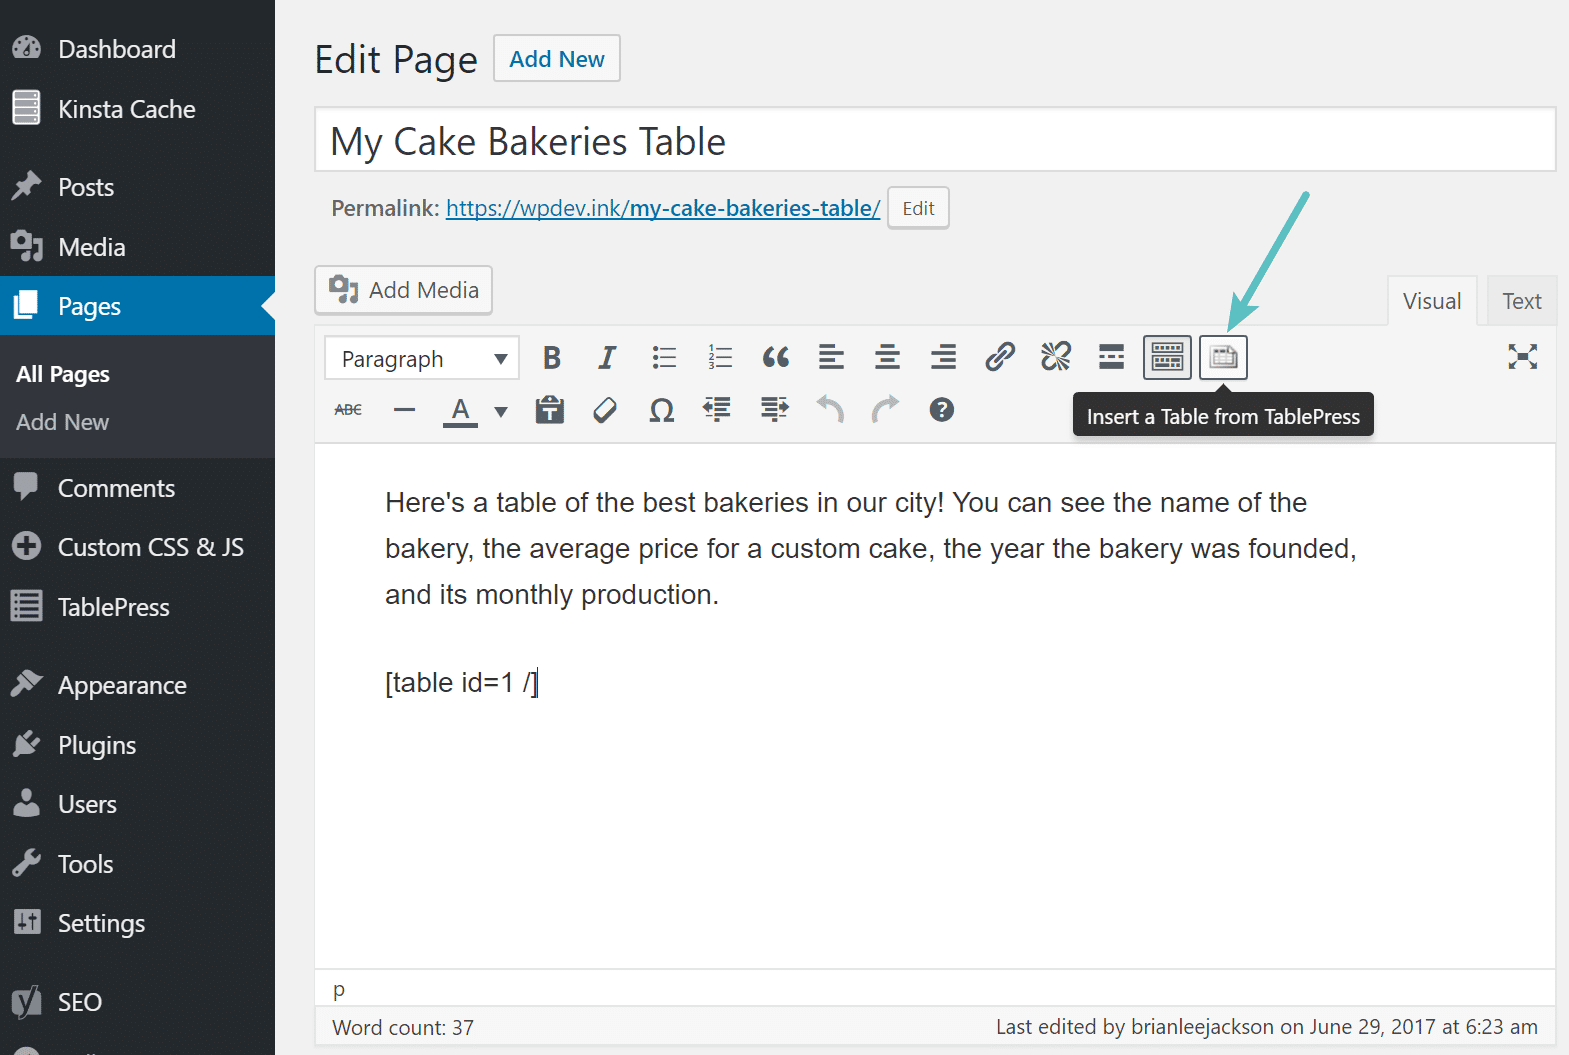
Now in a post or page, you can insert the table two different ways. The first is by copying and pasting the shortcode from earlier. For our example table, since it was the first one we created, the shortcode is [table id=1 /]. The shortcode format is very easy to remember.
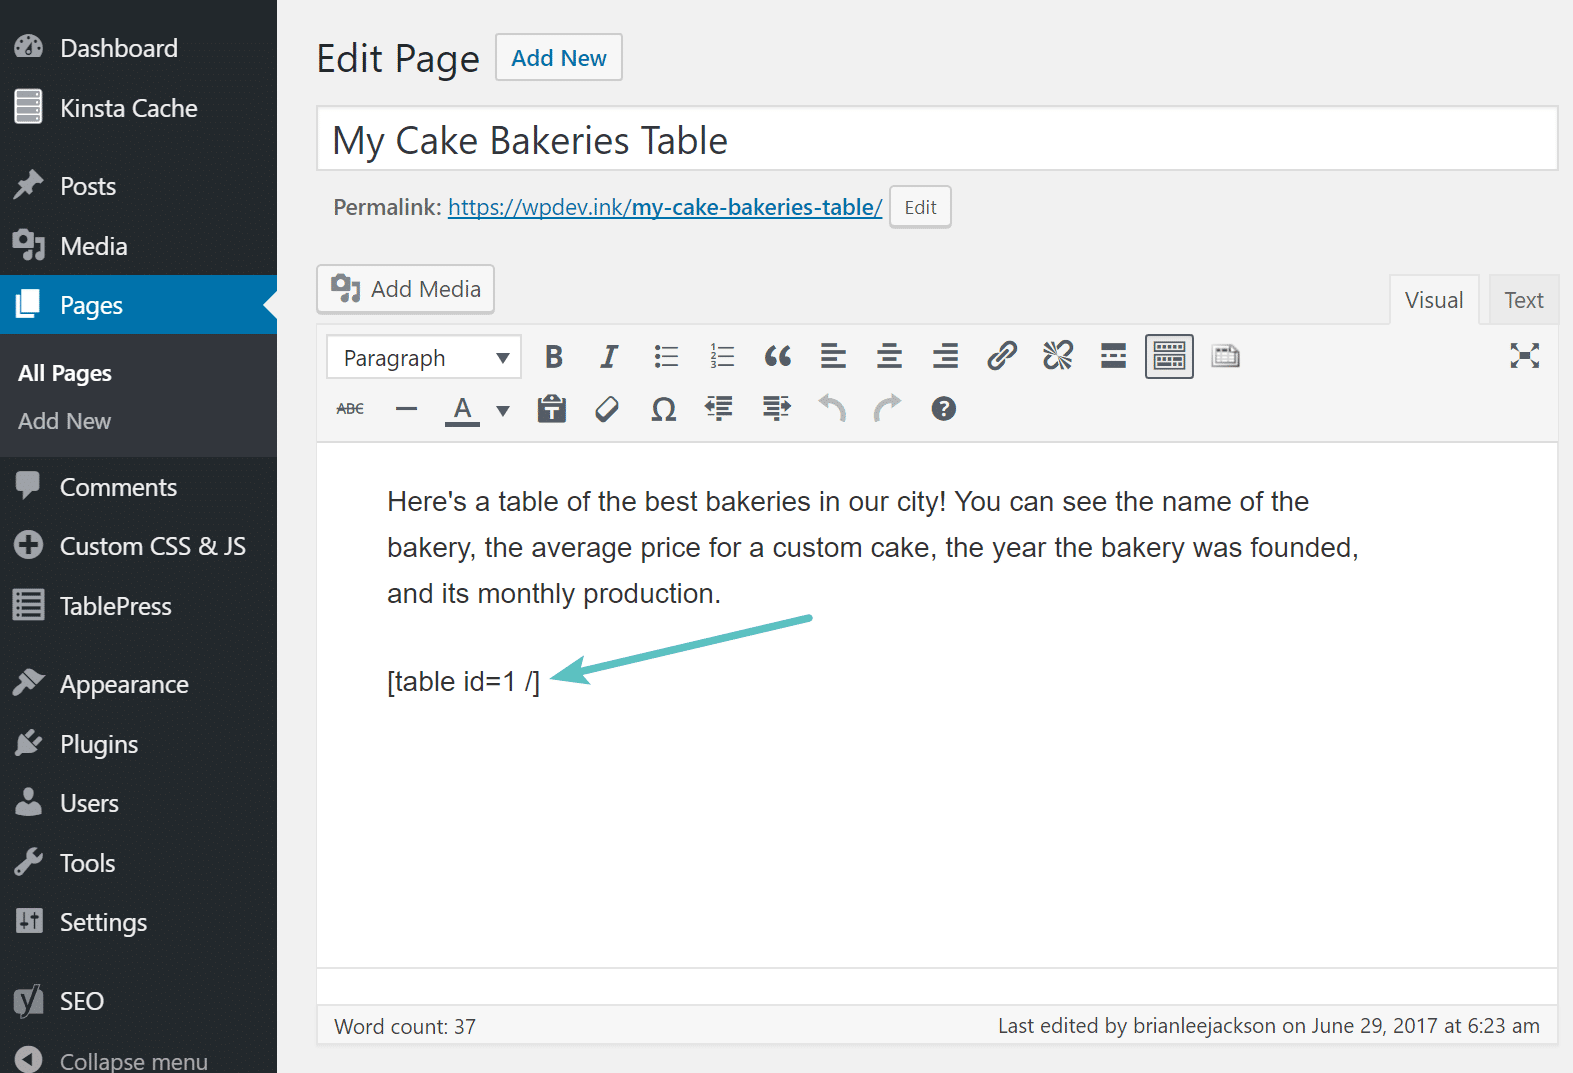
The second way is to use the “Insert a Table from TablePress” button in the visual editor toolbar.
Here’s an example of what the final output will look like on a website running the defau