How to Find and Add Stock Photos Without Leaving WordPress
- Category : WordPress
- Posted on : Mar 22, 2018
- Views : 2,629
- By : Naftali P.

We realize that many of you wear multiple hats and juggle an almost unprecedented amount of tasks each month. One minute you might be writing a blog post and the next you are on the phone trying to close a deal. Finding a way to speed up certain tasks or automate them can sometimes make all the difference. Time is money as they say, and you should be focusing on the tasks that affect your bottom line. Today we are going to dive into a few services and plugins that allow you to find and add beautiful stock photos to your website without ever leaving the WordPress dashboard.
Finding Stock Photos for WordPress
Let’s be honest, nobody really likes stock photos, but for a majority of businesses, blogs, and content creators, stock photos are the only solution. Many don’t have the funds, time, or expertise to create or take their own photos. Thankfully, compared to 5 years ago, there are a lot more places now to find premium stock photos, as well as free stock photos for your WordPress site. And many of them have huge databases of beautiful high-resolution images. Here are a few popular ones that come to mind:
- Shutterstock (premium)
- iStock (premium)
- Adobe Stock (premium)
- Stock Photo Secrets (premium)
- Depositphotos (premium)
- StockSnap.io (free)
- Pixabay (free)
- Unsplash (free)
- Stockvault.net (free)
- Wikimedia Commons (free)
- PikWizard (free)
And while many of those stock photo sites above are great, the problem is that then your constantly bouncing between WordPress, the stock photo site, downloading JPGs, resizing and optimizing them, etc. All of this adds up to time out of your busy schedule. Many business owners and writers need ways to speed up content creation and publishing, not juggle more tasks. Thankfully there are a few great solutions out there now that actually allow you to stay on your WordPress site and find/add images while you’re writing. Check out these two awesome services/plugins that allow you to upload directly to your WordPress media library.
1. Instant Images (free)
The first solution is called Instant Images, created by the team over at Connekt, a web design and development studio. What they have done is actually pretty clever, as they created a plugin to upload high-quality stock photos from Unsplash, directly to your WordPress media library. For those of you not familiar with Unsplash, it is a site that provides unrestricted free high-resolution photos. Everything is licensed under Creative Commons Zero, which means you can copy, modify, distribute and use the photos for free, including commercial purposes, without asking permission from or providing attribution to the photographer or Unsplash.

The free Instant Images plugin has over 1,000 active installs with a 5 out of 5 rating. It allows you to search the entire Unsplash library from right within your WordPress admin and upload images with a single click. You can download it from the WordPress repository or by searching for it within your WordPress dashboard under “Add New” plugins. Follow the steps below on what to do after activation.
Step 1
After you install and active the plugin you will need to sign up for an Unsplash account, as you will need to get an API key. By default Instant Images provides you with their key to get you started so you can test it out immediately if you want. But you should get your own API key long-term as this unlocks additional requests/lookups. It is completely free to join and you don’t have to subscribe to their newsletter if you don’t want to.
Step 2
After you join you will need to register as a developer. You can simply input the “Instant Images WordPress plugin” as the reason.

Step 3
You must then fill out an application. By default on an auto-approved application, the limits are 50 requests/searches per hour. This should be plenty for 99% of anyone using WordPress. You can give more details to them in the application later on to gain access to higher limits. But this is more applicable for those using it in an app, we simply want to look up photos.
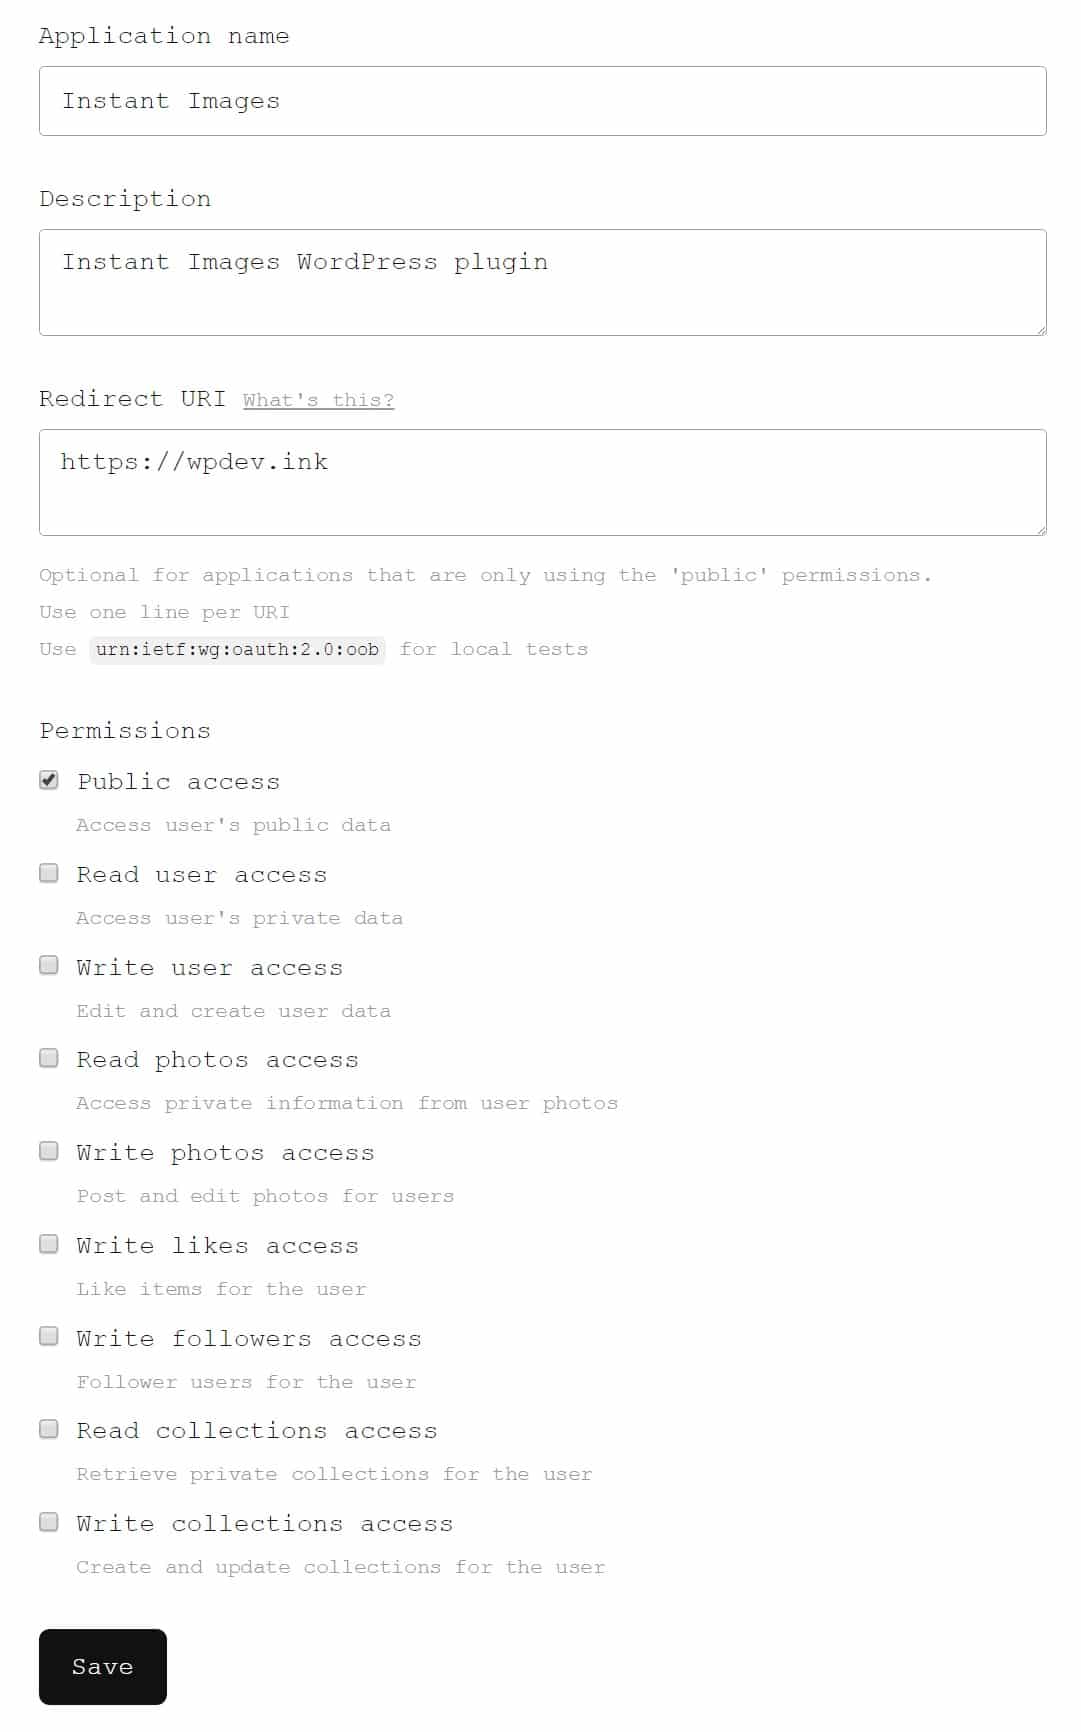
Step 4
You can then input the App ID (API Key) into the plugin settings of “Instant Images” under Media. You can also search the Unsplash library from here and specify your max image upload width and height.
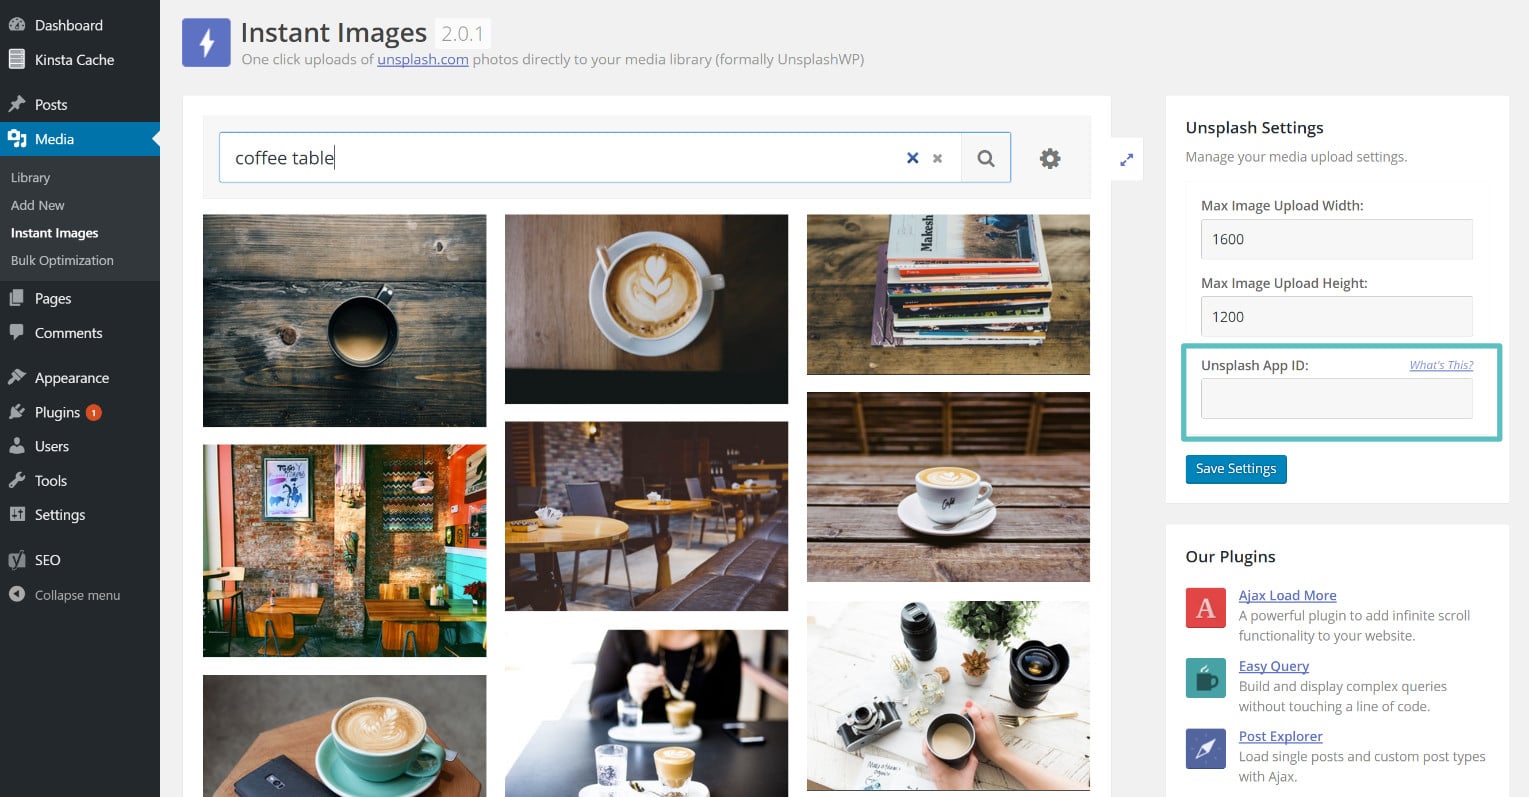
Sep 5
Then under in each post while you are writing you can click on the “Instant Images” button that is now in the visual editor. This will launch the search.
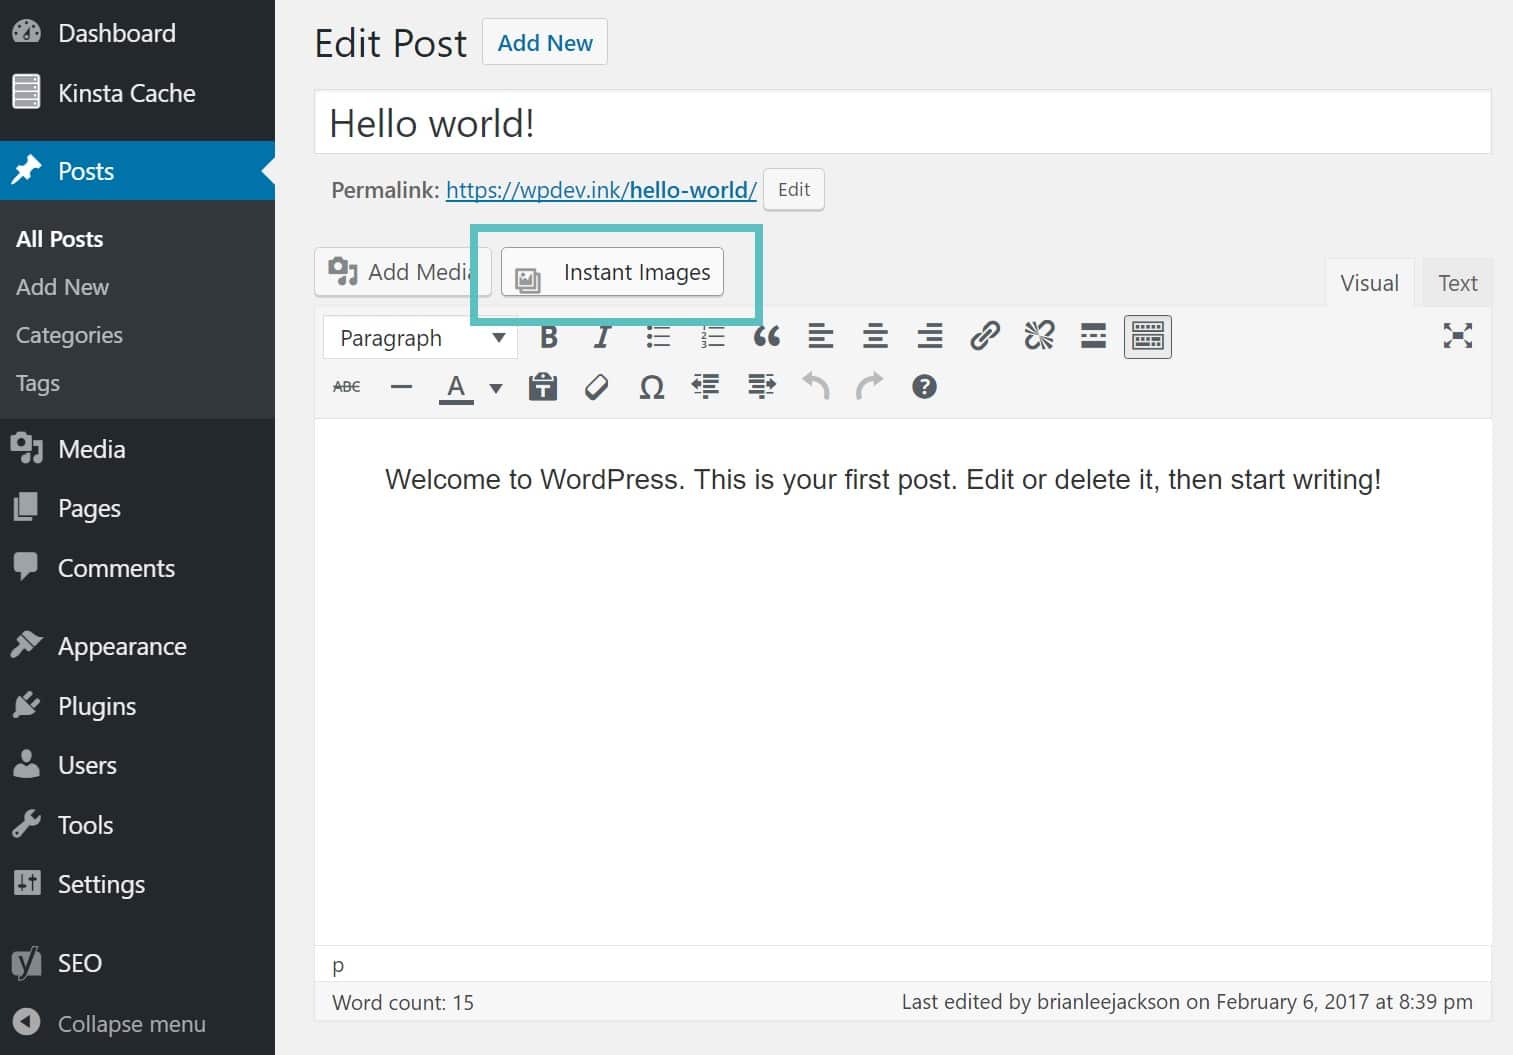
Step 6
You can then put in a keyword and click on an image to upload it to your media library. The one thing they should improve is that it doesn’t go into your post immediately, it simply goes to the WordPress media library. You then have to click on “Add Media” and then insert it from there. Not a big deal, but one extra click they could probably get rid of eventually. One other area for improvement would be to let you name the file after you click it, as this would slightly better for SEO purposes.
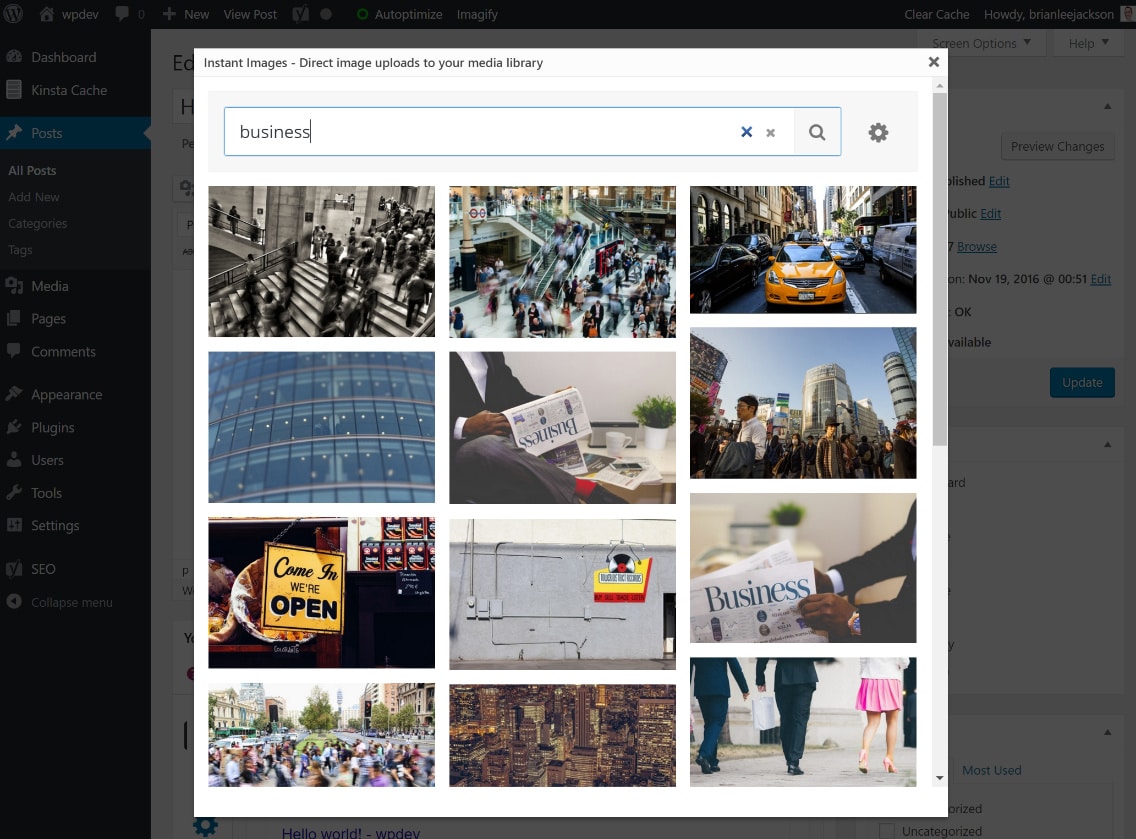
And that’s it! You now have a full high-resolution image in your post in just a couple seconds! Pretty awesome.

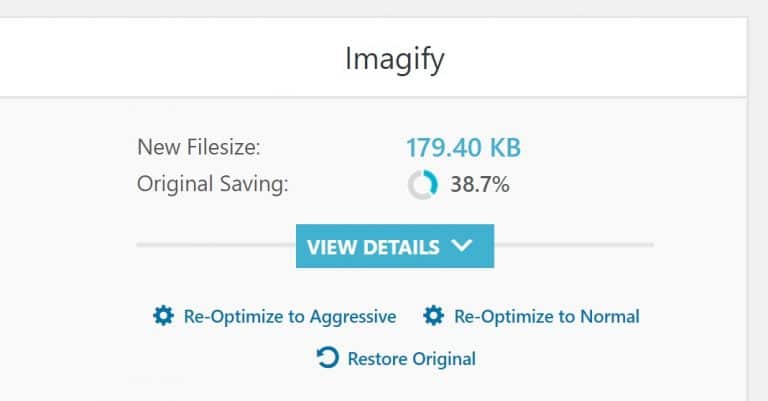
And if you are using an image optimization plugin, such as Imagify, they will still work, as they optimize images as they are uploaded to the media library.
For a completely free solution for WordPress stock photos we were very impressed with the Instant Images plugin and highly recommend it for any of you on a budget and needing a quick way to spruce up your blog posts with some high-resolution photos.
2. PixelRockstar (premium, yet insanely affordable)
The second solution is a newer service and plugin called PixelRockstar, based out of Germany. This isn’t free, but very affordable. You get access to a library of over 4 million high-quality stock photos right within your WordPress dashboard. If you buy their biggest pack of photos you can get it down to only $0.57 per photo! That is cheap.

They license all images under their own simple & safe license so you don’t have to worry about copyright issues. You can use the images for your WordPress site and even social media accounts. You’re even legally covered with up to $10,000 insurance on each image. Some additional features include:
- Download an image once and you can use it forever, they never expire.
- Stock photos can be downloaded a resolution of up to 2,000 pixels.
Follow the steps below on how to get started.
Step 1
The first step would be to head over to PixelRockstar and purchase a plan/pack of stock photos.
Step 2
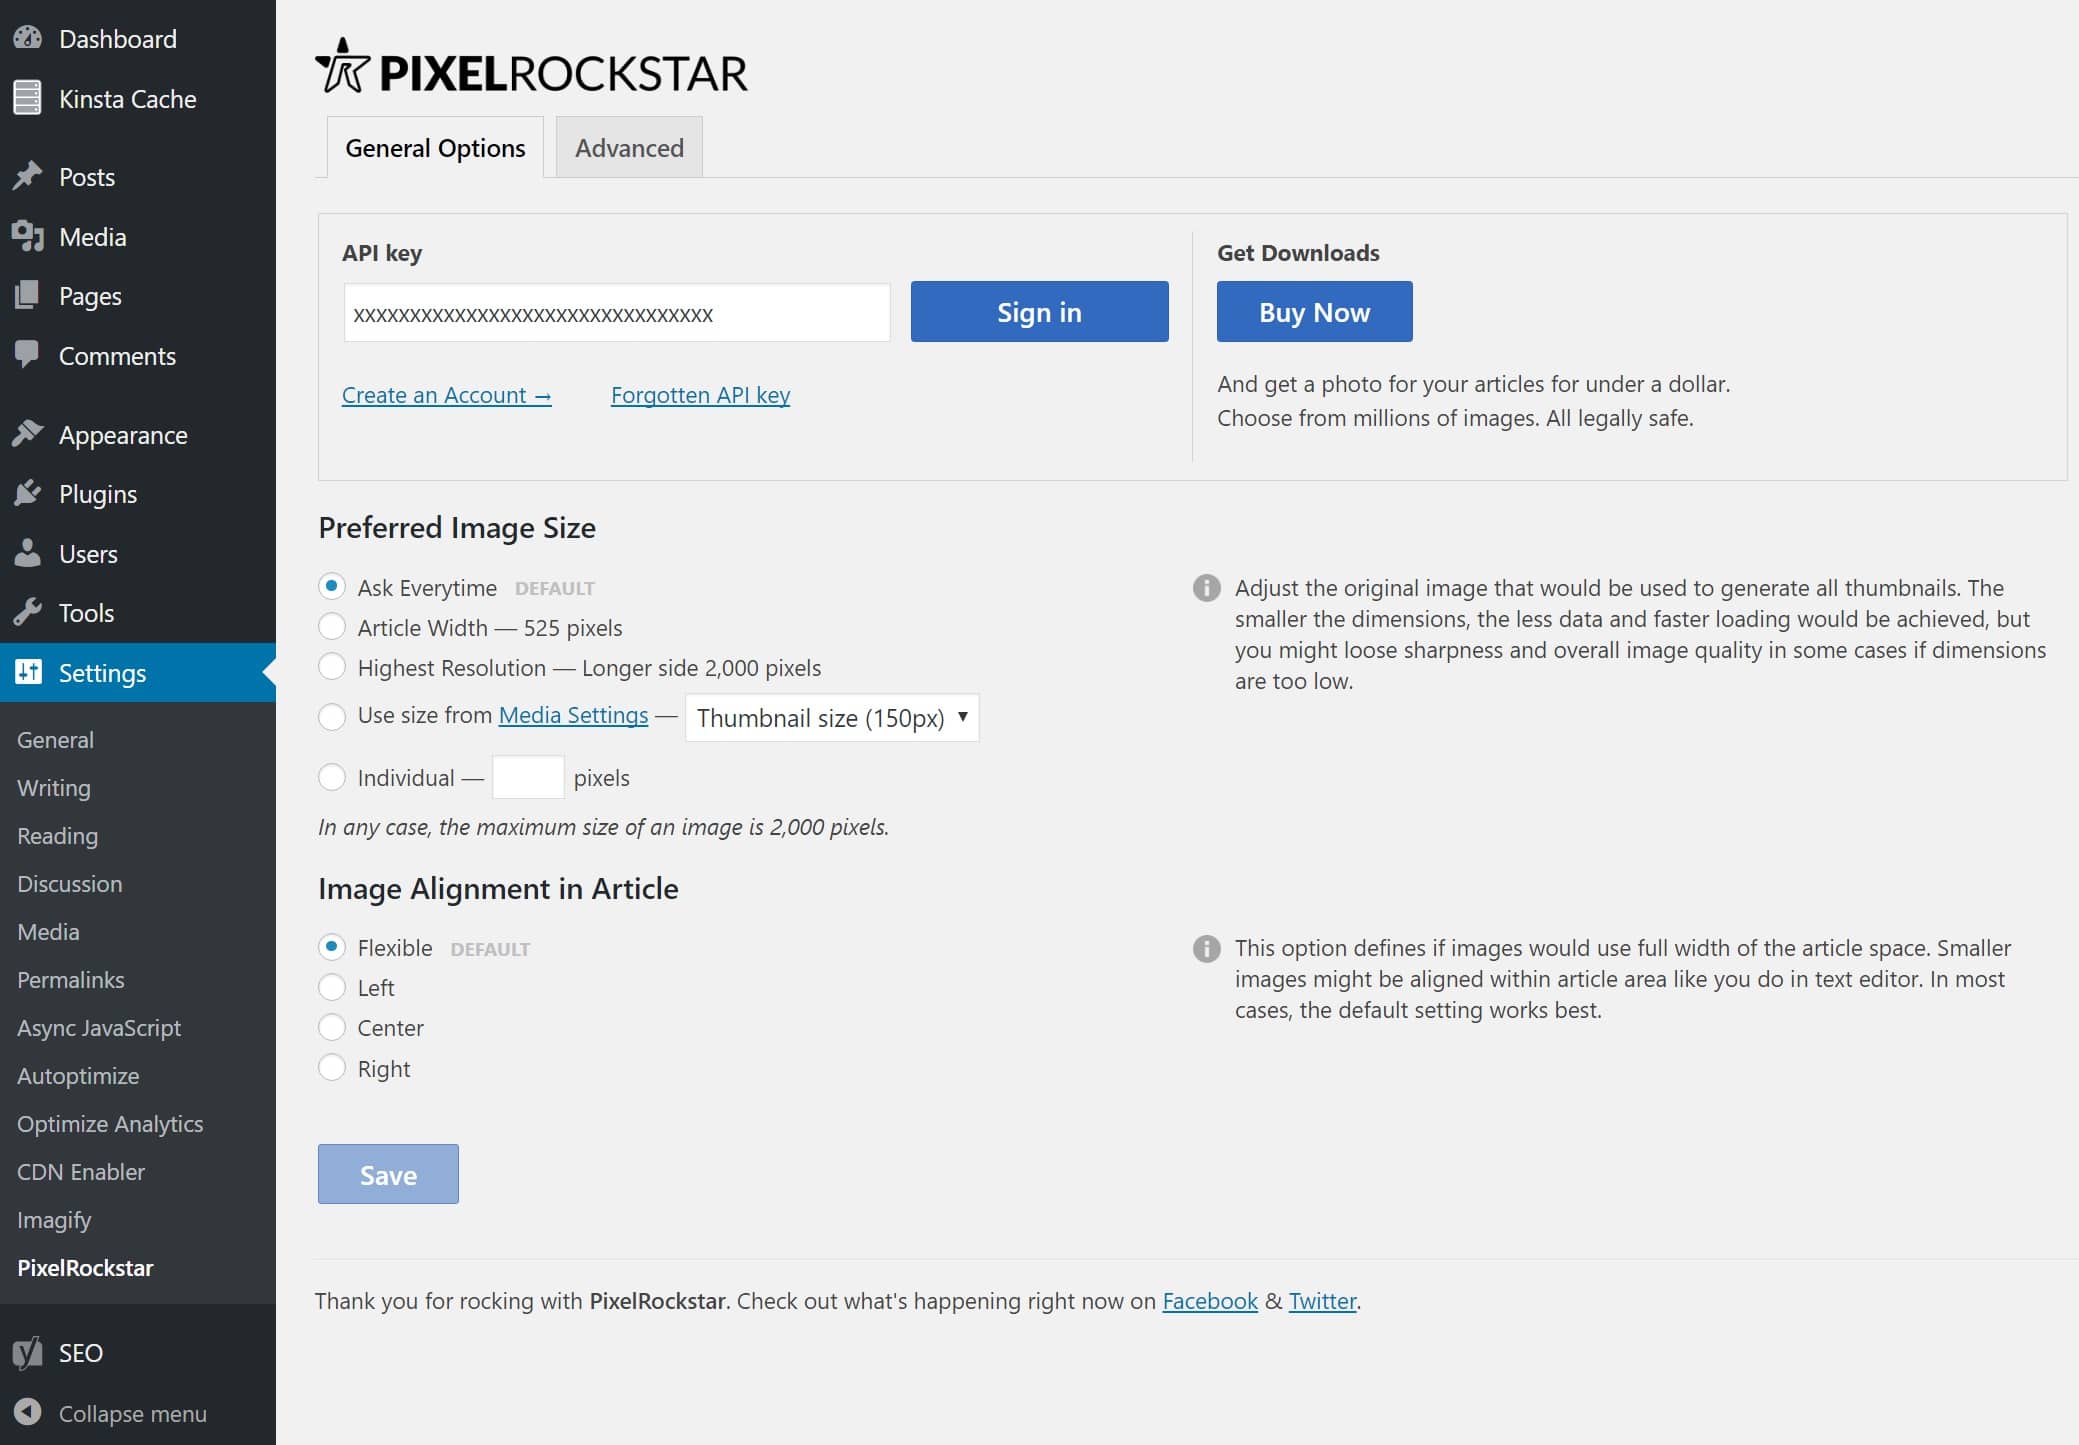
You can then follow the instructions how to install the WordPress plugin. We have no affiliation with PixelRockstar, but please note that we are using a beta version in our examples. They have also let us know that they are about to launch this new version of the plugin on the WordPress repository. After you install the plugin you will need to input your API key you receive from the email (also accessible in your account dashboard). You can then choose your preferred image size and default alignment.
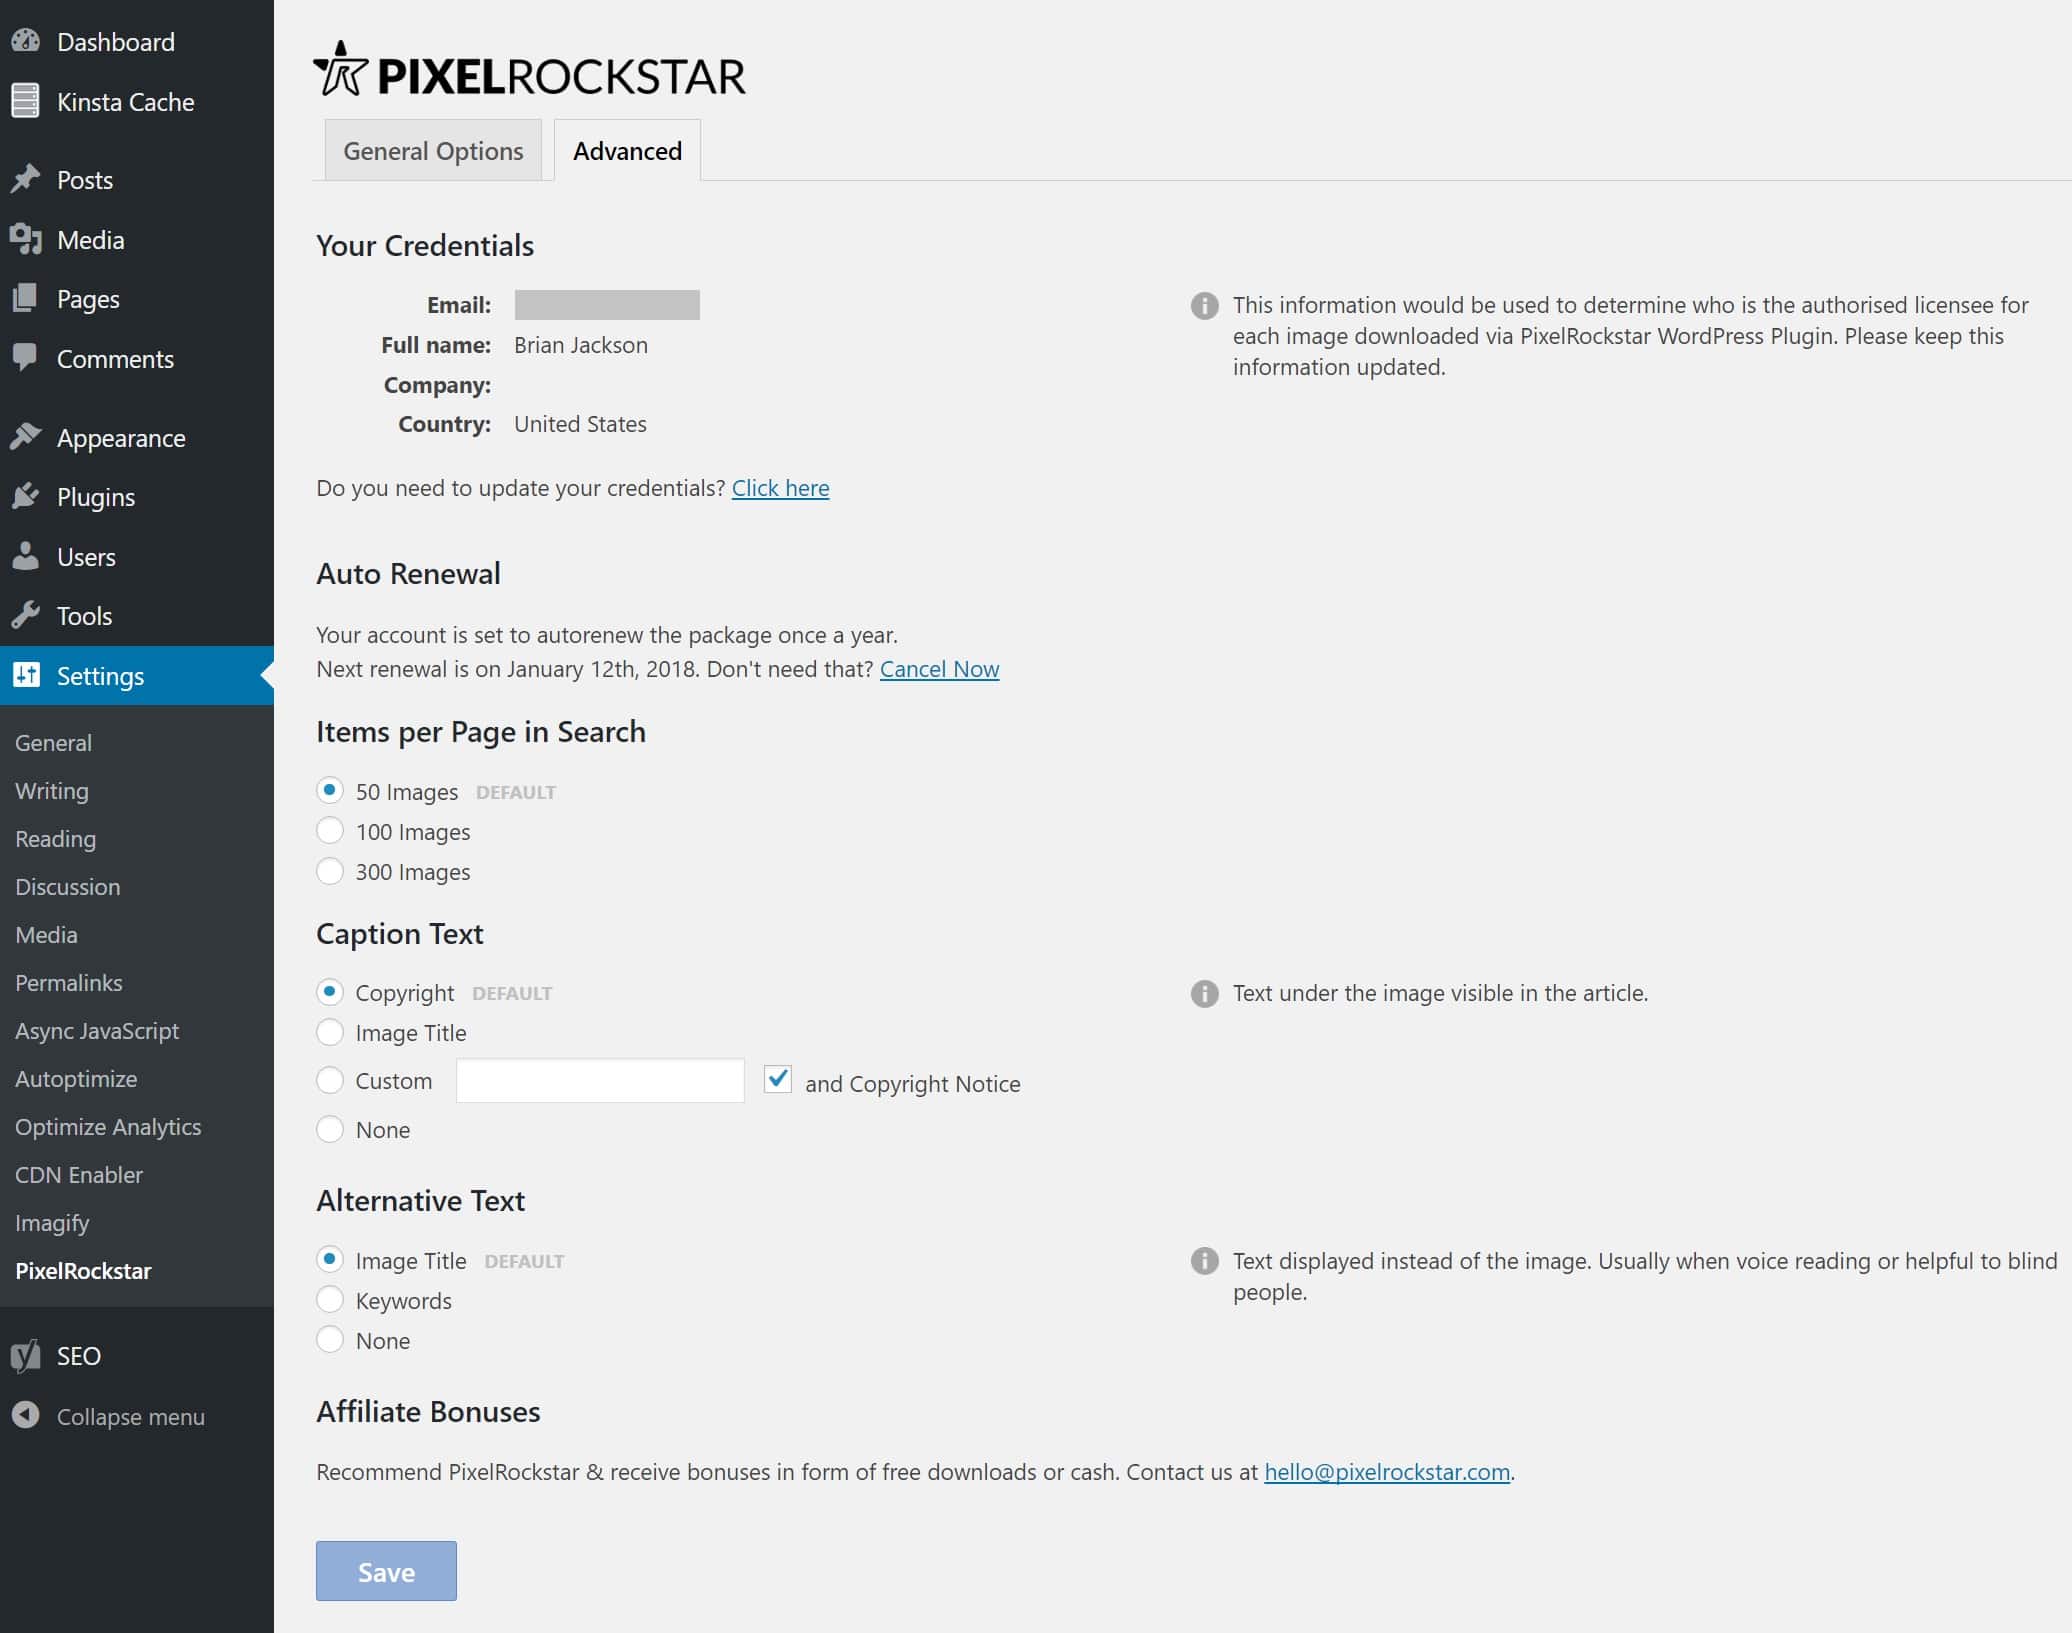
You also have the “Advanced” tab in which you can change how many items show up in search, your default caption text, and the default ALT text.
Step 3
Just like with the Instant Images plugin we mentioned above, when you are in the visual editor you can simply click on “Add Stock Photo” to insert an image.

Step 4
You can then search for the photo you want. Select the size (default is based on size you choose in settings), choose the current size, and also select the “add as featured image” option. And then click on “Download.”

Step 5
One advantage to this plugin over the Instant Image one is that after clicking download it takes you to the image details and you can immediately insert it into the post. This is a more straightforward process and allows you to easily customize ALT, title, etc. We noticed the file names with PixelRockstar are also named with the keyword out of the box, which is much better for SEO.

And that’s it! You now have a full high-resolution image in your post in just a couple seconds!

And just like with the other plugin, if you are using an image optimization plugin, it will still work, as they optimize images as they are uploaded to the media library. For a cost-effective premium solution for WordPress stock photos, PixelRockstar is pretty awesome! We highly recommend checking it out.
Summary
As you can see, the above solutions can definitely speed up your content creation and writing by enabling you to never have to leave your WordPress dashboard. Find beautiful images and insert them instantly while you’re in writing mode. Another big perk of these is that you never have to worry about copyright or legal issues either as they are both fully protected. We would love to hear your thoughts on your current workflow for adding stock photos on your WordPress site.
Categories
Subscribe Now
10,000 successful online businessmen like to have our content directly delivered to their inbox. Subscribe to our newsletter!Archive Calendar
| Sat | Sun | Mon | Tue | Wed | Thu | Fri |
|---|---|---|---|---|---|---|
| 1 | 2 | 3 | 4 | 5 | 6 | |
| 7 | 8 | 9 | 10 | 11 | 12 | 13 |
| 14 | 15 | 16 | 17 | 18 | 19 | 20 |
| 21 | 22 | 23 | 24 | 25 | 26 | 27 |
| 28 | ||||||
Recent Articles
-

Posted on : Jul 25
-

Posted on : Jul 07
-

Posted on : Apr 07
-

Posted on : Mar 19
Optimized my.cnf configuration for MySQL 8 (on cPanel/WHM servers)
Tags
- layer 7
- tweak
- kill
- process
- sql
- Knowledge
- vpn
- seo vpn
- wireguard
- webmail
- ddos mitigation
- attack
- ddos
- DMARC
- server load
- Development
- nginx
- php-fpm
- cheap vpn
- Hosting Security
- xampp
- Plesk
- cpulimit
- VPS Hosting
- smtp
- smtp relay
- exim
- Comparison
- cpu
- WHM
- mariadb
- encryption
- sysstat
- optimize
- Link Building
- apache
- centos
- Small Business
- VPS
- Error
- SSD Hosting
- Networking
- optimization
- DNS
- mysql
- ubuntu
- Linux


