
Enhancing WordPress Custom Menus for Navigation
- Category : WordPress
- Posted on : Sep 24, 2018
- Views : 2,940
- By : Radcliff S.

Custom navigation menus are an amazing WordPress feature that allows admin users to add any list of links anywhere into the site. They can be links to internal resources, like posts, pages and archives, as well as links to external resources, like your social profiles pages. WordPress reserves a specific admin page to custom navigation menus. In this page the admin user can create menus, arrange items and set properties which affect the way they appear in the front-end.
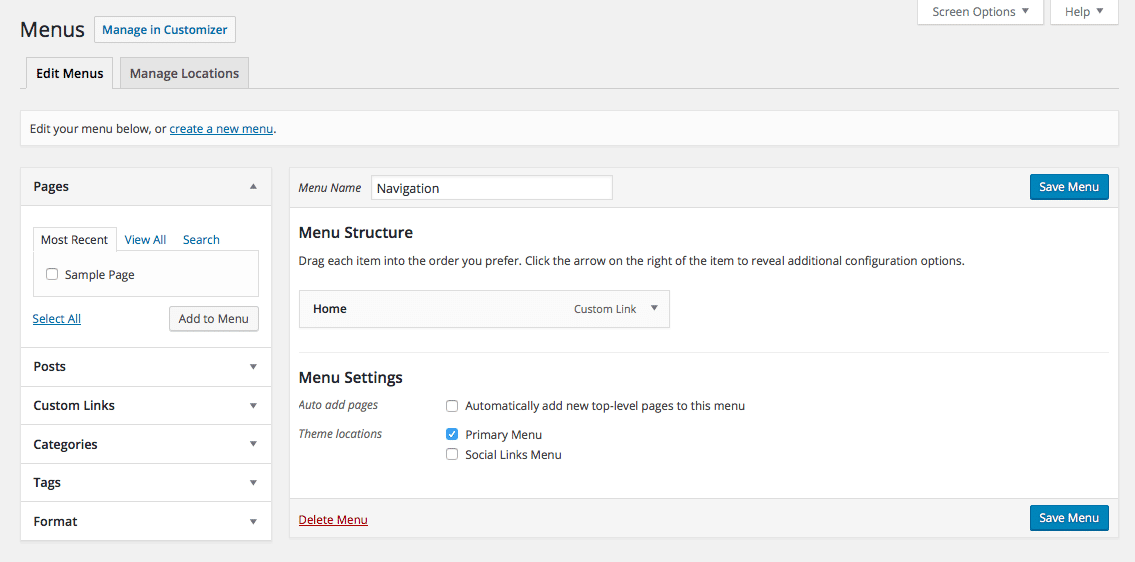
That being said, the main questions behind this post is: “Can we extend the built-in functionalities of the Menus Screen?”
Of course we can. So I will dive deep into the topic, and I will dissect sections and objects that allow to add and manage menus and their items. But it won’t be just a description of the screen. I will show you how to add custom items to the accordion menu placed in the left sidebar.
These custom boxes will show additional lists of links to choose from when building custom navigation menus. More specifically, I will show you how to add a box containing links to the site authors’ archives.
Let’s start diving into building a WordPress custom menu.
The Appearance Menus Screen
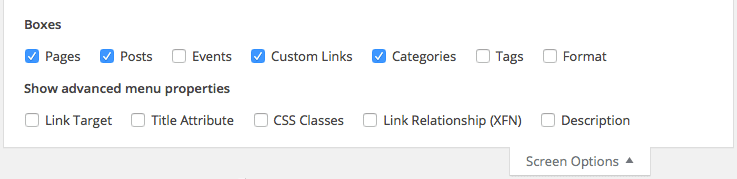
The Menus editing page allows users to create and manage custom menus thanks to an intuitive interface. The Screen Options button in the upper right corner unveils the first section of the page which contains two groups of checkboxes. The Boxes group allows the user to hide and show menu meta boxes in the left sidebar, while the Show advanced menu properties group hides and shows properties like link targets, descriptions and CSS classes for list items.
Once the first menu has been created, the Menus Screen looks a bit different from its default appearance. New sections appear in the Edit Menus tab.
- The top section provides a select menu to choose from and a create a new menu link;
- The left column holds an accordion menu containing the available menu item meta boxes. These meta boxes contain items selected from pages, posts, categories, tags, taxonomies, post types and post formats (shortly, custom post types and taxonomies).
- The Menu Structure section holds the menu item modules from which the user can arrange links and set their attributes and properties.
- The Menu Settings section provides a list of check boxes that link menus to registered theme locations.
Meta Boxes and Modules
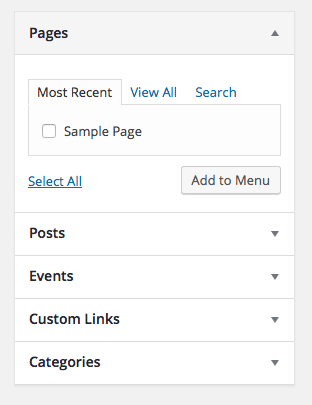
The left sidebar of Menus Screen holds an accordion menu whose elements are named menu item meta boxes. These blocks provide a number of form fields and controls that allow the user to search the site content and add links to navigation menus.
By default WordPress provides the following menu item meta boxes:
- pages
- posts
- custom links
- categories
- tags
- post formats
- custom post types
- custom taxonomies
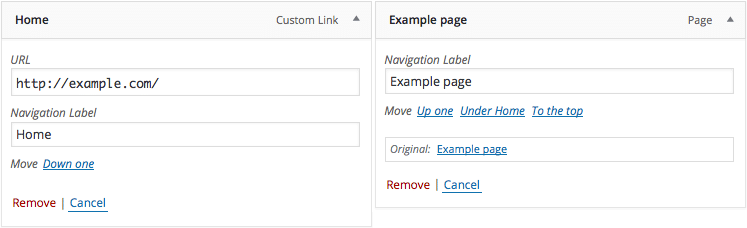
When the user adds a link to a menu, a new item module is appended to the Menu Structure section of the screen. WordPress provides four typologies of menu item modules:
- Post Type module (posts, pages and custom post types);
- Post Type Archive module;
- Taxonomy module (for categories, tags, custom taxonomies and post formats);
- Custom Links module.
We are going to to extend the built-in structure of the Appearance Menus Screen with custom meta boxes that would allow the admin user to select pieces of content not available by default, like author archives.
Unfortunately, the Core Navigation Menu API is not documented and to achieve our goal it was necessary to dissect line by line two core files: /wp-admin/includes/nav-menu.php for menu meta boxes, and /wp-includes/nav-menu.php for menu item modules.
Let’s start coding.
Create a WordPress Custom Menu Item Meta Box
Create a new plugin and add the following code to the main file:
/**
 * Add menu meta box
 *
 * @param object $object The meta box object
 * @link https://developer.wordpress.org/reference/functions/add_meta_box/
 */
function custom_add_menu_meta_box( $object ) {
add_meta_box( 'custom-menu-metabox', __( 'Authors' ), 'custom_menu_meta_box', 'nav-menus', 'side', 'default' );
return $object;
}
add_filter( 'nav_menu_meta_box_object', 'custom_add_menu_meta_box', 10, 1);
The WordPress add_meta_box function registers meta boxes in admin pages. It keeps the following arguments:
| Argument | Type | Description |
|---|---|---|
$id | string (required) | the meta box ID |
$callback | callable(required) | the function that echoes the meta box content |
$screen | string|array|WP_Screen(optional) | the screen on which to show the meta box |
$context | string (optional) | the context within the screen where the meta box shloud display (possible values are 'normal', 'side', 'advanced', defaults to 'advanced') |
$priority | string (optional) | possible values 'high', 'low', 'default' |
$callback_args | array (optional) | an array of arguments to be passed to the callback |
Maybe you would have expected the add_meta_box function would be hooked to an action like add_meta_boxes, which is triggered in post editing pages. Unfortunately, we don’t have an action in nav-menus.php we can hook the function to, so we’re forced to use the nav_menu_meta_box_object filter. This hook determines whether a menu item meta box will be added for an object type. When the filter runs, add_meta_box registers the custom meta box.
Now we can define the callback function which will produce the HTML content for the meta box.
/**
 * Displays a metabox for an author menu item.
 *
 * @global int|string $nav_menu_selected_id (id, name or slug) of the currently-selected menu
 */
function custom_menu_meta_box(){
global $nav_menu_selected_id;
$walker = new Walker_Nav_Menu_Checklist();
...
}
The global variable keeps memory of the current menu ID, while $walker stores a new instance of Walker_Nav_Menu_Checklist object, which builds the HTML list of menu items.
Then, we have to set the value of $current_tab variable which will determine the active tab in the meta box. To keep things easy, I will provide just two tabs:
$current_tab = 'all';
if ( isset( $_REQUEST['authorarchive-tab'] ) && 'admins' == $_REQUEST['authorarchive-tab'] ) {
$current_tab = 'admins';
}elseif ( isset( $_REQUEST['authorarchive-tab'] ) && 'all' == $_REQUEST['authorarchive-tab'] ) {
$current_tab = 'all';
}
Following, we will get all users with write privileges, adding a number of properties to the $authors object.
$authors = get_users( array( 'orderby' => 'nicename', 'order' => 'ASC', 'who' => 'authors' ) );
$admins = array();
/* set values to required item properties */
foreach ( $authors as &$author ) {
$author->classes = array();
$author->type = 'custom';
$author->object_id = $author->nickname;
$author->title = $author->nickname . ' - ' . implode(', ', $author->roles);
$author->object = 'custom';
$author->url = get_author_posts_url( $author->ID );
	$author->attr_title = $author->displayname;
if( $author->has_cap( 'edit_users' ) ){
$admins[] = $author;
}
}
$removed_args = array( 'action', 'customlink-tab', 'edit-menu-item', 'menu-item', 'page-tab', '_wpnonce' );
?>
get_users returns an array of $user objects selected by the specified parameters. The who param forces WordPress to query the database just for users with writing privileges.
$admins array will store an array of authors, while the latest variable, $removed_args, will store a list of query vars to be removed.
When we’re done with data, we can print the meta box mark-up. First we’ll build tab labels and links:
<div id="authorarchive" class="categorydiv">
<ul id="authorarchive-tabs" class="authorarchive-tabs add-menu-item-tabs">
<li <?php echo ( 'all' == $current_tab ? ' class="tabs"' : '' ); ?>>
<a class="nav-tab-link" data-type="tabs-panel-authorarchive-all" href="<?php if ( $nav_menu_selected_id ) echo esc_url( add_query_arg( 'authorarchive-tab', 'all', remove_query_arg( $removed_args ) ) ); ?>#tabs-panel-authorarchive-all">
<?php _e( 'View All' ); ?>
</a>
</li><!-- /.tabs -->
<li <?php echo ( 'admins' == $current_tab ? ' class="tabs"' : '' ); ?>>
<a class="nav-tab-link" data-type="tabs-panel-authorarchive-admins" href="<?php if ( $nav_menu_selected_id ) echo esc_url( add_query_arg( 'authorarchive-tab', 'admins', remove_query_arg( $removed_args ) ) ); ?>#tabs-panel-authorarchive-admins">
<?php _e( 'Admins' ); ?>
</a>
</li><!-- /.tabs -->
</ul>
We have to be careful and assign the correct class names, IDs and data attributes to the elements of the meta box. In case of error, the accordion menu won’t work properly.
We used add_query_arg and remove_query_arg functions to set tab specific values for authorarchive-tab query var and remove unnecessary query variables.
The image below shows the resulting tab labels.
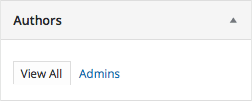
Next, we will build the HTML content of the tabs (again, pay attention to class names and IDs):
<div id="tabs-panel-authorarchive-all" class="tabs-panel tabs-panel-view-all <?php echo ( 'all' == $current_tab ? 'tabs-panel-active' : 'tabs-panel-inactive' ); ?>">
<ul id="authorarchive-checklist-all" class="categorychecklist form-no-clear">
<?php
echo walk_nav_menu_tree( array_map('wp_setup_nav_menu_item', $authors), 0, (object) array( 'walker' => $walker) );
?>
</ul>
</div><!-- /.tabs-panel -->
<div id="tabs-panel-authorarchive-admins" class="tabs-panel tabs-panel-view-admins <?php echo ( 'admins' == $current_tab ? 'tabs-panel-active' : 'tabs-panel-inactive' ); ?>">
<ul id="authorarchive-checklist-admins" class="categorychecklist form-no-clear"