
Shareaholic Review: A Suite of Audience-Engaging WordPress Tools
- Category : WordPress
- Posted on : May 10, 2019
- Views : 3,034
- By : Xavier N.

As a WordPress site owner, you’re probably always on the lookout for new opportunities to engage with your audience.
Shareaholic is a popular WordPress plugin/service that comes with a suite of tools to help you do just that, and maybe even make a little extra money in the process.
But while Shareaholic does give you access to tons of features in one neat package, it also uses a modular approach to ensure you aren’t bogging down your site with features you don’t want. That is, it lets you turn specific features on or off according to your preferences.
In this post, we’ll take a deep look at Shareaholic. We’ll start by discussing all the features that come with Shareaholic. Then, we’ll go hands-on and show you how everything comes together on a live WordPress site.
- Shareaholic Features
- Installing the Shareaholic Plugin
- What About Performance?
- How Much Does Shareaholic Cost?
Shareaholic Features: More Than Just Social Sharing
When you see the name “Shareaholic”, your brain probably goes straight to social media sharing buttons.
And yes – Shareaholic certainly does social sharing…
You can add both floating and in-content share buttons, as well as share buttons on individual images and a couple of options for social follow buttons. Each placement comes with its own array of detailed settings, with the ability to turn on share counts, choose specific social networks, and a lot more.
However, there’s also a lot more than social sharing, which is one of the things that makes Shareaholic unique against all of the other WordPress social sharing plugins.
You also get:
- Related content – show related content suggestions on your site. The nice thing here is that all the processing happens on Shareaholic’s servers, which offers a better performance approach because you won’t have a bunch of database queries running on your own site.
- Analytics – find out how your content fares on social media thanks to UTM and Event tracking integrations with Google Analytics. You can also view this data inside your WordPress dashboard.
- Post Share Prompts – display messages after a user shares your content. You can display your own message and add social follow buttons or banner ads.
- Monetization – Shareaholic offers a number of monetization options, including the ability to automatically insert affiliate links, add banner ads to your related content, and promote sponsored content recommendations (in addition to related content from your own site). These features are totally optional.
- Link shortening – create shortened links (e.g. “shrlc.com/PnVrDPN” right from your dashboard. These links automatically track clicks, and you can view that click data in your dashboard as well.
Let’s take a deeper look at all the features and how they work!
Installing the Shareaholic Plugin
Shareaholic has sort a hybrid setup process where many of the features are available as soon as you activate the plugin, but you can also get access to morefeatures if you create a Shareaholic account and connect it to your site.
It’s important to note that you are not forced to create an account to use most of Shareaholic’s functionality. However, creating an account does give you access to more features, so we’ve connected our example site to our Shareaholic account for this post.
Once you install and activate the free plugin from WordPress.org, you can go to the new Shareaholic area in your WordPress dashboard and click the Shareaholic Dashboard button to create a free Shareaholic account and sync it with your website:
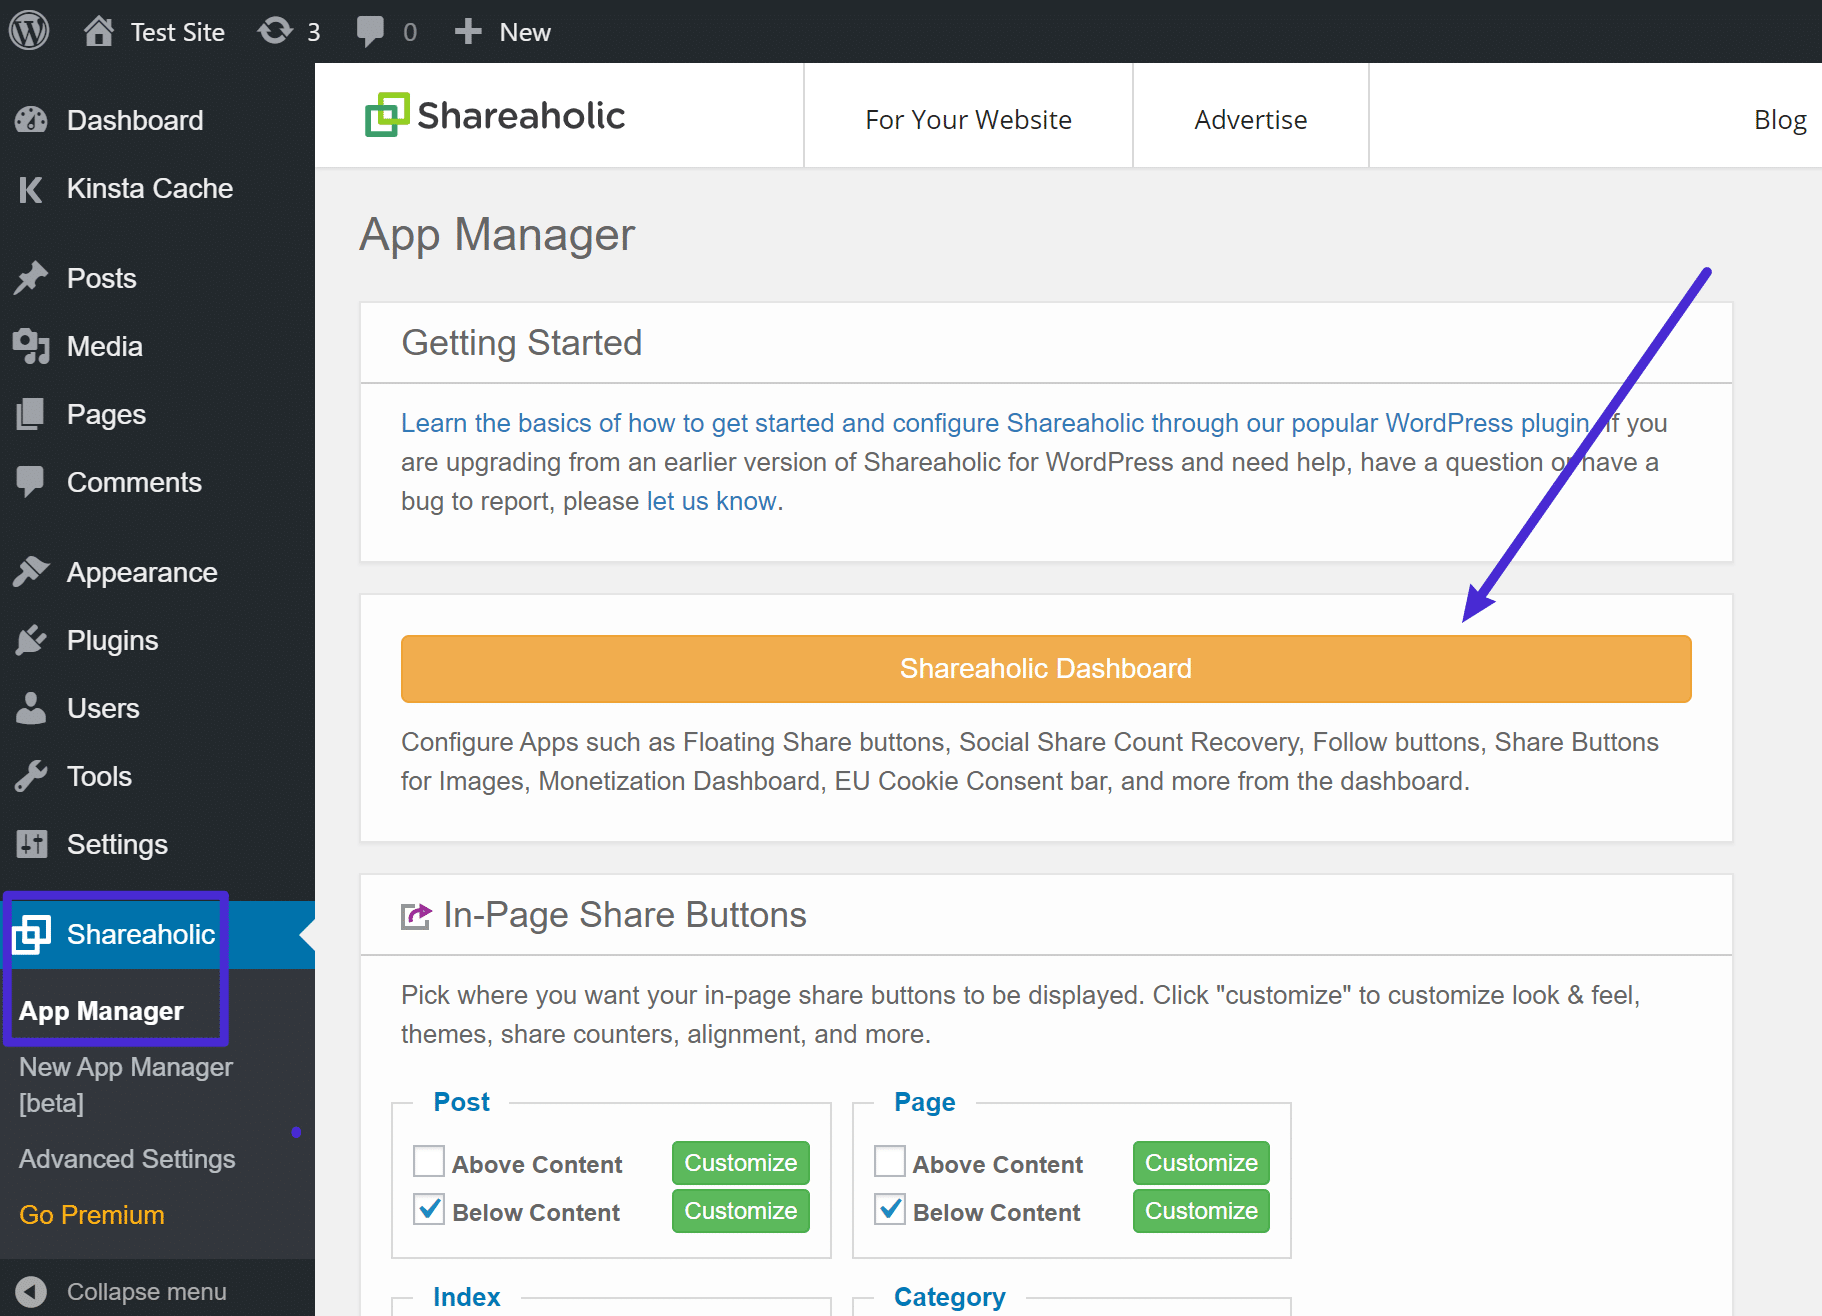
From there, you can manage your site’s functionality using either:
- The New App Manager option in your WordPress dashboard (this feature is technically still in beta when we’re writing this post)
- The Shareaholic cloud dashboard
Either way, the interface is pretty much the same:
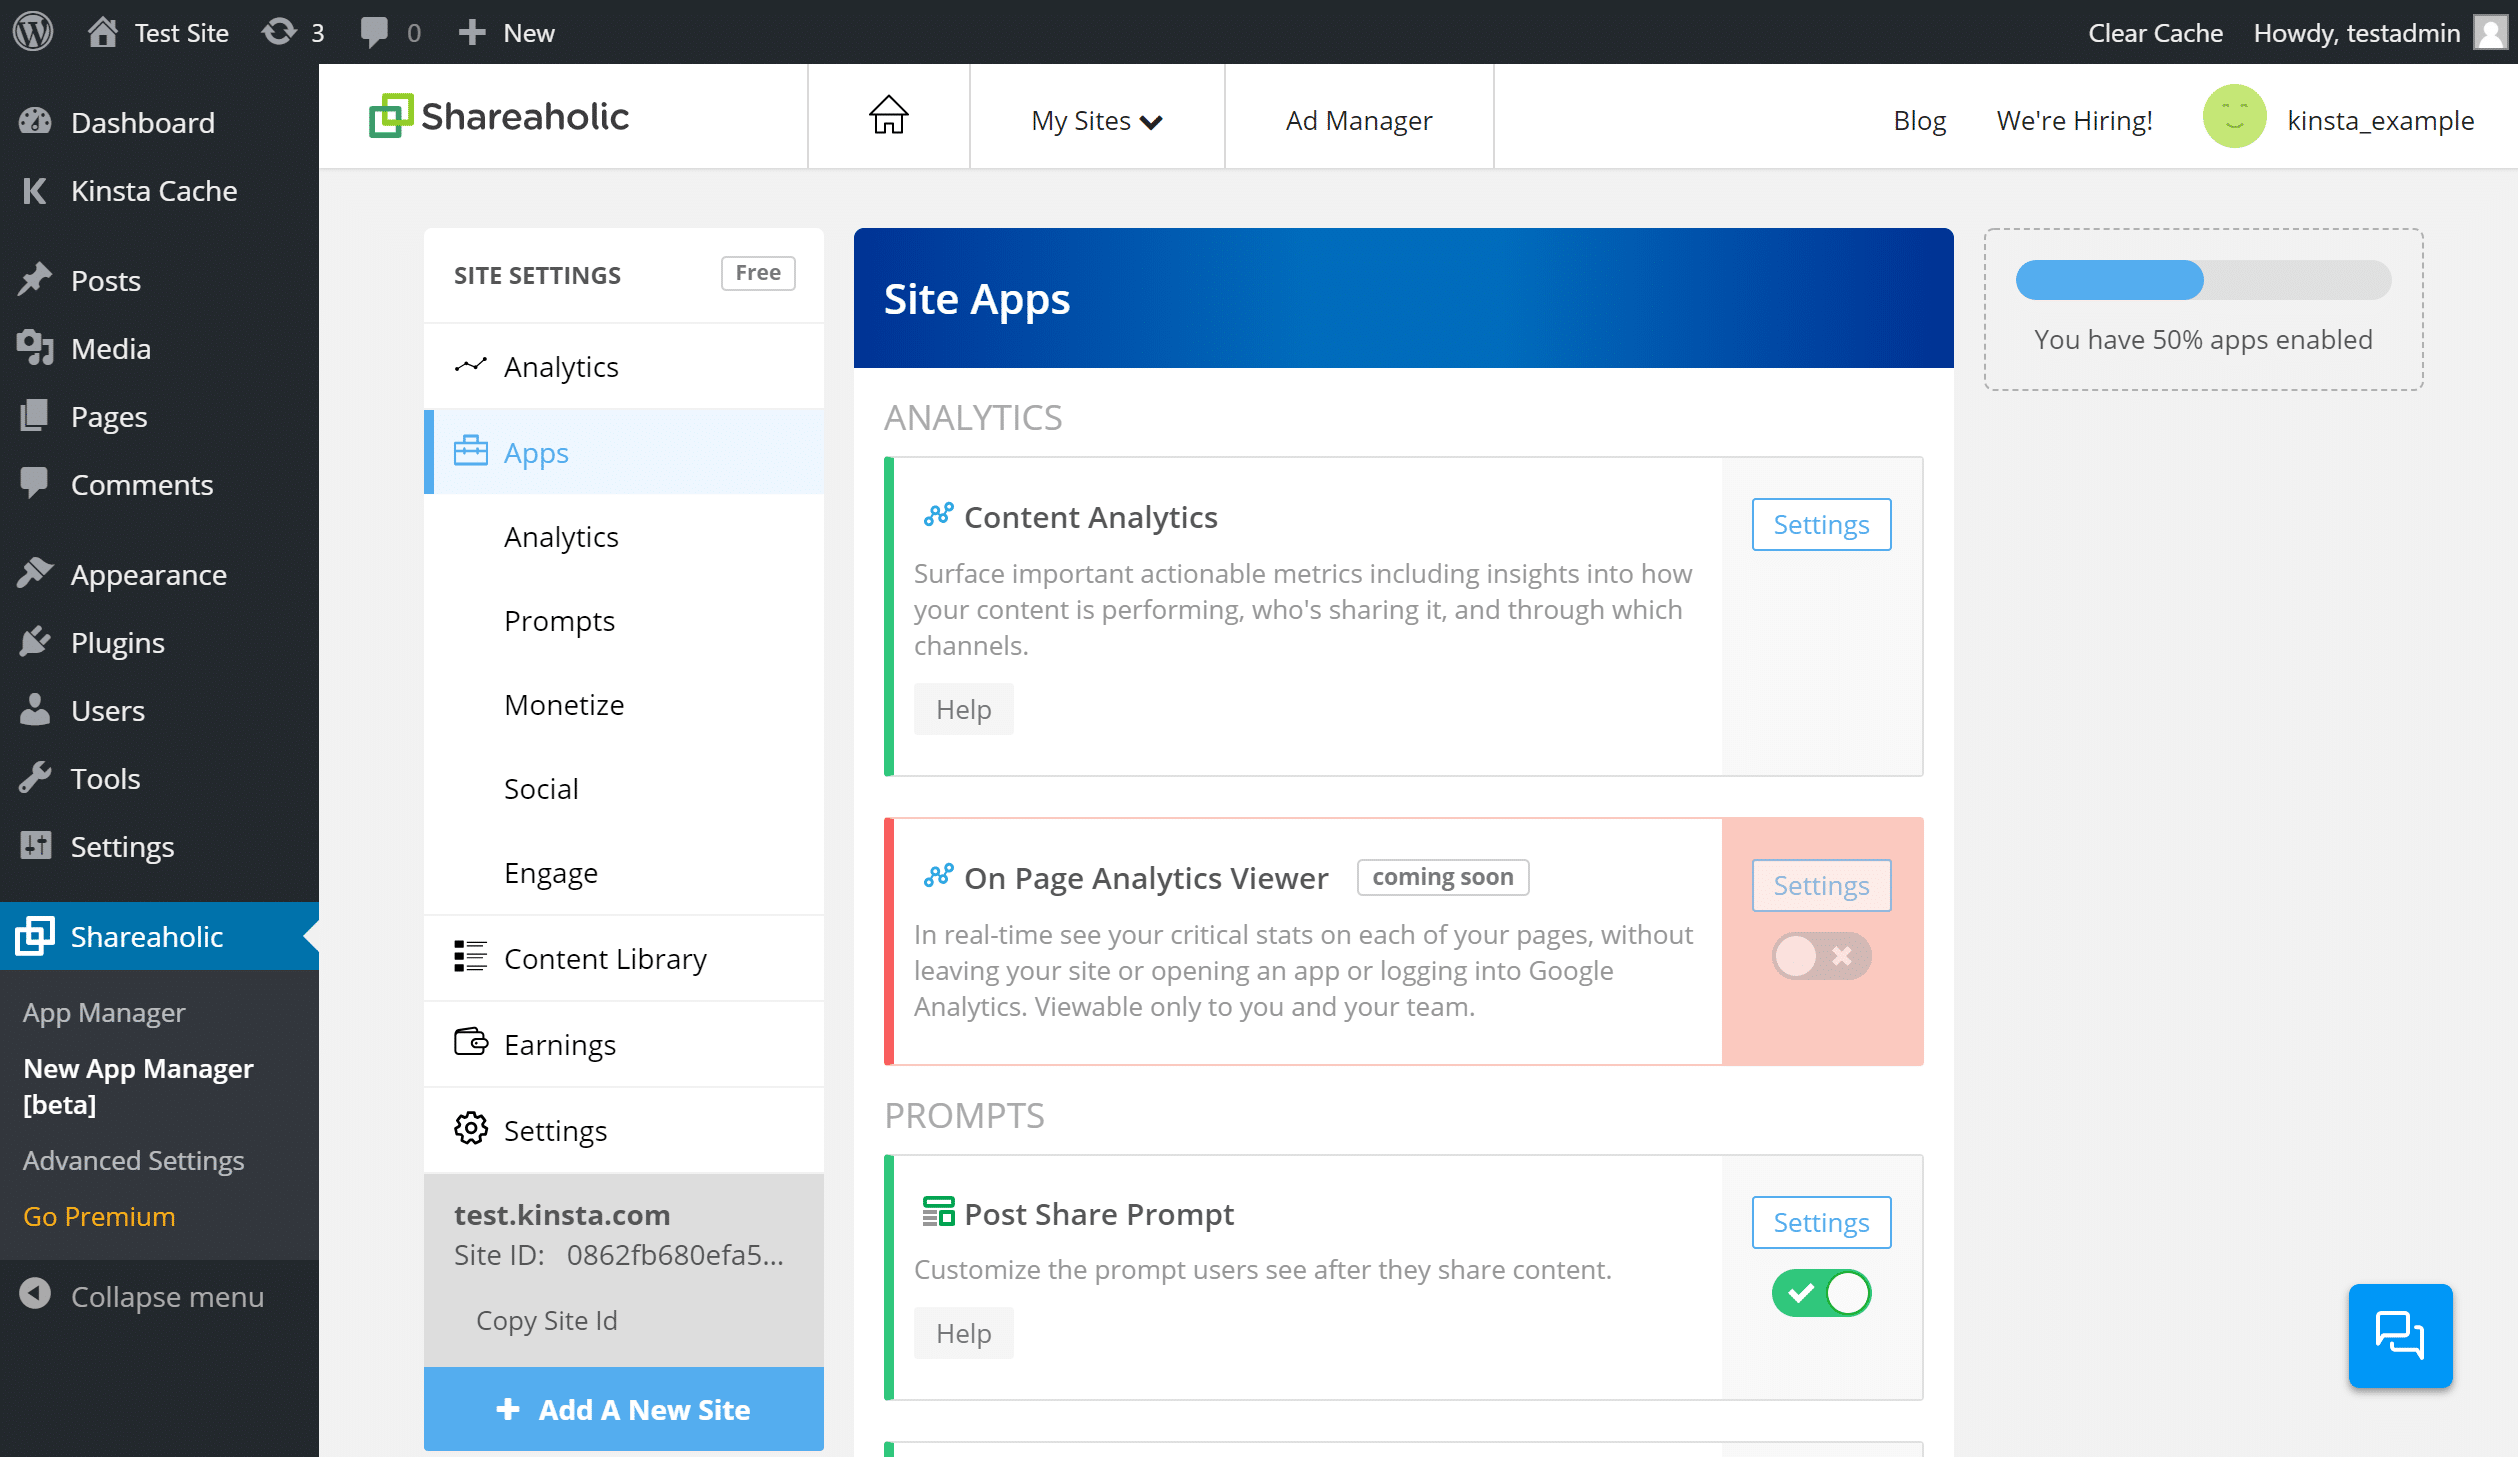
Each feature is an “app” that you can enable or disable as needed. This lets you keep things lightweight because you can only use the exact features you want.
Let’s go through the features…
Social Media Share Buttons
As soon as you activate the plugin, Shareaholic automatically adds social media share buttons in two different spots:
- A floating sidebar
- After your post content
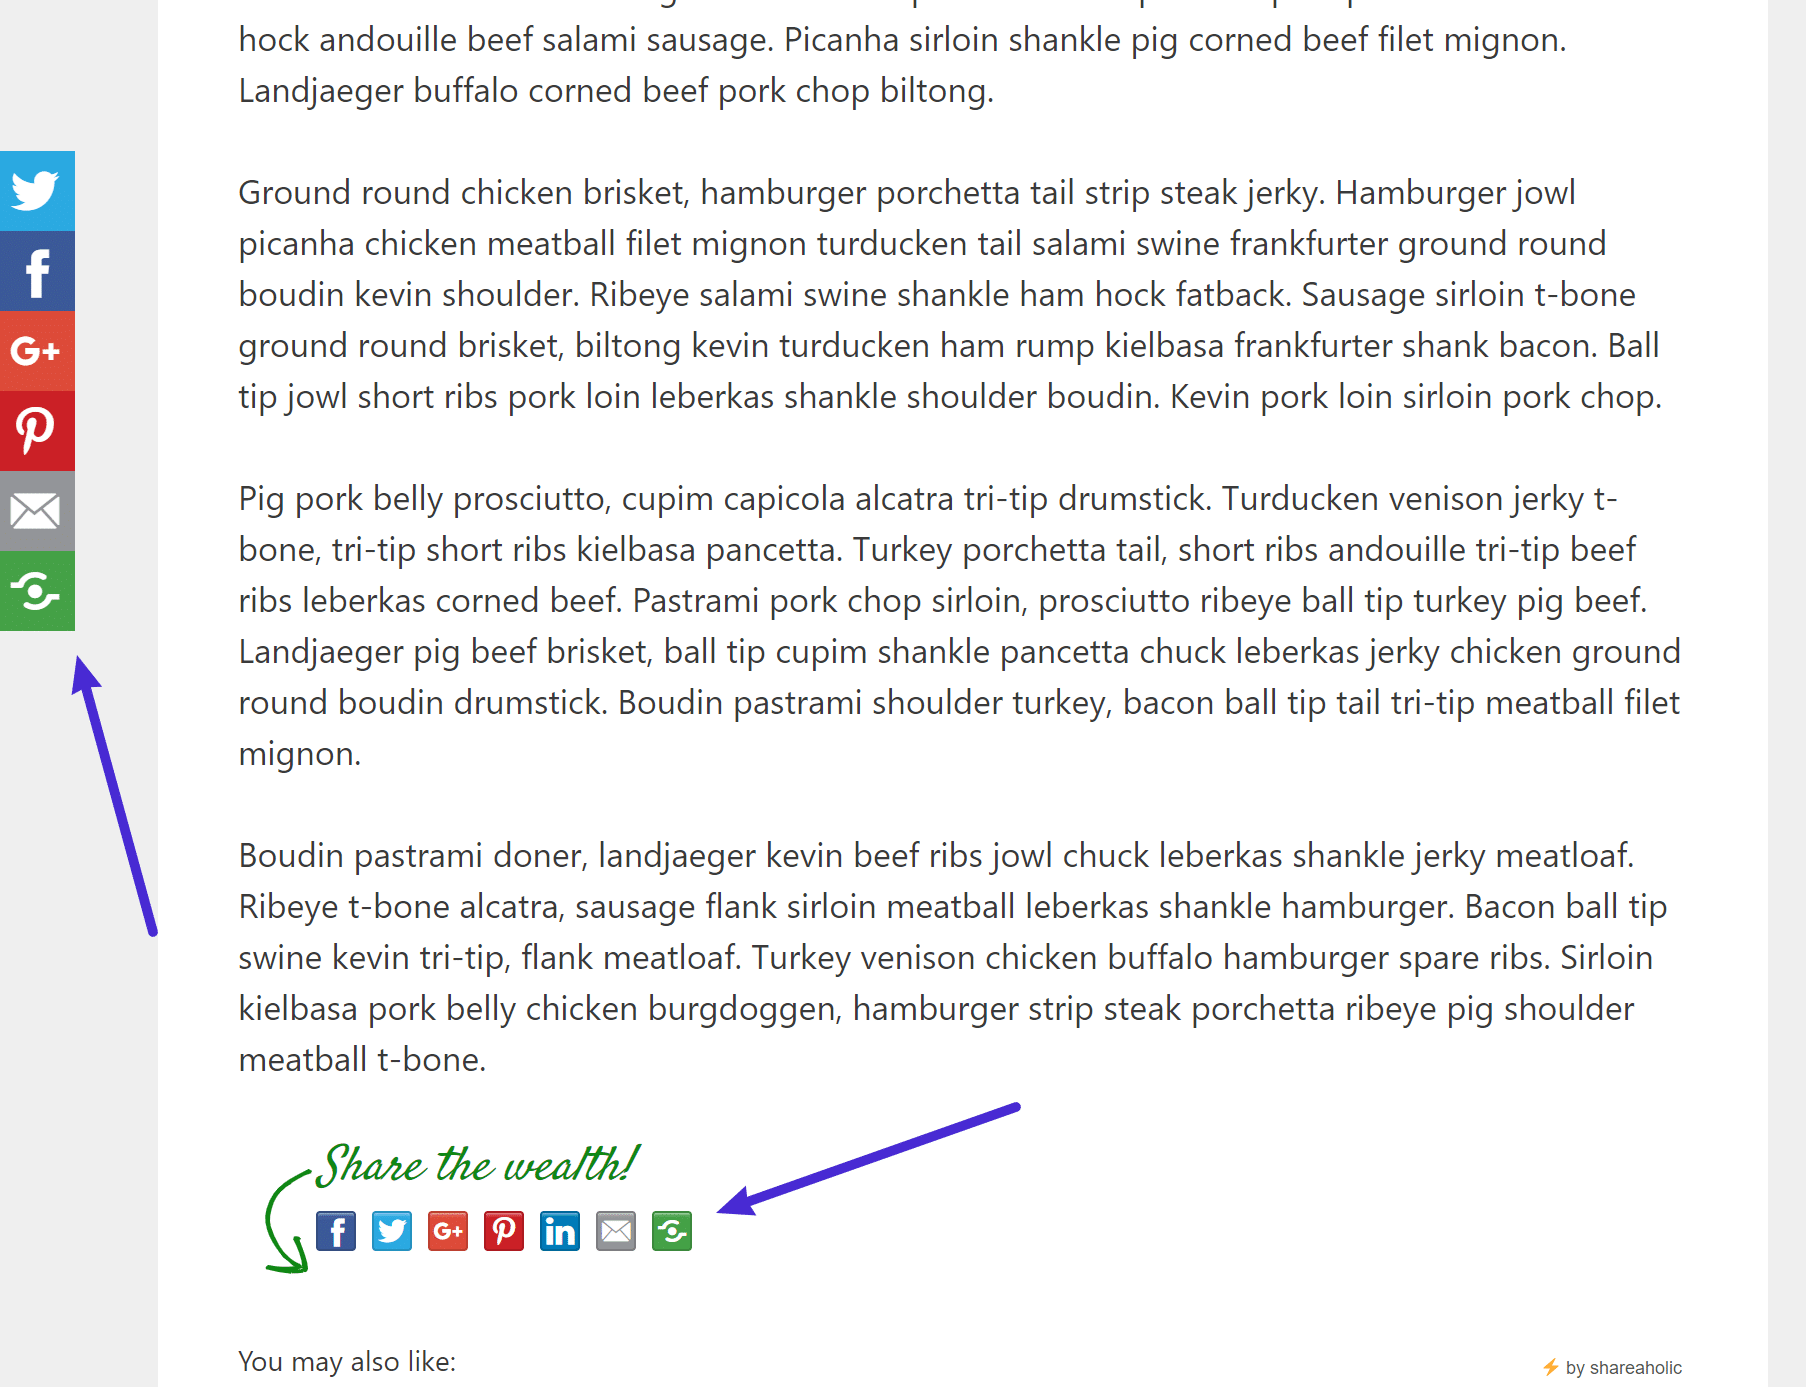
Beyond those defaults, you can also add share buttons to individual images (like adding a Pinterest “Pin It” button on images), as well as social media follow buttons.
To control and configure all of this functionality, you can go to the Social area of the App Manager:
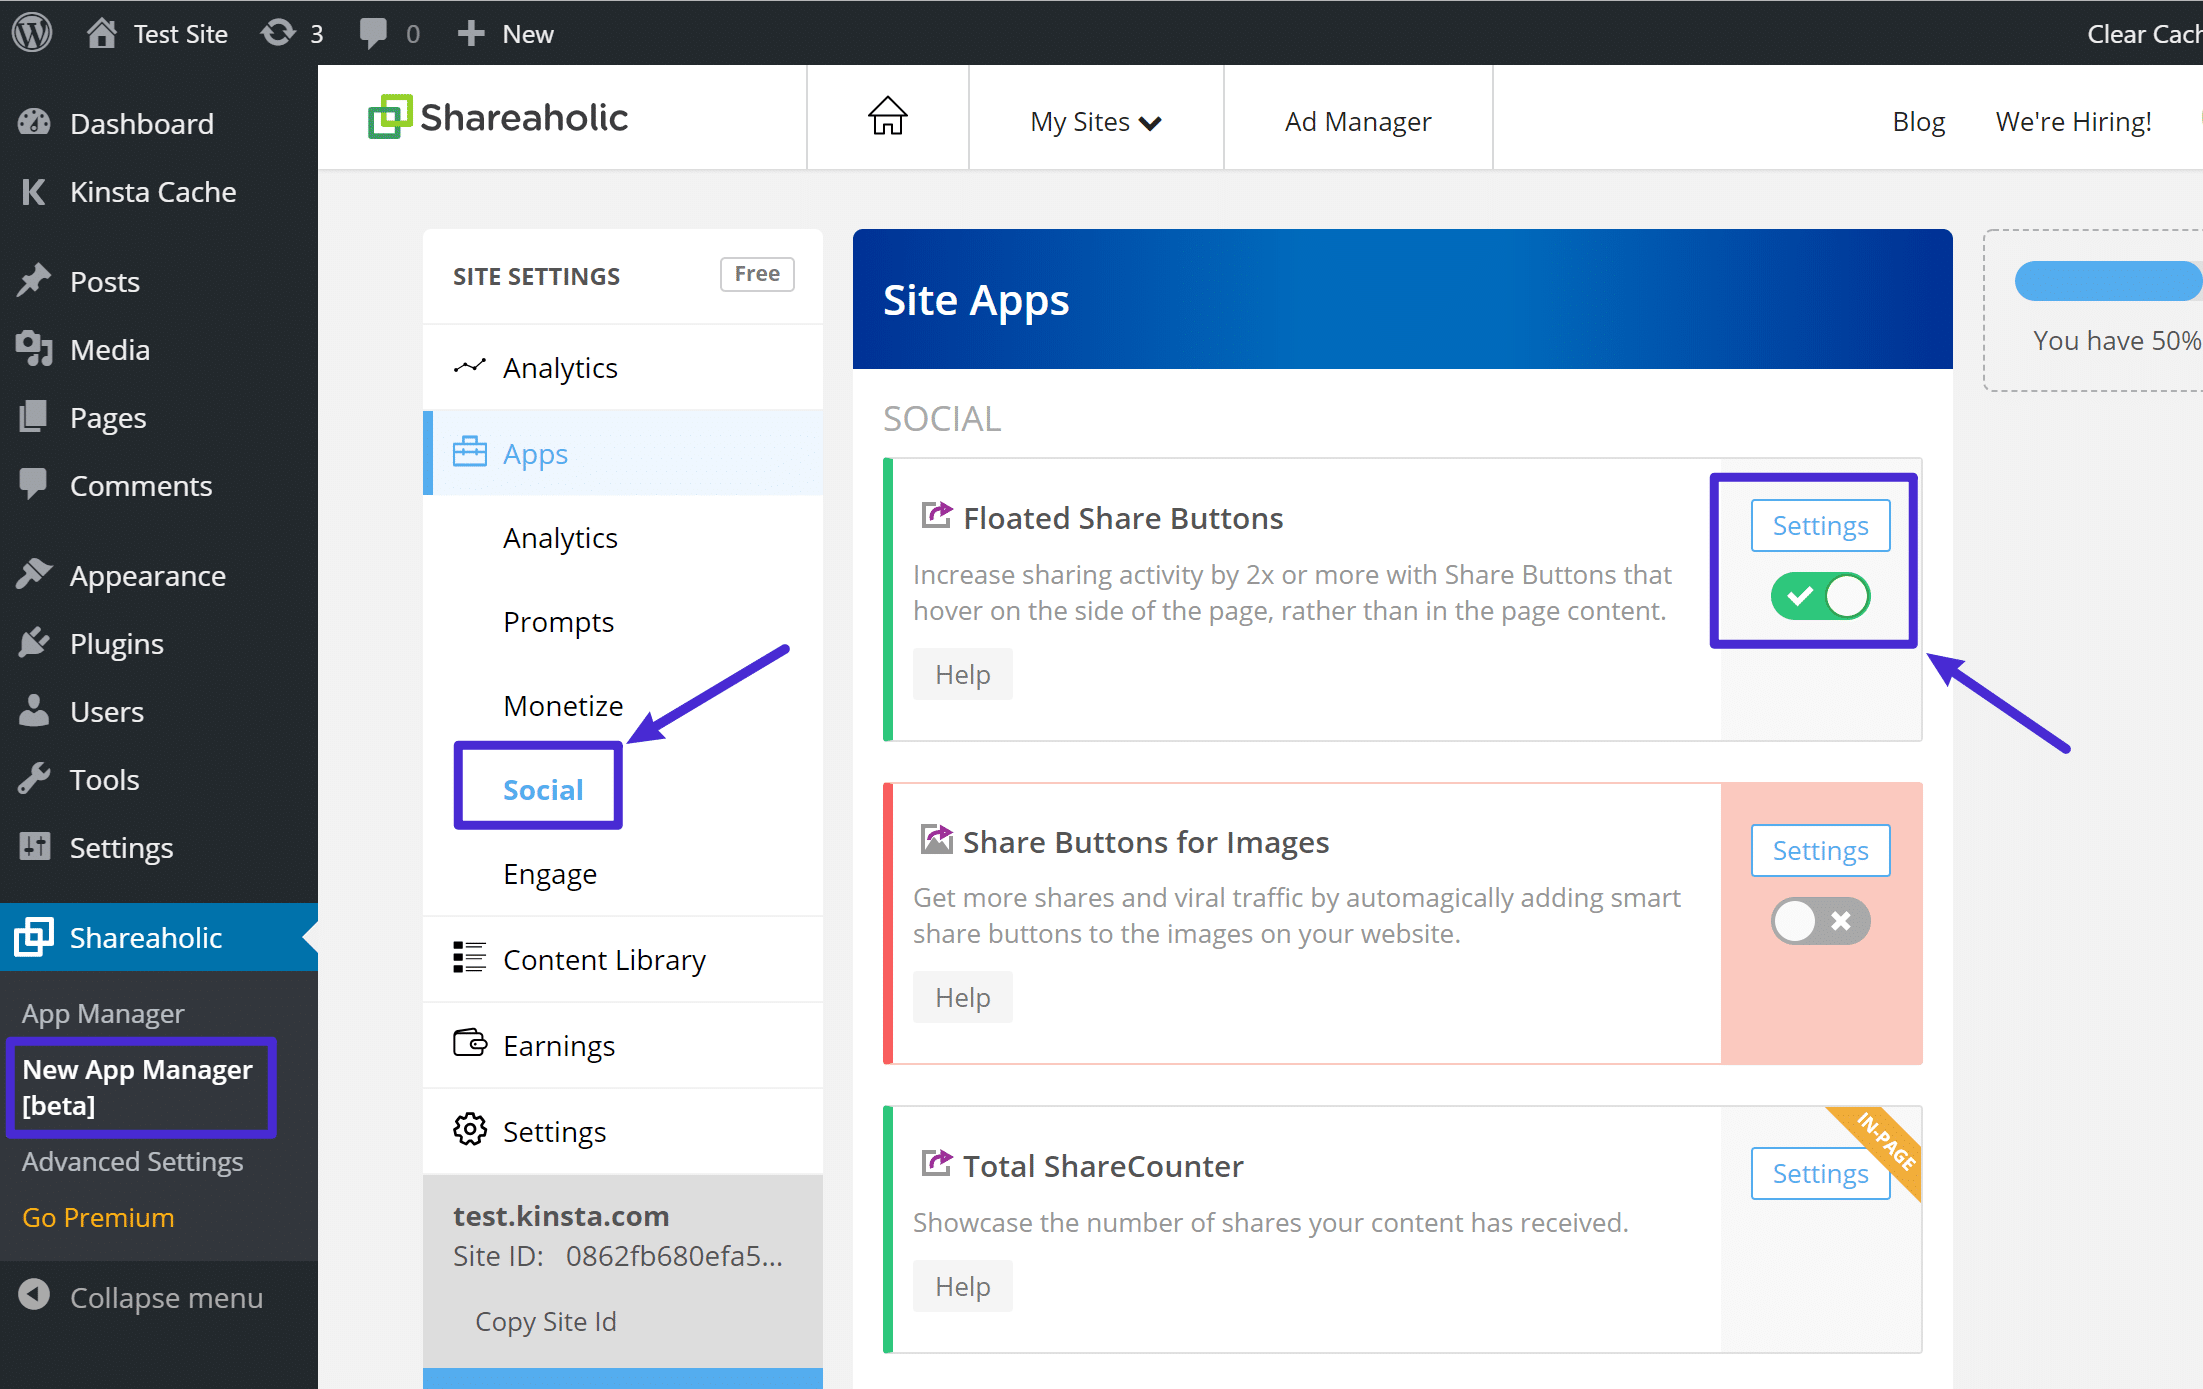
From there, you can use the toggle to turn individual features on or off, and the Settings button to configure specific options for each placement.
For example, if you open the settings for the Floated Share Buttons, it will open a detailed popup where you can control all kinds of options:
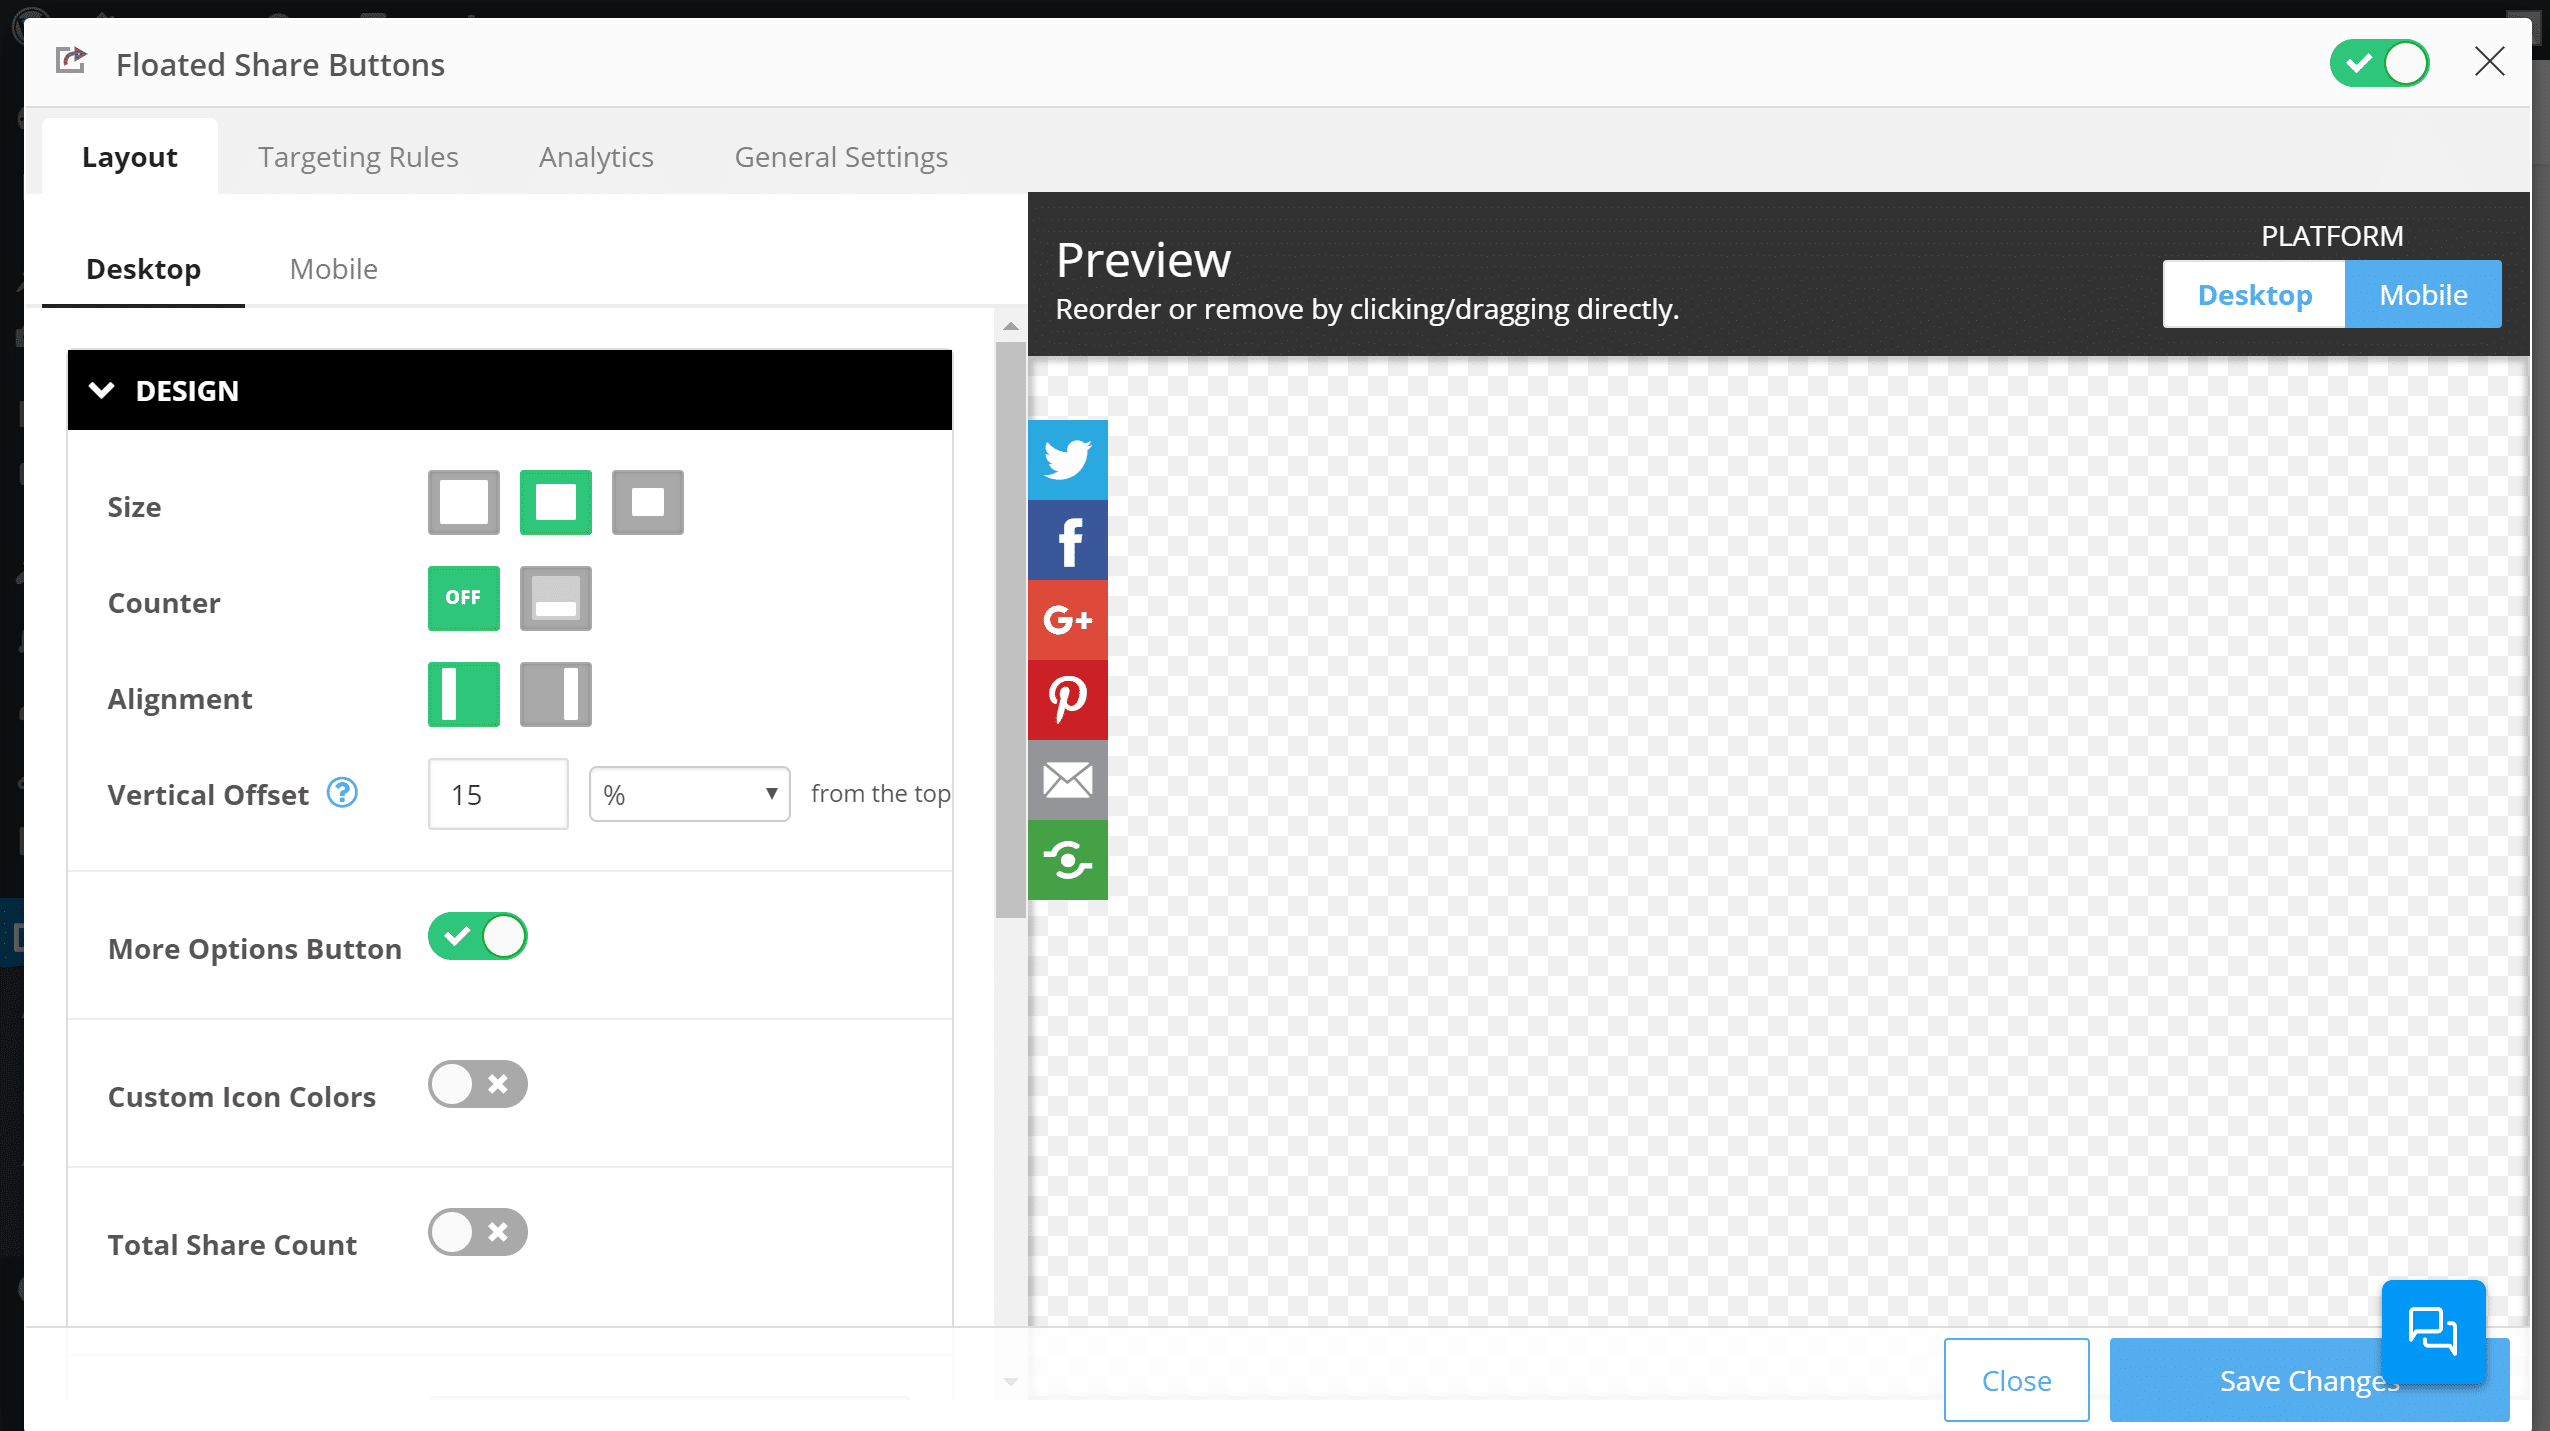
Some of the things that you can do include:
- Change button size
- Add individual or total share counts
- Choose which social media networks to include
- Add a delay to wait to trigger your share buttons
- Control the mobile design
- Add page targeting rules to control which content has share buttons
- Add Google Analytics UTM tag tracking
- Customize the Twitter share message
For example, if you’re editing the mobile share buttons, you can choose to stick them to the bottom of a visitor’s screen for a better user experience:
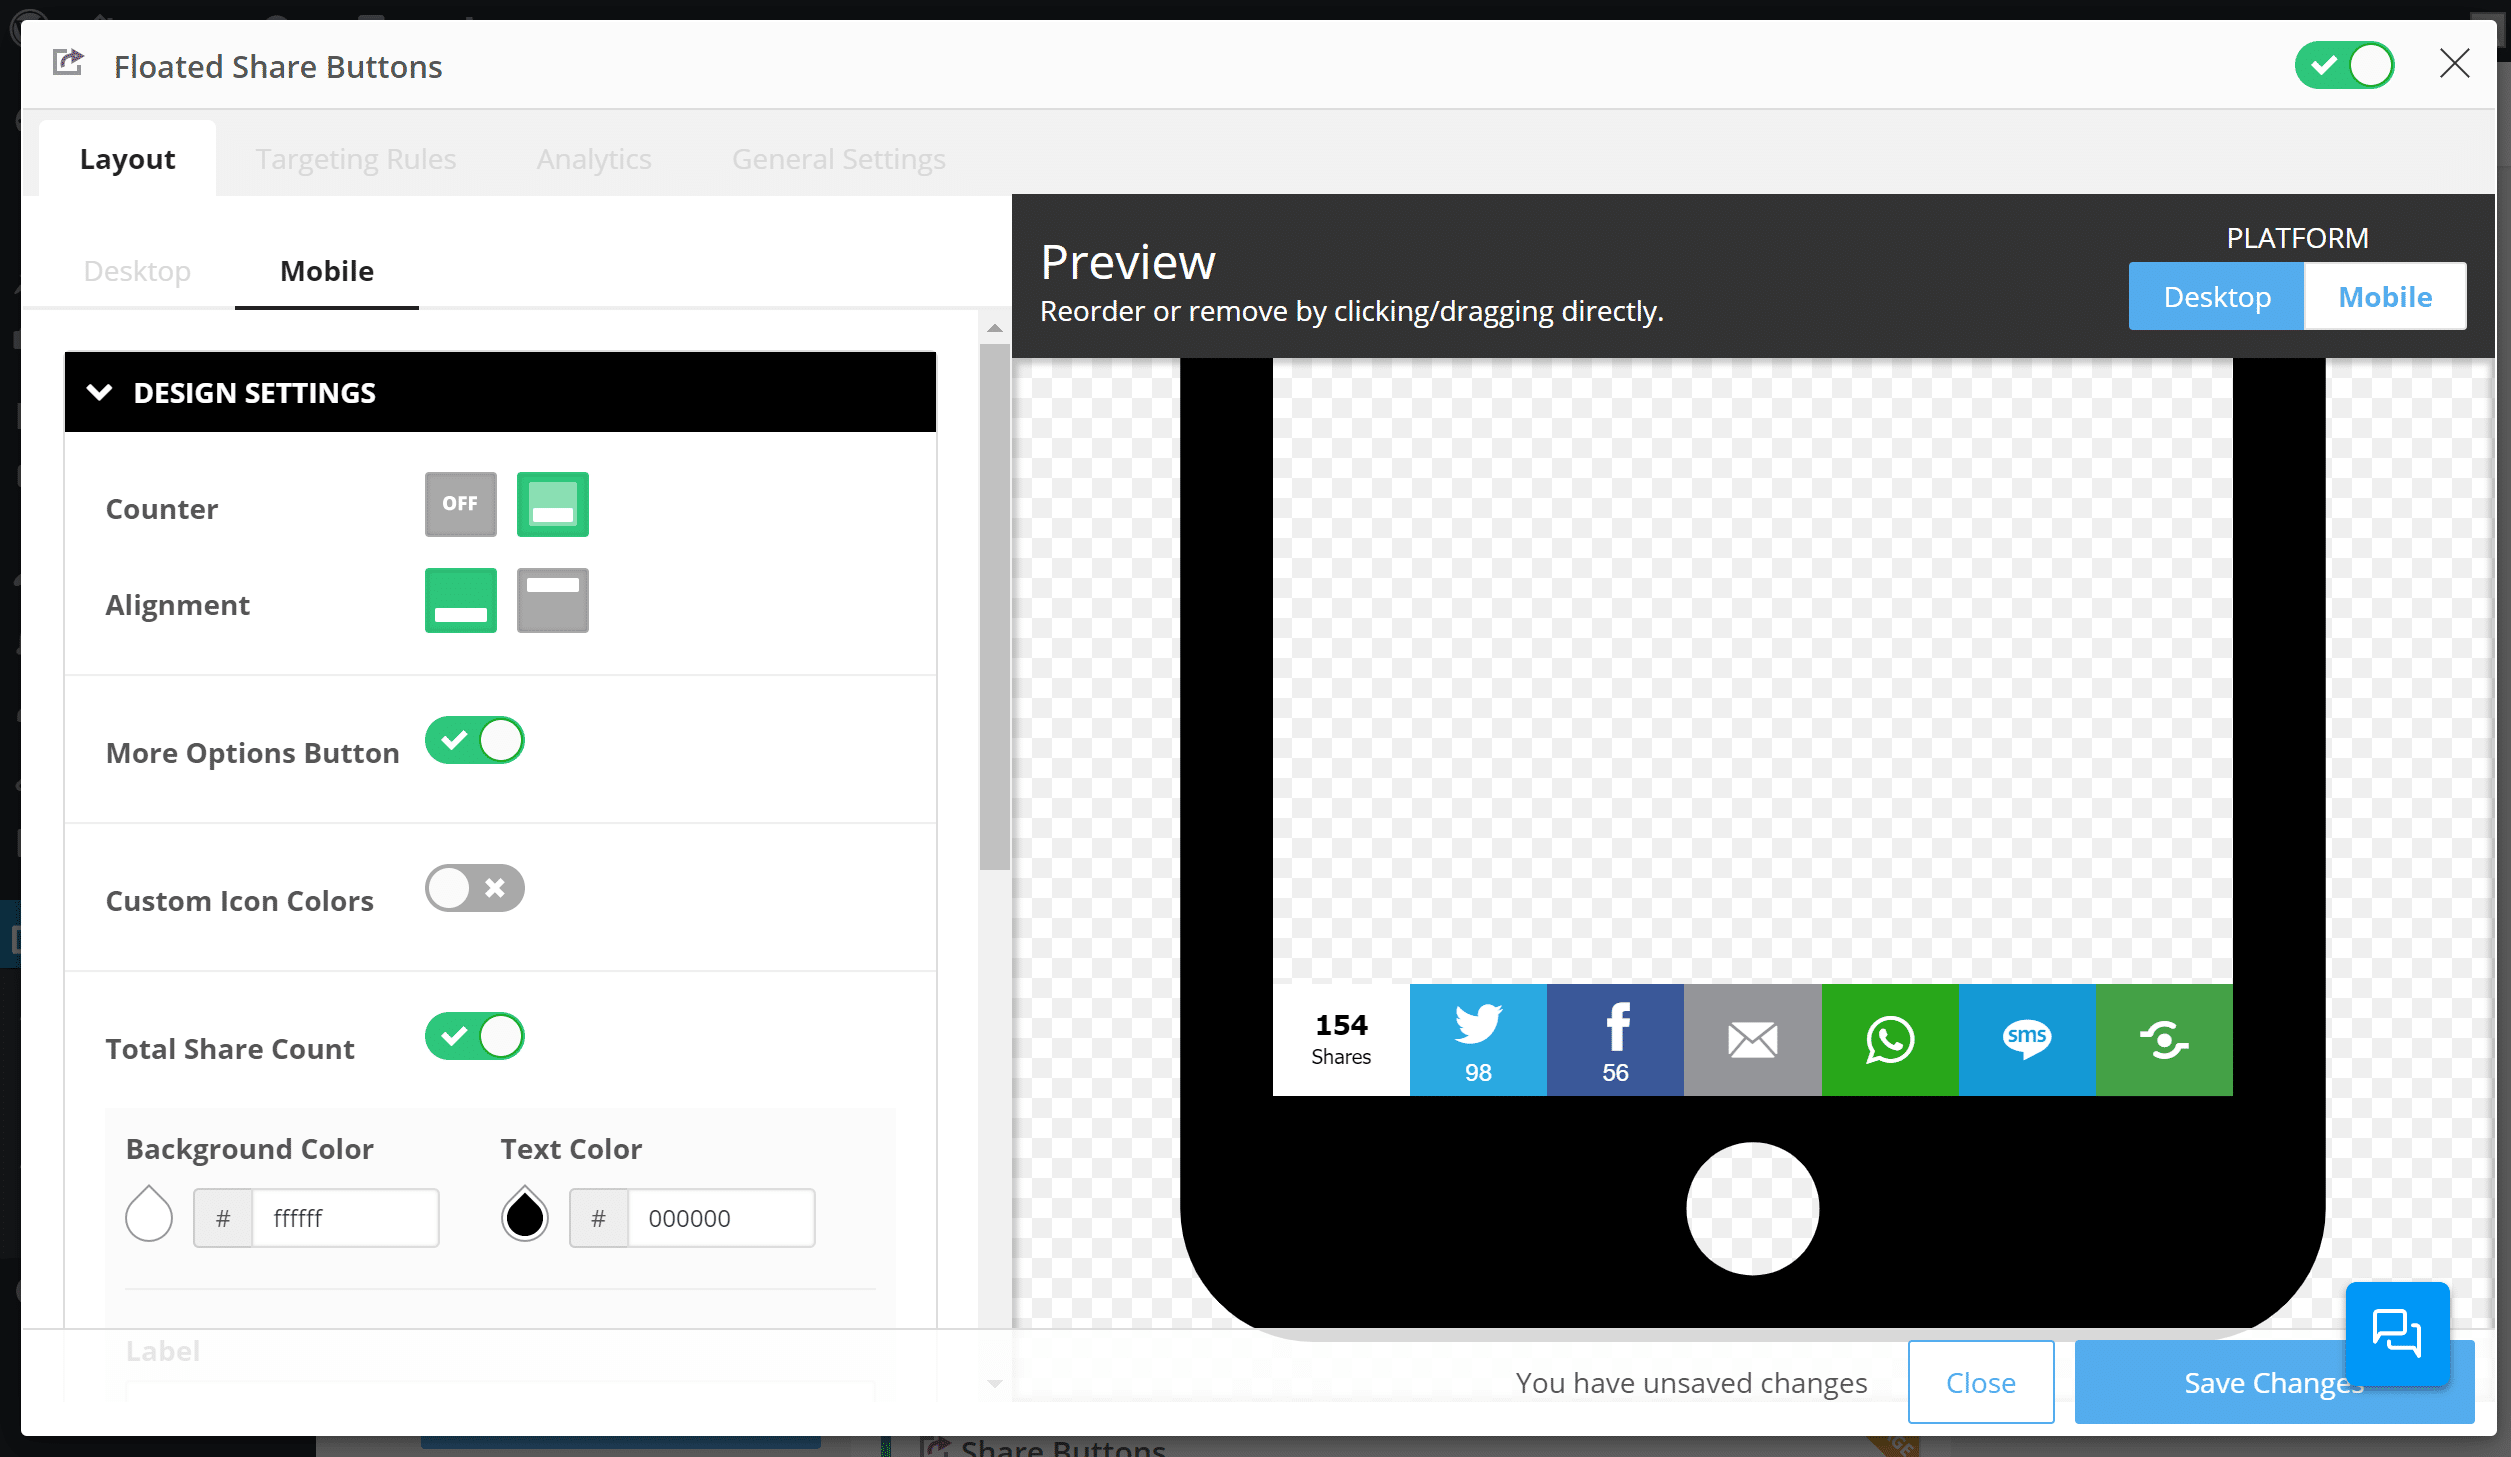
You can even have Shareaholic dynamically order your buttons based on which buttons convert the best for specific pages.
Beyond the Floated Share Button settings, Shareaholic’s other social apps also have a similar level of detail.
For example, here’s what it looks like to customize the share buttons that appear at the bottom of a post:
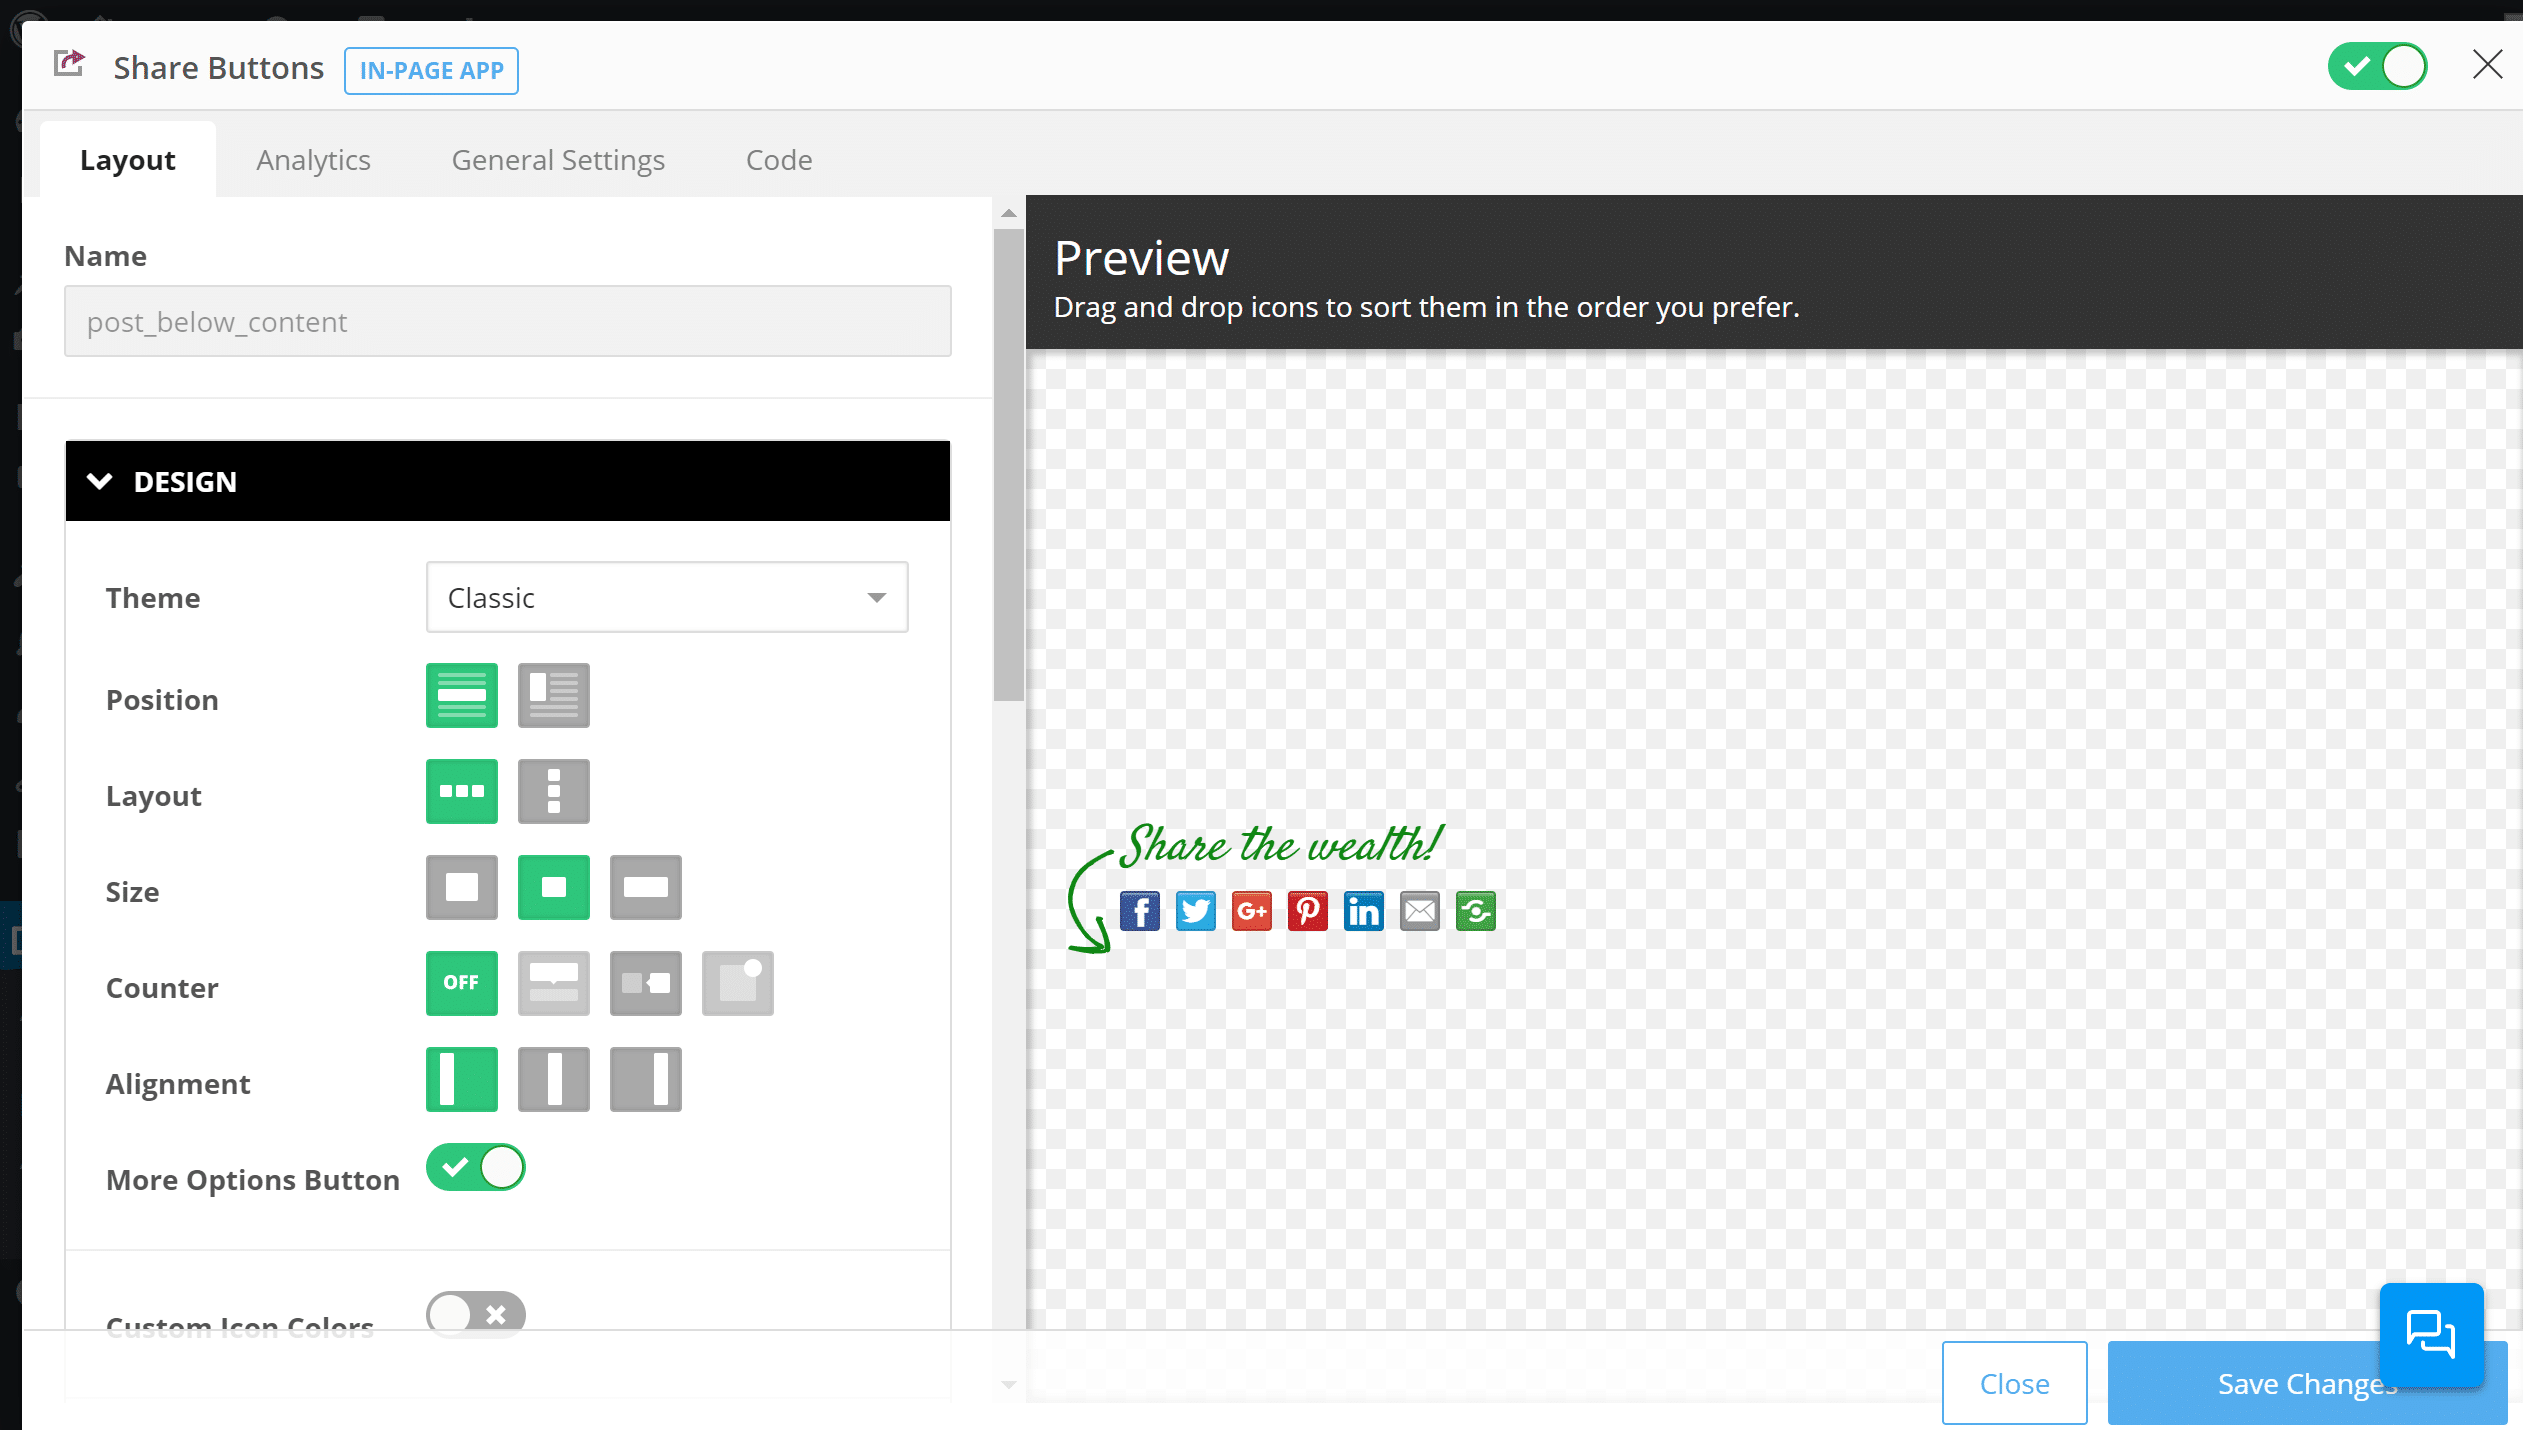
Related Content
Next up, let’s take a look at the related content suggestions in Shareaholic. As soon as you activate Shareaholic, it will start displaying related content underneath your blog posts automatically.
Here’s an example of what it looks like on our test site:
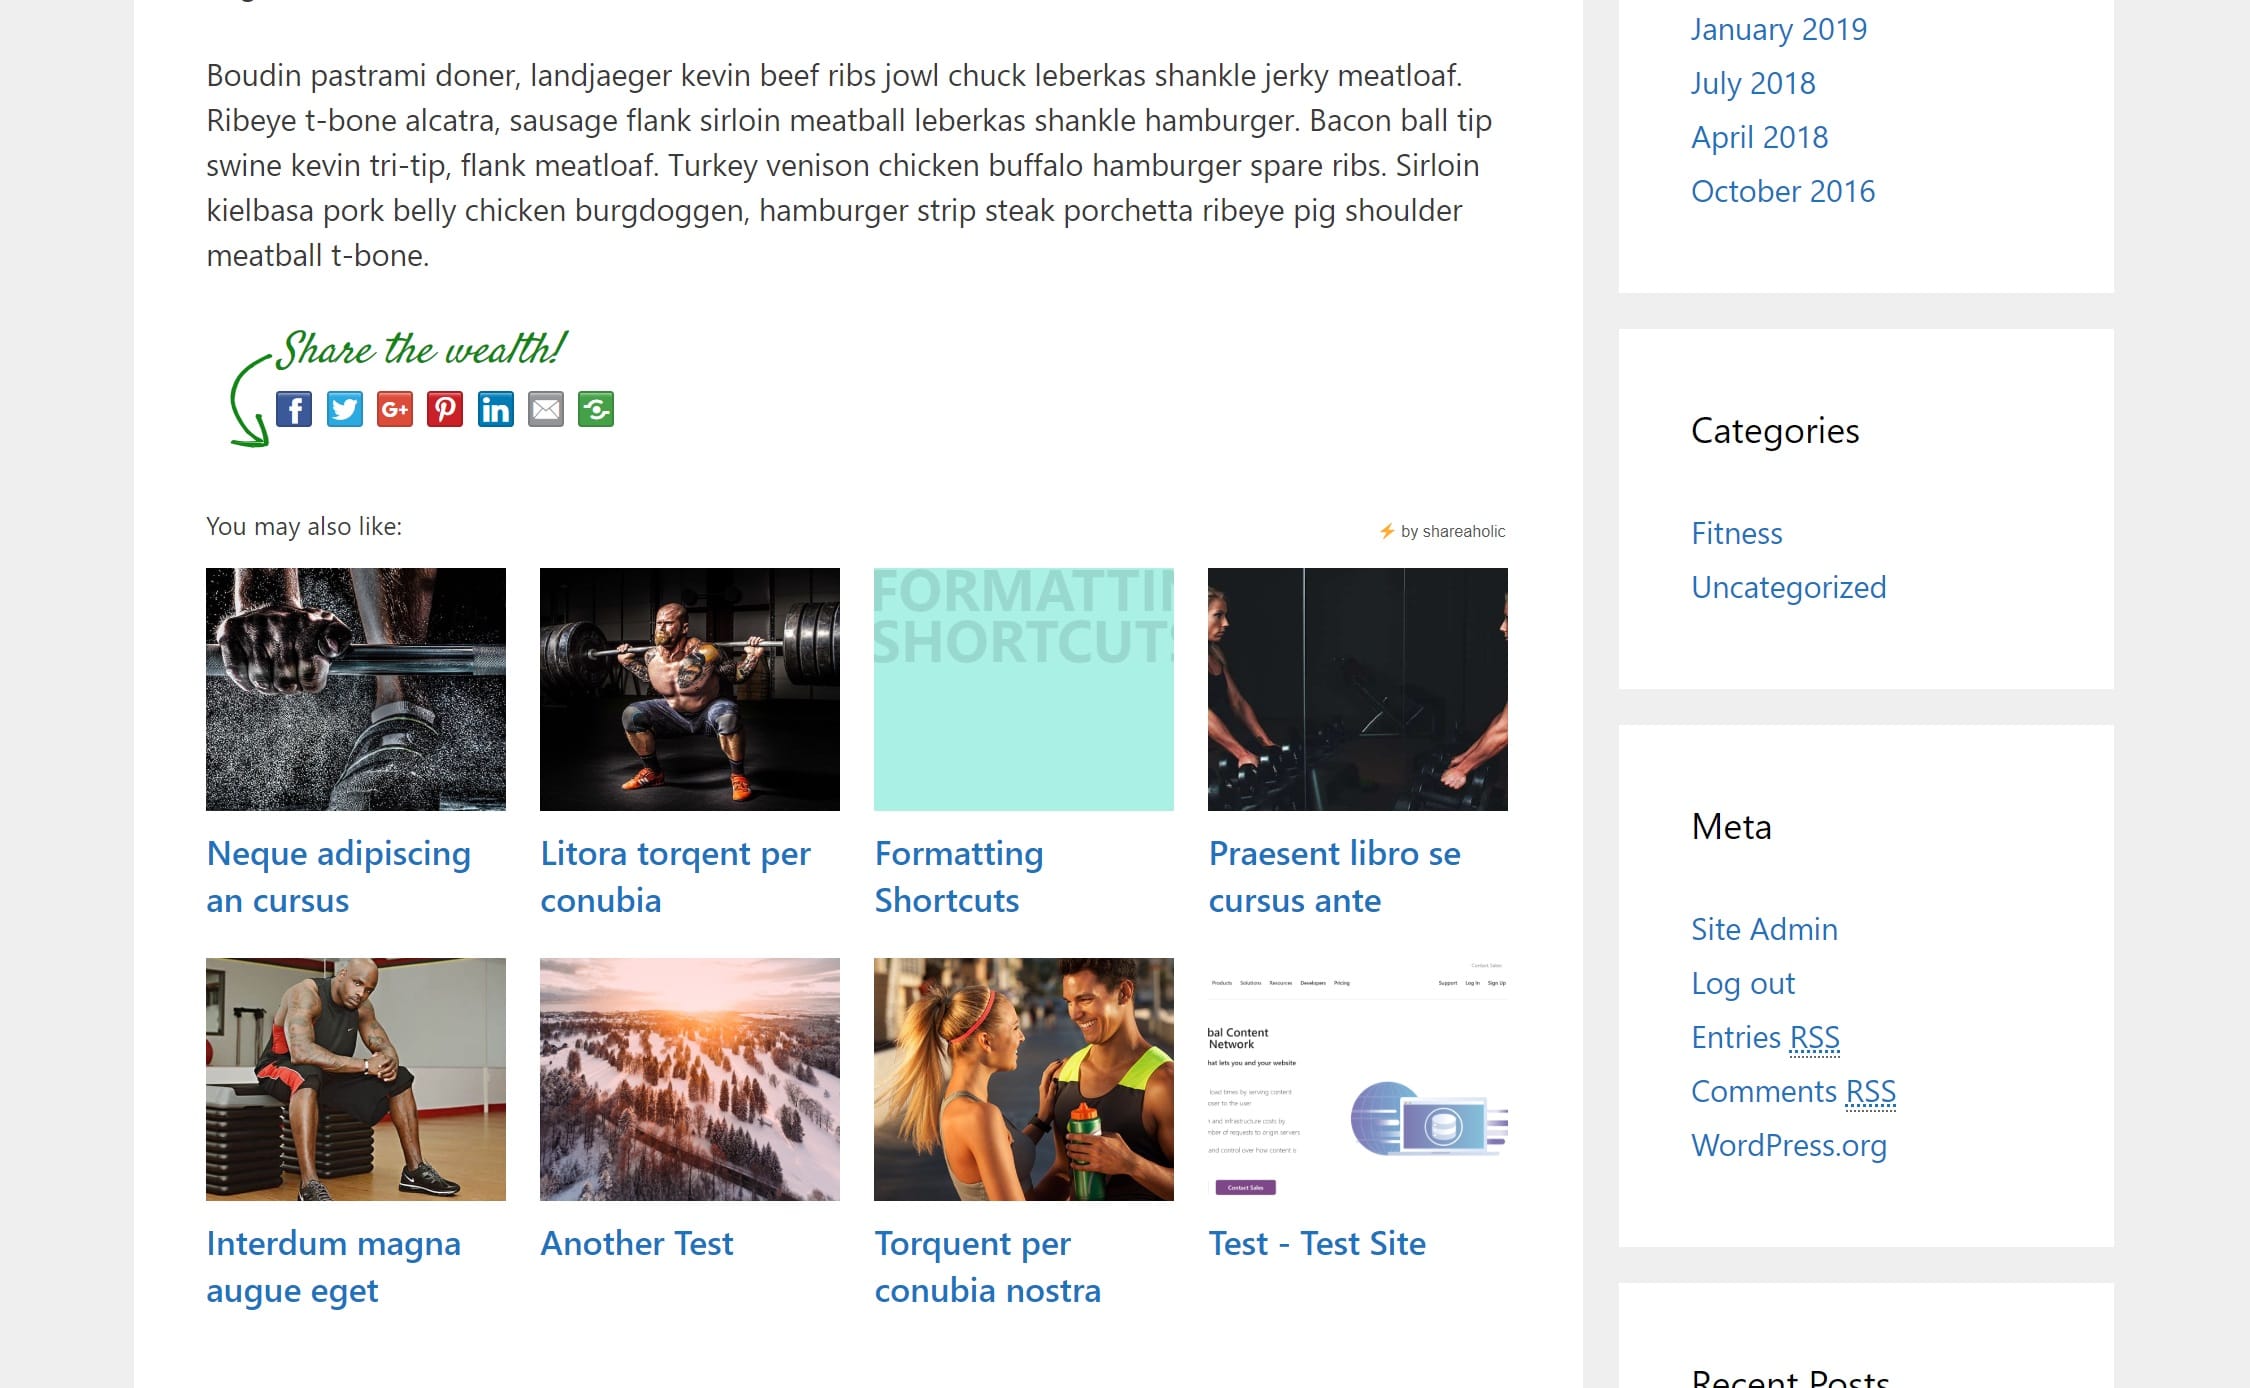
Again, the nice thing about these related content suggestions is that the processing happens on Shareaholic’s servers, rather than your WordPress site’s server. Some related posts plugins can be pretty database-intensive, so this off-site approach takes the load off your server.
To configure your related content, you can go to the Engage