HOW TO SETUP A DESKTOP ENVIRONMENT IN CENTOS 7
- Category : Server Administration
- Posted on : Jan 14, 2017
- Views : 3,120
- By : Xavier N.

A default CentOS 7 instance comes with a graphical user interface (GUI) installed. However, in case you have decided to skip the GUI installation, or are using a minimal distribution, you can always set up your visual environment later.
As CentOS is a distribution typically aimed for systems administrators, most users prefer working on their system over the terminal. However, we’re writing this article today for those who’d still prefer to have a visual interface to interact with their cheap CentOS 7 server.
Before we start, let us list some of the most common desktop environments for Linux distributions:
- GNOME3
- KDE Plasma 5
- Cinnamon
- MATE
- Xfce
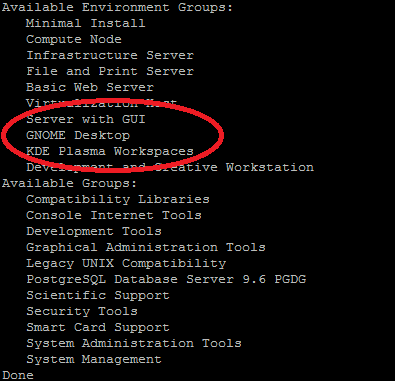
Let’s start by executing the command- yum group list to see what’s available. We recommend you go for GNOME Desktop.

If GNOME is not available, you can use the command- yum groupinstall “X Window system” to install the X Window system.
INSTALLING GNOME DESKTOP
You can install the GNOME 3 desktop environment executing yum -y groupinstall “GNOME Desktop” as shown below-
This will take some time to install. Once this is done, execute the command- startx. This is used to start the GUI.
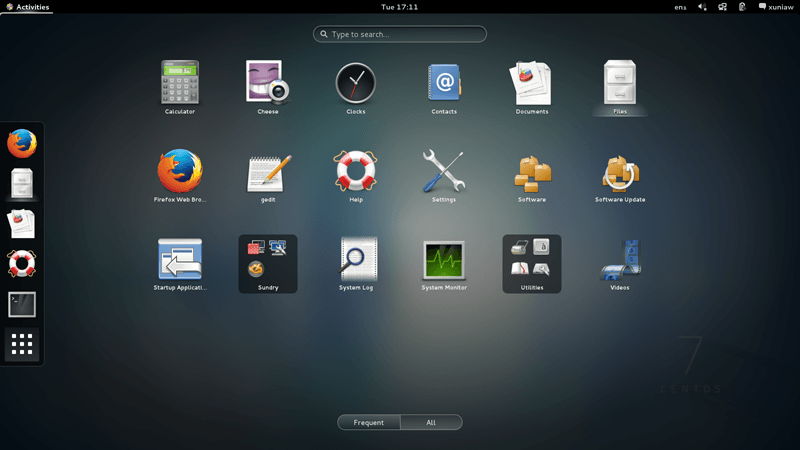
The GNOME desktop environment is now set up. For the initial boot, you will have to configure the following:
- System Language
- Keyboard type
- Online accounts
Once you’ve entered your preferred settings for the items listed above, GNOME Desktop will have started in Classic mode. You can check the default settings by using the command- systemctl get-default as shown below. This will return the default type- multi-user.target
You can change this setting to GNOME shell by using either of the two options detailed below:
- Option #1- If you use the startx command to start the service, you can then execute the following:
echo “exec gnome-session” >> ~/.xinitrc
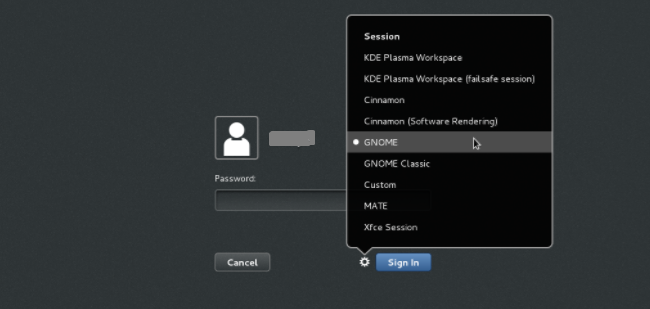
startx - Option #2- Use the command systemctl set-default graphical.target and reboot the system. After reboot, click the button next to Sign In. Select GNOME from the list. Click Sign in and you will have logged in with a GNOME shell.

Here is a list of systemd targets with the specific level defined. By default, this is set to level 3 and in order to use a GUI we must change it to level 5.
| RUN LEVEL | TARGET UNITS | DESCRIPTION |
| 0 | runlevel0.target, poweroff.target | Shut down and power off the system |
| 1 | runlevel1.target, rescue.target | Set up a rescue shell |
| 2 | runlevel2.target, multi-user.target | Set up a non-graphical multi-user system |
| 3 | runlevel3.target, multi-user.target | Set up a non-graphical multi-user system |
| 4 | runlevel4.target, multi-user.target | Set up a non-graphical multi-user system |
| 5 | runlevel5.target, graphical.target | Set up a graphical multi-user system |
| 6 | runlevel6.target, reboot.target | Shut down and reboot the system |
INSTALLING KDE DESKTOP
To install the KDE environment you can use the command- yum -y groupinstall “KDE”
This will take some time to complete. After the installation is complete, use the following commands to start in GUI mode:
Reboot the system and you will be able see the KDE desktop environment up and running.
INSTALLING CINNAMON DESKTOP
Before starting the Cinnamon installation, you will have to add the EPEL (Extra Packages for Enterprise Linux) repository to your system. This is provided by the Fedora project. To add it use the command- yum -y install epel-release
Then, use the command- yum install cinnamon -y to complete the installation.
Once the installation is complete, you can use following commands to start the GUI. The Cinnamon desktop will be seen on reboot. As usual, the first time you use it you will have to set language preferences, among other things.
INSTALLING MATE DESKTOP
Similar to Cinnamon, you will have to first install the EPEL repository in case it is not already present, using the command- yum install epel-release -y. Once this is done, you can install MATE desktop using the command – yum groupinstall “MATE Desktop”
You can now start the environment and reboot the system to make it effective:
INSTALLING XFCE DESKTOP
For our final desktop environment, first install the EPEL repository using the command- yum install epel-release -y. Then, you may install Xfce using the command- yum groupinstall xfce -y
Once installed, you can execute the following commands to start Xfce.
That’s it. We’ve given you a rundown of the different desktop environments available for CentOS 7, and how to set them up. We hope you’ve found this useful!
Categories
Subscribe Now
10,000 successful online businessmen like to have our content directly delivered to their inbox. Subscribe to our newsletter!Archive Calendar
| Sat | Sun | Mon | Tue | Wed | Thu | Fri |
|---|---|---|---|---|---|---|
| 1 | 2 | 3 | 4 | 5 | 6 | |
| 7 | 8 | 9 | 10 | 11 | 12 | 13 |
| 14 | 15 | 16 | 17 | 18 | 19 | 20 |
| 21 | 22 | 23 | 24 | 25 | 26 | 27 |
| 28 | ||||||
Recent Articles
-

Posted on : Jul 25
-

Posted on : Jul 07
-

Posted on : Apr 07
-

Posted on : Mar 19
Optimized my.cnf configuration for MySQL 8 (on cPanel/WHM servers)
Tags
- layer 7
- tweak
- kill
- process
- sql
- Knowledge
- vpn
- seo vpn
- wireguard
- webmail
- ddos mitigation
- attack
- ddos
- DMARC
- server load
- Development
- nginx
- php-fpm
- cheap vpn
- Hosting Security
- xampp
- Plesk
- cpulimit
- VPS Hosting
- smtp
- smtp relay
- exim
- Comparison
- cpu
- WHM
- mariadb
- encryption
- sysstat
- optimize
- Link Building
- apache
- centos
- Small Business
- VPS
- Error
- SSD Hosting
- Networking
- optimization
- DNS
- mysql
- ubuntu
- Linux


